Chapter 12. Type Development Strategies
All recipes up until now have dealt with specific aspects of the TypeScript programming language and its type system. You have learned about effectively using basic types in Chapter 2 and Chapter 3, making your code more reusable through generics in Chapter 4, and crafting advanced types for very delicate situations using conditional types in Chapter 5, string template literal types in Chapter 6, and variadic tuple types in Chapter 7.
We established a collection of helper types in Chapter 8, and worked around standard library limitations in Chapter 9. We found out how and when to use classes in Chapter 11, and how to deal with JSX as a language extension in Chapter 10. Every recipe discussed in detail the pros and cons of each approach, giving you a better tool to decide the right thing for every situation, creating better types, more robust programs, and a stable development flow.
In short: It was a lot! There is one thing still missing, though, the final piece that brings everything together: How do we approach new type challenges? Where do we start? What do we need to look out for?
These are the contents of this chapter. Here you will learn about the concept of low-maintenance types. We will find a process on how you can start with simple types first and get gradually more refined and stronger. You will learn about the secret features of the TypeScript playground, and learn how to deal with libraries that make validation easier. You will find guides to make hard decisions and learn about workarounds to the most common, yet tough-to-beat type errors that will definitely hit you in your TypeScript journey.
If the rest of the book brought you from novice to apprentice, the next recipes will lead you to become an expert. Welcome to the last chapter.
12.1 Writing Low Maintenance Types
Problem
Every time your model changes you need to touch a dozen types throughout your code-base. That is tedious and it’s also easy to miss something.
Solution
Derive types from others, infer from usage, and create low maintenance types.
Discussion
Throughout this book, we spent a lot of time creating types from other types. The moment we can derive a type from something that is already there means that we spend less time writing and adapting type information, and more time fixing bugs and errors in JavaScript.
TypeScript can be seen as a layer of metainformation on top of JavaScript. Our goal is still to write JavaScript. but make it as robust and easy as possible. Tooling that helps you stay productive and doesn’t get in your way.
That’s how I write TypeScript in general: I write regular JavaScript, and where TypeScript needs extra information, I happily add some extra annotations. One condition: I don’t want to be bothered maintaining types. I rather create types that can update themselves if their dependencies or surroundings change. I call this approach creating low maintenance types.
Creating low maintenance types can be seen as a three-way step.
-
Model your data or infer from existing models
-
Define derivates (mapped types, partials, etc)
-
Define behavior with conditional types
Let’s take a look at this brief and incomplete copy function. I want to copy files from one directory to another. To make my life easier, I created a set of default options so I don’t have to repeat myself too much:
constdefaultOptions={from:"./src",to:"./dest",};functioncopy(options){// Let's merge default options and optionsconstallOptions={...defaultOptions,...options};// todo: Implementation of the rest}
That’s a pattern you might see a lot in JavaScript. What you see immediately is that TypeScript misses some type information. Especially the options argument of the copy function is any at the moment. So let’s better add a type for that!
One thing I could do is create types explicitly:
typeOptions={from:string;to:string;};constdefaultOptions:Options={from:"./src",to:"./dest",};typePartialOptions={from?:string;to?:string;};functioncopy(options:PartialOptions){// Let's merge default options and optionsconstallOptions={...defaultOptions,...options};// todo: Implementation of the rest}
That’s a very reasonable approach. You think about types, then you assign types, and then you get all the editor feedback and type-checking you are used to. But what if something changes? Let’s assume we add another field to Options, we would have to adapt our code three times:
typeOptions={from:string;to:string;overwrite:boolean;// added};constdefaultOptions:Options={from:"./src",to:"./dest",overwrite:true,// added};typePartialOptions={from?:string;to?:string;overwrite?:boolean;// added};
But why? The information is already there! In defaultOptions, we tell TypeScript exactly what we’re looking for. Let’s optimize.
-
Drop the
PartialOptionstype and use the utility typePartial<T>to get the same effect. You might have guessed this one already -
Make use of the
typeofoperator in TypeScript to create a new type on the fly.
constdefaultOptions={from:"./src",to:"./dest",overwrite:true,};functioncopy(options:Partial<typeofdefaultOptions>){// Let's merge default options and optionsconstallOptions={...defaultOptions,...options};// todo: Implementation of the rest}
There you go. Just annotation where we need to tell TypeScript what we’re looking for.
-
If we add new fields, we don’t have to maintain anything at all.
-
If we rename a field, we get just the information we care about: All usages of
copywhere we have to change the options we pass to the function. -
We have one single source of truth: The actual
defaultOptionsobject. This is the object that counts because it’s the only information we have at run-time.
And our code becomes a little bit terser. TypeScript becomes less intrusive and more aligned to how we write JavaScript.
Another example is one that has accompanied us from the beginning, the toy shop that started in Recipe 3.1, and has continued in Recipe 4.5 and Recipe 5.3. Go revisit all three items and think about how we can only change the model to get all other types updated.
12.2 Refining Types Step by Step
Problem
Your API needs elaborate types, using advanced features like generics, conditional types, and string template literal types. You don’t know where to start.
Solution
Refine your types step by step. Start with basic primitive and object types, subset, add generics, and then go all-in advanved. The process described in this lesson will help you craft types. It’s also a good way to recap everything you’ve learned.
Discussion
Take a look at the following example.
app.get("/api/users/:userID",function(req,res){if(req.method==="POST"){res.status(20).send({message:"Got you, user "+req.params.userId,});}});
We have an Express-style server that allows us to define a route (or path), and executes a callback if the URL is requested.
The callback takes two arguments:
-
The request object. Here we get information on the HTTP method used (e.g GET, POST, PUT, DELETE), and additional parameters that come in. In this example
userIDshould be mapped to a parameteruserIDthat, well, contains the user’s identifier! -
The response or reply object. Here we want to prepare a proper response from the server to the client. We want to send correct status codes (method
status) and send JSON output over the wire.
What we see in this example is heavily simplified, but gives a good idea of what we are up to. The example above is also riddled with errors! Have a look:
app.get("/api/users/:userID",function(req,res){if(req.method==="POST"){/* Error 1 */res.status(20).send({/* Error 2 */message:"Welcome, user "+req.params.userId/* Error 3 */,});}});
Oh wow! Three lines of implementation code, and three errors? What has happened?
-
The first error is nuanced. While we tell our app that we want to listen to GET requests (hence
app.get), we only do something if the request method is POST. At this particular point in our application,req.methodcan’t be POST. So we would never send any response, which might lead to unexpected timeouts. -
Great that we explicitly send a status code!
20isn’t a valid status code, though. Clients might not understand what’s happening here. -
This is the response we want to send back. We access the parsed arguments but have a mean typo. It’s
userID, notuserId. All our users would be greeted with “Welcome, user undefined!”. Something you have definitely seen in the wild!
Solving issues like this is TypeScript’s main purpose. TypeScript wants to understand your JavaScript code better than you do. And where TypeScript can’t figure out what you mean, you can assist by providing extra type information. The problem is that it’s often hard to start adding types. You might have the most puzzling edge cases in your mind, but don’t know how to get to them.
I want to propose a little process that might help you get started, and also shows you where there’s a good place to stop. You can increase the strengths of your types step-by-step. It only gets better with each refinement, and you can increase type safety over a longer period of time. Let’s start!
Step 1: Basic typing
We start with some basic type information. We have an app object that points to a get function. The get function takes a path, which is a string, and a callback.
constapp={get/* post, put, delete, ... to come! */,};functionget(path:string,callback:CallbackFn){// to be implemented --> not important right now}
CallbackFn is a function type that returns void and takes two arguments:
-
req, which is of typeServerRequest -
reply, which is of typeServerReply
typeCallbackFn=(req:ServerRequest,reply:ServerReply)=>void;
ServerRequest is a pretty complex object in most frameworks. We do a simplified version for demonstration purposes. We pass in a method string, for "GET", "POST", "PUT", "DELETE", etc. It also has a params record. Records are objects that associate a set of keys with a set of properties. For now, we want to allow every string key to be mapped to a string property. We refactor this one later.
typeServerRequest={method:string;params:Record<string,string>;};
For ServerReply, we lay out some functions, knowing that a real ServerReply object has much more. A send function takes an optional argument obj with the data we want to send. We have the possibility to set a status code with the status function using a fluent interface:footnote[Fluent interfaces allow for chainable operations by returning the instance with every method call].
typeServerReply={send:(obj?:any)=>void;status:(statusCode:number)=>ServerReply;};
With some very basic compound types and a simple primitive type for paths, we already added a lot of type safety to our project. We can rule out a couple of errors:
app.get("/api/users/:userID",function(req,res){if(req.method===2){// ^ This condition will always return 'false' since the types// 'string' and 'number' have no overlap.(2367)res.status("200").send()// ^// Argument of type 'string' is not assignable to// parameter of type 'number'.(2345)}});
That’s great, but there’s still a lot to do. We can still send wrong status codes (any number is possible) and have no clue about the possible HTTP methods (any string is possible). Let’s refine our types.
Step 2: Subset Primitive Types
You can see primitive types as a set of all possible values of that certain category. For example, string includes all possible strings that can be expressed in JavaScript, number includes all possible numbers with double float precision. boolean includes all possible boolean values, which are true and false.
TypeScript allows you to refine those sets to smaller subsets. For example, we can create a type Methods that includes all possible strings we can receive for HTTP methods:
typeMethods="GET"|"POST"|"PUT"|"DELETE";typeServerRequest={method:Methods;params:Record<string,string>;};
Methods is a smaller set of the bigger string set. Methods is a union type of literal types. A literal type is the smallest unit of a given set. A literal string. A literal number. There is no ambiguity, e.g. it’s just "GET". You put them in a union with other literal types, creating a subset of whatever bigger types you have. You can also do a subset with literal types of both string and number, or different compound object types. There are lots of possibilities to combine and put literal types into unions.
This has an immediate effect on our server callback. Suddenly, we can differentiate between those four methods (or more if necessary) and can exhaust all possibilities in code. TypeScript will guide us.
That’s one category of errors less. We now know exactly which possible HTTP methods are available. We can do the same for HTTP status codes, by defining a subset of valid numbers that statusCode can take:
typeStatusCode=100|101|102|200|201|202|203|204|205|206|207|208|226|300|301|302|303|304|305|306|307|308|400|401|402|403|404|405|406|407|408|409|410|411|412|413|414|415|416|417|418|420|422|423|424|425|426|428|429|431|444|449|450|451|499|500|501|502|503|504|505|506|507|508|509|510|511|598|599;typeServerReply={send:(obj?:any)=>void;status:(statusCode:StatusCode)=>ServerReply;};
Type StatusCode is again a union type. And with that, we exclude another category of errors. Suddenly, code like that fails:
app.get("/api/user/:userID",(req,res)=>{if(req.method==="POS"){// ^ This condition will always return 'false' since// the types 'Methods' and '"POS"' have no overlap.(2367)res.status(20)// ^// Argument of type '20' is not assignable to parameter of// type 'StatusCode'.(2345)}})
And our software becomes a lot safer! But we can do more!
Step 3: Adding Generics
When we define a route with app.get, we implicitly know that the only HTTP method possible is "GET". But with our type definitions, we still have to check for all possible parts of the union.
The type for CallbackFn is correct, as we could define callback functions for all possible HTTP methods, but if we explicitly call app.get, it would be nice to save some extra steps which are only necessary to comply with typings.
TypeScript generics can help! We want to define ServerRequest in a way that we can specify a part of Methods instead of the entire set. For that, we use the generic syntax where we can define parameters as we would do with functions:
typeServerRequest<MetextendsMethods>={method:Met;params:Record<string,string>;};
This is what happens:
-
ServerRequestbecomes a generic type, as indicated by the angle brackets -
We define a generic parameter called
Met, which is a subset of typeMethods -
We use this generic parameter as a generic variable to define the method.
With that change, we can specify different ServerRequest variants without duplicating things:
typeOnlyGET=ServerRequest<"GET">;typeOnlyPOST=ServerRequest<"POST">;typePOSTorPUT=ServerRquest<"POST"|"PUT">;
Since we changed the interface of ServerRequest, we have to make changes to all our other types that use ServerRequest, like CallbackFn and the get function:
typeCallbackFn<MetextendsMethods>=(req:ServerRequest<Met>,reply:ServerReply)=>void;functionget(path:string,callback:CallbackFn<"GET">){// to be implemented}
With the get function, we pass an actual argument to our generic type. We know that this won’t be just a subset of Methods, we know exactly which subset we are dealing with.
Now, when we use app.get, we only have one possible value for req.method:
app.get("/api/users/:userID",function(req,res){req.method;// can only be GET});
This ensures that we don’t assume that HTTP methods like "POST" or similar are available when we create an app.get callback. We know exactly what we are dealing with at this point, so let’s reflect that in our types.
We already did a lot to make sure that request.method is reasonably typed and represents the actual state of affairs. One nice benefit we get with subsetting the Methods union type is that we can create a general purpose callback function outside of app.get that is type-safe:
consthandler:CallbackFn<"PUT"|"POST">=function(res,req){res.method// can be "POST" or "PUT"};consthandlerForAllMethods:CallbackFn<Methods>=function(res,req){res.method// can be all methods};app.get("/api",handler);// ^// Argument of type 'CallbackFn<"POST" | "PUT">' is not// assignable to parameter of type 'CallbackFn<"GET">'.app.get("/api",handlerForAllMethods);// This works
Step 4: Advanced Types to Type-Check
What we haven’t touched yet is typing the params object. So far, we get a record that allows accessing every string key. It’s our task now to make that a little bit more specific!
We do that by adding another generic variable. One for methods, one for the possible keys in our Record:
typeServerRequest<MetextendsMethods,Parextendsstring=string>={method:Met;params:Record<Par,string>;};
The generic type variable Par can be a subset of type string, and the default value is every string. With that, we can tell ServerRequest which keys we expect:
// request.method = "GET"// request.params = {// userID: string// }typeWithUserID=ServerRequest<"GET","userID">;
Let’s add the new argument to our get function and the CallbackFn type, so we can set the requested parameters:
functionget<Parextendsstring=string>(path:string,callback:CallbackFn<"GET",Par>){// to be implemented}constapp={get/* post, put, delete, ... to come! */,};typeCallbackFn<MetextendsMethods,Parextendsstring>=(req:ServerRequest<Met,Par>,reply:ServerReply)=>void;
If we don’t set Par explicitly, the type works as we are used to, since Par defaults to string. If we set it though, we suddenly have a proper definition for the req.params object!
app.get<"userID">("/api/users/:userID",function(req,res){req.params.userID;// Works!!req.params.anythingElse;// doesn't work!!});
That’s great! There is one little thing that can be improved, though. We still can pass every string to the path argument of app.get. Wouldn’t it be better if we could reflect Par in there as well? We can! This is where string template literal types (see Chapter 6) come into play.
Let’s create a type called IncludesRouteParams, where we want to make sure that Par is properly included in the Express-style way of adding a colon in front of the parameter name:
typeIncludesRouteParams<Parextendsstring>=|`${string}/:${Par}`|`${string}/:${Par}/${string}`;
The generic type IncludesRouteParams takes one argument, which is a subset of string. It creates a union type of two template literals:
-
The first template literal starts with any
string, then includes a/character followed by a:character, followed by the parameter name. This makes sure that we catch all cases where the parameter is at the end of the route string. -
The second template literal starts with any
string, followed by the same pattern of/,:, and the parameter name. Then we have another/character, followed by any string. This branch of the union type makes sure we catch all cases where the parameter is somewhere within a route.
This is how IncludesRouteParams with the parameter name userID behaves with different test cases:
consta:IncludesRouteParams<"userID">="/api/user/:userID";// worksconstb:IncludesRouteParams<"userID">="/api/user/:userID/orders";// worksconstc:IncludesRouteParams<"userID">="/api/user/:userId";// breaksconstd:IncludesRouteParams<"userID">="/api/user";// breaksconste:IncludesRouteParams<"userID">="/api/user/:userIDAndmore";// breaks
Let’s include our new utility type in the get function declaration.
functionget<Parextendsstring=string>(path:IncludesRouteParams<Par>,callback:CallbackFn<"GET",Par>){// to be implemented}app.get<"userID">("/api/users/:userID",function(req,res){req.params.userID;// Yes!});
Great! We get another safety mechanism to ensure that we don’t miss out on adding the parameters to the actual route! How powerful.
Step 5: Locking Literal Types
But guess what, I’m still not happy with it. There are a few issues with that approach that become apparent the moment your routes get a little more complex.
-
The first issue I have is that we need to explicitly state our parameters in the generic type parameter. We have to bind
Parto"userID", even though we would specify it anyway in the path argument of the function. This is not JavaScript-y! -
This approach only handles one route parameter. The moment we add a union — e.g
"userID" | "orderId"the failsafe check is satisfied with only one of those arguments being available. That’s how sets work. It can be one, or the other.
There must be a better way. And there is. Otherwise, this recipe would end on a very bitter note.
Let’s inverse the order! Let’s not try to define the route params in a generic type variable, but rather extract the variables from the path we pass as the first argument of app.get.
functionget<Pathextendsstring=string>(path:Path,callback:CallbackFn<"GET",ParseRouteParams<Path>>){// to be implemented}
We remove the Par generic type and add Path. Path can be a subset of any string. We set path to this generic type Path, which means the moment we pass a parameter to get, we catch its string literal type. We pass Path to a new generic type ParseRouteParams which we haven’t created yet.
Let’s work on ParseRouteParams. Here, we switch the order of events around again. Instead of passing the requested route params to the generic to make sure the path is alright, we pass the route path and extract the possible route params. For that, we need to create a conditional type.
Step 6: Adding Conditional types
Conditional types are syntactically similar to the ternary operator in JavaScript. You check for a condition, and if the condition is met, you return branch A, otherwise, you return branch B. For example:
typeParseRouteParams<Route>=Routeextends`${string}/:${inferP}`?P:never;
Here, we check if Route is a subset of every path that ends with the parameter at the end Express-style (with a preceding "/:"). If so, we infer this string. Which means we capture its contents into a new variable. If the condition is met, we return the newly extracted string, otherwise, we return never, as in: “There are no route parameters”,
If we try it out, we get something like that:
typeParams=ParseRouteParams<"/api/user/:userID">;// Params is "userID"typeNoParams=ParseRouteParams<"/api/user">;// NoParams is never: no params!
Great, that’s already much better than we did earlier. Now, we want to catch all other possible parameters. For that, we have to add another condition:
typeParseRouteParams<Route>=Routeextends`${string}/:${inferP}/${inferR}`?P|ParseRouteParams<`/${R}`>:Routeextends`${string}/:${inferP}`?P:never;
Our conditional type now works as follows:
-
In the first condition, we check if there is a route parameter somewhere in between the route. If so, we extract both the route parameter and everything else that comes after that. We return the newly found route parameter
Pin a union where we call the same generic type recursively with the restR. For example, if we pass the route"/api/users/:userID/orders/:orderID"toParseRouteParams, we infer"userID"intoP, and"orders/:orderID"intoR. We call the same type withR. -
This is where the second condition comes in. Here we check if there is a type at the end. This is the case for
"orders/:orderID". We extract"orderID"and return this literal type. -
If there is no more route parameter left, we return never.
// Params is "userID"typeParams=ParseRouteParams<"/api/user/:userID">;// MoreParams is "userID" | "orderID"typeMoreParams=ParseRouteParams<"/api/user/:userID/orders/:orderId">;
Let’s apply this new type and see what our final usage of app.get looks like.
app.get("/api/users/:userID/orders/:orderID",function(req,res){req.params.userID;// Worksreq.params.orderID;// Also available});
And that’s it! Let’s recap what we got. The types we just created for one function app.get make sure that we exclude a ton of possible errors:
-
We can only pass proper numeric status codes to
res.status(). -
req.methodis one of four possible strings, and when we useapp.get, we know it can only be"GET"- -
We can parse route params and make sure that we don’t have any typos inside our callback parameters.
If we look at the example from the beginning of this article, we get the following error messages:
app.get("/api/users/:userID",function(req,res){if(req.method==="POST"){// ^ This condition will always return 'false' since// the types 'Methods' and '"POST"' have no overlap.(2367)res.status(20).send({// ^// Argument of type '20' is not assignable to parameter of// type 'StatusCode'.(2345)message:"Welcome, user "+req.params.userId// ^// Property 'userId' does not exist on type// '{ userID: string; }'. Did you mean 'userID'?});}});
And all that before we actually run our code! Express-style servers are a perfect example for the dynamic nature of JavaScript. Depending on the method you call, and the string you pass for the first argument, a lot of behavior changes inside the callback. Take another example and all your types look entirely different.
The great thing about this approach is that every step added more type-safety:
-
You can easily stop at basic types and get more out of it than having no types at all.
-
Subsetting helps you getting rid of typos by reducing the amount of valid values.
-
Generics help you tailor behaviour to use-case-
-
Advanced types like string template literal types give your app more meaning in a stringly-typed world
-
Locking in generics allow you to work with literals in JavaScript and treat them as types.
-
Conditional types make your types as flexible as your JavaScript code.
The best thing? Once you added your types, people will just write plain JavaScript and still get all the type information. A win for everybody.
12.3 Checking Contracts with satisfies
Problem
You want to work with literal types but need an annotation type-check to make sure you fulfill a contract.
Solution
Use the satisfies operator to do annotation-like type checking while retaining the literal types.
Discussion
Mapped types are great, as they allow for the flexibility in object structures JavaScript is known for. But they have some crucial implications on the type system. Take this example from a generic messaging library, that takes a “channel definition” where multiple channel tokens can be defined.
typeMessages=|"CHANNEL_OPEN"|"CHANNEL_CLOSE"|"CHANNEL_FAIL"|"MESSAGE_CHANNEL_OPEN"|"MESSAGE_CHANNEL_CLOSE"|"MESSAGE_CHANNEL_FAIL";typeChannelDefinition={[key:string]:{open:Messages;close:Messages;fail:Messages;};};
The keys from this channel definition object are what the user wants them to be. So this is a valid channel definition:
constimpl:ChannelDefinition={test:{open:'CHANNEL_OPEN',close:'CHANNEL_CLOSE',fail:'CHANNEL_FAIL'},message:{open:'MESSAGE_CHANNEL_OPEN',close:'MESSAGE_CHANNEL_CLOSE',fail:'MESSAGE_CHANNEL_FAIL'}}
We have a problem when we want to access the keys we defined so flexibly. Let’s say we have a function that opens a channel. We pass the whole channel definition object, as well as the channel we want to open.
functionopenChannel(def:ChannelDefinition,channel:keyofChannelDefinition){// to be implemented}
So what are the keys of ChannelDefinition? Well, it’s every key: [key: string]. So the moment we assign a specific type, TypeScript treats impl as this specific type, ignoring the actual implementation. The contract is fulfilled. Moving on. This allows for wrong keys to be passed:
// Passes, even though "massage" is not part of implopenChannel(impl,"massage");
So we are more interested in the actual implementation, not the type we assign to our constant. This means we have to get rid of the ChannelDefinition type and make sure we care about the actual type of the object.
First, the openChannel function should take any object that is a subtype of ChannelDefinition, but work with the concrete subtype:
functionopenChannel<TextendsChannelDefinition>(def:T,channel:keyofT){// to be implemented}
TypeScript now works on two levels:
-
Checking if
Tactually extendsChannelDefinition. If so, we work with typeT -
All our function parameters are typed with the generic
T. This also means we get the real keys ofTthroughkeyof T.
To benefit from that, we have to get rid of the type definition for impl. The explicit type definition overrides all actual types. From the moment we explicitly specify the type, TypeScript treats it as ChannelDefinition, not the actual underlying subtype. We also have to set const context, so we can convert all strings to their unit type (and thus be compliant with Messages):
constimpl={test:{open:"CHANNEL_OPEN",close:"CHANNEL_CLOSE",fail:"CHANNEL_FAIL",},message:{open:"MESSAGE_CHANNEL_OPEN",close:"MESSAGE_CHANNEL_CLOSE",fail:"MESSAGE_CHANNEL_FAIL",},}asconst;
Without const context, the inferred type of impl is:
/// typeof impl{test:{open:string;close:string;fail:string;};message:{open:string;close:string;fail:string;};}
With const context, the actual type of impl is now:
/// typeof impl{test:{readonlyopen:"CHANNEL_OPEN";readonlyclose:"CHANNEL_CLOSE";readonlyfail:"CHANNEL_FAIL";};message:{readonlyopen:"MESSAGE_CHANNEL_OPEN";readonlyclose:"MESSAGE_CHANNEL_CLOSE";readonlyfail:"MESSAGE_CHANNEL_FAIL";};}
const context allows us to satisfy the contract made by ChannelDefinition. Now, openChannel works correctly:
openChannel(impl,"message");// satisfies contractopenChannel(impl,"massage");// ^// Argument of type '"massage"' is not assignable to parameter// of type '"test" | "message"'.(2345)
This works but comes with a caveat. The only point where we can check if impl is actually a valid sub-type of ChannelDefinition is when we are using it. Sometimes we want to annotate early to figure out potential breaks in our contract. We want to see if this specific implementation satisfies a contract.
Thankfully, there is a keyword for that. We can define objects and do a type-check to see if this implementation satisfies a type, but TypeScript will treat it as a literal type.
constimpl={test:{open:"CHANNEL_OPEN",close:"CHANNEL_CLOSE",fail:"CHANNEL_FAIL",},message:{open:"MESSAGE_CHANNEL_OPEN",close:"MESSAGE_CHANNEL_CLOSE",fail:"MESSAGE_CHANNEL_FAIL",},}satisfiesChannelDefinition;functionopenChannel<TextendsChannelDefinition>(def:T,channel:keyofT){// to be implemented}
With that, we can make sure that we fulfill contracts, but have the same benefits as with const context. The only difference is that the fields are not set to readonly, but since TypeScript takes the literal type of everything, there is no way to set fields to anything else after a satisfaction type-check.
impl.test.close="CHANEL_CLOSE_MASSAGE";// ^// Type '"CHANEL_CLOSE_MASSAGE"' is not assignable// to type '"CHANNEL_CLOSE"'.(2322)
With that, we get the best of both worlds: Proper type-checks at annotation time, as well as the power of narrowed types for specific situations.
12.4 Testing Complex Types
Problem
You have written very elaborate and complex types, and you want to make sure that they behave correctly.
Solution
There are some commonly known helper types that work like a test framework. Test your types!
Discussion
In dynamically typed programming languages people always circle around the discussion if you need types when you can have a proper test suite. This is at least what one camp says, the other thinks why should we test so much when we can have types? The answer is probably somewhere in the middle.
It is true that types can solve a lot of test cases. Is the result a number? Is the result an object with certain properties of certain types? This is something we can easily check via types. Does my function produce correct results? Are the values what I expect them to be? This belongs to tests.
Throughout this book, we learned a lot about very complex types. With conditional types, we opened up the meta-programming capabilities of TypeScript, where we could craft new types based on certain features of previous types. Powerful, Turing-complete, and very advanced. This bears the question: How do we ensure that those complex types actually do what they should do? Maybe we should test our types?
We actually can. There are a few helper types that are known within the community that can serve as some sort of testing framework. The following types come from the excellent Type Challenges repository which allows you to test your TypeScript type system skills to an extreme. They include very challenging tasks, some of them which have relevance to real-world use cases, others which are just for fun.
Their testing library starts with a few types that expect a truthy or a falsy value. They are pretty straightforward. By using generics and literal types, we can check if this one boolean is true or false.
exporttypeExpect<Textendstrue>=T;exporttypeExpectTrue<Textendstrue>=T;exporttypeExpectFalse<Textendsfalse>=T;exporttypeIsTrue<Textendstrue>=T;exporttypeIsFalse<Textendsfalse>=T;
They don’t do much on their own but are fantastic when being used with Equal<X, Y> and NotEqual<X, Y>, which return either true or false.
exporttypeEqual<X,Y>=(<T>()=>TextendsX?1:2)extends(<T>()=>TextendsY?1:2)?true:false;exporttypeNotEqual<X,Y>=trueextendsEqual<X,Y>?false:true;
Equals<X,Y> is interesting as it creates generic functions and checks them against both types that should be compared with each other. Since there is no resolution on each conditional type, TypeScript compares both conditional types and can see if there is compatibility or not. It’s a step within TypeScript’s conditional type logic. that is masterfully explained by Alex Chashin on Stack Overflow.
The next batch allows us to check if a type is any or not.
exporttypeIsAny<T>=0extends1&T?true:false;exporttypeNotAny<T>=trueextendsIsAny<T>?false:true;
It’s a simple conditional type that checks 0 against 1 & T. 1 & T should always narrow down to 1 or never, which always yields the false branch of the conditional type. Except when we intersect with any. An intersection with any is always any, and 0 is a subset of any.
The next batch is re-interpretations of Remap and DeepRemap we saw in Recipe 8.3, along with Alike as a way to compare types that are structurally equal, but not in their construction.
exporttypeDebug<T>={[KinkeyofT]:T[K]};exporttypeMergeInsertions<T>=Textendsobject?{[KinkeyofT]:MergeInsertions<T[K]>}:T;exporttypeAlike<X,Y>=Equal<MergeInsertions<X>,MergeInsertions<Y>>;
The Equal check before should theoretically be able to e.g. understand that { x : number, y: string } is equal to { x: number } & { y: string }, but implementation details of the TypeScript type checker don’t see them as equal. That’s where Alike comes into play.
The last batch of the type challenges testing file does two things:
-
It does subset checks with a simple conditional type.
-
It checks if a tuple you have constructed can be seen as a valid argument for a function.
exporttypeExpectExtends<VALUE,EXPECTED>=EXPECTEDextendsVALUE?true:false;exporttypeExpectValidArgs<FUNCextends(...args:any[])=>any,ARGSextendsany[]>=ARGSextendsParameters<FUNC>?true:false;
Having a small helper type library like this for type testing and debugging is really helpful when your types get more and more complex. Add them to your global type definition files (see Recipe 9.7) and make good use of them.
12.5 Validating Data Types at Runtime with Zod
Problem
You rely on data from external sources and can’t trust them to be correct.
Solution
Define schemas using a library called Zod, and use it to validate data from external sources.
Discussion
Congratulations, you got very far in the book! We’re almost at the end. If you followed along from start to finish, you were constantly reminded that TypeScript’s type system follows a couple of goals. First and foremost, it wants to give you excellent tooling so you can be productive when developing applications. It also wants to cater to all JavaScript frameworks and make sure they are fun and easy to use. It sees itself as an add-on to JavaScript, as a syntax for static types. There are also some non-goals or trade-offs. It prefers productivity over correctness, it allows developers to bend the rules to their needs, and it has no claim of being provably sound.
In Recipe 3.9 we learned that we can influence TypeScript if we think that types should be something different through type assertions, in Recipe 9.2 we learned how we can make unsafe operations more robust and easier to spot. Since TypeScript’s type system is compile-time only, all our safeguards evaporate once we run JavaScript in our selected runtime.
Usually, compile-time type checks are good enough. As long as we are within the inner world where we write our own types, let TypeScript check that everything is okay, and our code is good to go. In JavaScript applications, however, we also deal with a lot of things beyond our control: user input, for example. APIs from third parties that we need to access and process. There is an inevitable point in our development process where we need to leave the boundaries of our well-typed application and deal with data that we can’t trust.
While developing, working with external sources or user input might work well enough, but to make sure that the data we use stays the same when running in production requires extra effort. You might want to validate that your data adhere to a certain scheme.
Thankfully, there are libraries that deal with that kind of task. One library that has gained popularity in recent years is Zod. Zod is TypeScript-first, which means that it not only makes sure that the data you consume is valid and also what you expect, it also makes sure that you get TypeScript types that you can use throughout your program. Zod sees itself as the guard between the outer world outside of your control, to the inner world where everything is well-typed and also type checked.
Think of an API that gives you data for the Person type that we’ve seen throughout the book. A Person has a name and age, a profession that is optional, and also a status: In our system, they can be either active, inactive, or only registered, waiting for confirmation.
The API also packs a couple of Person objects in an array contained within a Result type. In short, an example for a classic response type for HTTP calls.
typePerson={name:string;age:number;profession?:string|undefined;status:"active"|"inactive"|"registered";};typeResults={entries:Person[]};
You know how to type models like this. By now, you are fluent in recognizing and applying both syntax and patterns. If we want to have the same type, but at runtime for data outside our control, we use Zod. And writing the same type in JavaScript (the value namespace) looks very familiar.
import{z}from"zod";constPerson=z.object({name:z.string(),age:z.number().min(0).max(150),profession:z.string().optional(),status:z.union([z.literal("active"),z.literal("inactive"),z.literal("registered"),]),});constResults=z.object({entries:z.array(Person),});
As you see, we are in JavaScript, and we add names to the value namespace, not the type namespace (see Recipe 2.9), but the tools we get from Zod’s fluent interface are very familiar to us TypeScript developers. We define objects, strings, numbers, and arrays. We can also define union types and literals. All the building blocks for defining models are here, and we can also nest types, as we see by defining Person first, and reusing it in Results. The fluent interface also allows us to make certain properties optional. All things that we know from TypeScript. Furthermore, we can set validation rules. We can say that age should be above or equal to 0, and below 100. Things that we can’t do reasonably within the type system.
Those objects are not types that we can use like we would use TypeScript types. They are schemas, waiting for data they can parse and validate. Since Zod is TypeScript first, we have helper types that allow us to cross the bridge from the value space to the type space. With z.infer (a type, not a function), we can extract the type we defined through Zod’s schema functions.
typePersonType=z.infer<typeofPerson>;typeResultType=z.infer<typeofResults>;
So, how do we apply Zod’s validation techniques? Let’s talk about a function called fetchData, which calls an API that gets entries of type ResultType. We just don’t know if the values we receive actually adhere to the types we’ve defined. So, after fetching data as json, we use the Results schema to parse the data we’ve received. If this process is successful, we get data that is of type ResultType.
typeResultType=z.infer<typeofResults>;asyncfunctionfetchData():Promise<ResultType>{constdata=awaitfetch("/api/persons").then((res)=>res.json());returnResults.parse(data);}
Note that we already had our first safeguard in how we defined the function interface. Promise<ResultType> is based on what we get from z.infer.
Results.parse(data) is of the inferred type, but without a name. The structural type system makes sure that we return the right thing. There might be errors, and we can catch them using the respective Promise.catch methods or try/catch blocks.
Usage with try-catch:
fetchData().then((res)=>{// do something with results}).catch((e)=>{// a potential zod error!});// ortry{constres=awaitfetchData();// do something with results}catch(e){// a potential zod error!}
While we can make sure that we only continue if we have correct data, nothing keeps us from not checking errors. If we want to make sure that we look at the parsing result first before we continue with our program safeParse is the method to go.
asyncfunctionfetchData():Promise<ResultType>{constdata=awaitfetch("/api/persons").then((res)=>res.json());constresults=Results.safeParse(data);if(results.success){returnresults.data;}else{// Depending on your application, you might want to have a// more sophisticated way of error handling than returning// an empty result.return{entries:[]};}}
This already makes Zod a valuable asset if you need to rely on external data. Furthermore, it allows you to adapt to API changes. Let’s say that your program only can work with active and inactive states of Person, it does not know how to handle registered. It’s easy to apply a transform where based on the data you get, you modify the "registered" state to be actually "active".
constPerson=z.object({name:z.string(),age:z.number().min(0).max(150),profession:z.string().optional(),status:z.union([z.literal("active"),z.literal("inactive"),z.literal("registered"),]).transform((val)=>{if(val==="registered"){return"active";}returnval;}),});
You then work with two different types. The input type represents what the API is giving you, as well as the output type, the data you have after parsing. Thankfully, we can get both types from the respective Zod helper types z.input and z.output.
typePersonTypeIn=z.input<typeofPerson>;/*type PersonTypeIn = {name: string;age: number;profession?: string | undefined;status: "active" | "inactive" | "registered";};*/typePersonTypeOut=z.output<typeofPerson>;/*type PersonTypeOut = {name: string;age: number;profession?: string | undefined;status: "active" | "inactive";};*/
Zod’s typings are clever enough to understand that you removed one of the three literals from status. So there are no surprises and you actually deal with the data you’ve been expecting.
Zod’s API is elegant, easy to use, and very aligned with TypeScript’s features. For data at the boundaries that you can’t control, where you need to rely on third parties to provide the expected shape of data, Zod is a life-saver without you having to do too much work. It comes at a cost, though: Runtime validation takes time. The bigger the dataset, the longer it takes. Also, with 12KB it’s considerably big. Be certain that you need this kind of validation for data at your boundaries.
If the data you request comes from some other team within your company, maybe the person sitting next to you, no library, not even Zod, beats talking with each other and collaborating towards the same goals. Types are a way to guide collaboration, not a means to get rid of it.
12.6 Working Around Index Access Restrictions
Problem
When accessing an object’s property using index access, TypeScript complains that the type you want to assign is not assignable to never.
Solution
TypeScript looks for the lowest common denominator of possible values. Use a generic type to lock in specific keys so TypeScript doesn’t assume the rule needs to apply for all.
Discussion
Sometimes when writing TypeScript, some of the things you’d usually do in JavaScript work a little differently and cause some weird, and puzzling situations. Sometimes you just want to assign a value to an object property via index access and get an error like “Type string | number is not assignable to type never. Type string is not assignable to type never.(2322)”
This isn’t something out of the ordinary, it’s just something where “unexpected intersection types” make you think a little bit more about the type system.
Let’s look at this example. We create a little function that lets us update things from one object anotherPerson to object person via providing a key. Both person and anotherPerson have the same type Person, but TypeScript throws errors at us.
letperson={name:"Stefan",age:39,};typePerson=typeofperson;letanotherPerson:Person={name:"Not Stefan",age:20,};functionupdate(key:keyofPerson){person[key]=anotherPerson[key];//^ Type 'string | number' is not assignable to type 'never'.// Type 'string' is not assignable to type 'never'.(2322)}update("age");
Property assignments via the index access operator are super hard to track down for TypeScript. Even if you narrow down all possible access keys via keyof Person, the possible values that can be assigned are string or number (for name and age respectively). While this is ok if you have index access on the right-hand side of a statement (reading), it gets a little interesting if you have index access on the left-hand side of a statement (writing).
TypeScript can’t guarantee, that the value you pass along is actually correct. Look at this function signature:
functionupdateAmbiguous(key:keyofPerson,value:Person[keyofPerson]){//...}updateAmbiguous("age","Stefan");
Nothing prevents me from adding a falsely typed value to every key. Except for TypeScript, which throws an error at us. But why does TypeScript tell us the type is never?
To allow for some assignments TypeScript compromises. Instead of not allowing any assignments at all on the right-hand side, TypeScript looks for the lowest common denominator of possible values. Take this for example:
typeSwitch={address:number,on:0|1};declareconstswitcher:Switch;declareconstkey:keyofSwitch;
Here, both keys are subsets of number. address is the entire set of numbers, on on the other side is either 0 or 1. It’s absolutely possible to set 0 or 1 to both fields! And this is what you get with TypeScript as well.
switcher[key]=1;// This worksswitcher[key]=2;// Error// ^ Type '2' is not assignable to type '0 | 1'.(2322)
TypeScript gets to the possible assignable values by doing an intersection type of all property types. This means that in the case of the Switch, it’s number & (0 | 1), which boils down to 0 | 1. In the case of all Person properties, it’s string & number, which has no overlap, therefore it’s never! Hah! There’s the culprit!
One way to get around this strictness (which is for your own good!) is by using generics. Instead of allowing all keyof Person values to access, we bind a specific subset of keyof Person to a generic variable:
functionupdate<KextendskeyofPerson>(key:K){person[key]=anotherPerson[key];// works}update("age");
When I do update("age"), K is bound to the literal type of "age". No ambiguity there!
There is a theoretical loophole since we could instantiate update with a much broader generic value:
update<"age"|"name">("age");
But this is something the TypeScript team allows, for now. See also this comment by Anders Hejlsberg. Note that Anders asks to see use cases for such a scenario, which perfectly details how the TypeScript team works. The original assignment via index access on the right-hand side has so much potential for errors, that they give you enough safeguards until you make it very intentional what you want to do. This is ruling out entire classes of errors without getting too much in the way.
12.7 Deciding Whether to Use Function Overloads or Conditional Types
Problem
With conditional types, you have more possibilities to define function signatures than before. You wonder if you still need function overloads or if they’re obsolete.
Solution
Function overloads provide better readability and an easier way to define expectations from your type than conditionals. Use them when the situation calls for.
Discussion
With type system features like conditional types or variadic tuple types, one technique to describe a function’s interface has faded into the background: Function overloads. And there’s a good reason for that. Both features have been implemented to deal with the shortcomings of regular function overloads.
See this concatenation example directly from the TypeScript 4.0 release notes. This is an array concat function:
functionconcat(arr1,arr2){return[...arr1,...arr2];}
To correctly type a function like this so it takes all possible edge cases into account, we would end up in a sea of overloads.
// 7 overloads for an empty second arrayfunctionconcat(arr1:[],arr2:[]):[];functionconcat<A>(arr1:[A],arr2:[]):[A];functionconcat<A,B>(arr1:[A,B],arr2:[]):[A,B];functionconcat<A,B,C>(arr1:[A,B,C],arr2:[]):[A,B,C];functionconcat<A,B,C,D>(arr1:[A,B,C,D],arr2:[]):[A,B,C,D];functionconcat<A,B,C,D,E>(arr1:[A,B,C,D,E],arr2:[]):[A,B,C,D,E];functionconcat<A,B,C,D,E,F>(arr1:[A,B,C,D,E,F],arr2:[]):[A,B,C,D,E,F];// 7 more for arr2 having one elementfunctionconcat<A2>(arr1:[],arr2:[A2]):[A2];functionconcat<A1,A2>(arr1:[A1],arr2:[A2]):[A1,A2];functionconcat<A1,B1,A2>(arr1:[A1,B1],arr2:[A2]):[A1,B1,A2];functionconcat<A1,B1,C1,A2>(arr1:[A1,B1,C1],arr2:[A2]):[A1,B1,C1,A2];functionconcat<A1,B1,C1,D1,A2>(arr1:[A1,B1,C1,D1],arr2:[A2]):[A1,B1,C1,D1,A2];functionconcat<A1,B1,C1,D1,E1,A2>(arr1:[A1,B1,C1,D1,E1],arr2:[A2]):[A1,B1,C1,D1,E1,A2];functionconcat<A1,B1,C1,D1,E1,F1,A2>(arr1:[A1,B1,C1,D1,E1,F1],arr2:[A2]):[A1,B1,C1,D1,E1,F1,A2];// and so on, and so forth
And this only takes into account arrays that have up to six elements. Variadic tuple types help greatly with situations like this.
typeArr=readonlyany[];functionconcat<TextendsArr,UextendsArr>(arr1:T,arr2:U):[...T,...U]{return[...arr1,...arr2];}
The new function signature requires a lot less effort to parse, is very clear on what types it expects to get as arguments and what it returns. The return value also maps to the return type. No extra assertions, TypeScript can make sure that you are returning the correct value.
It’s a similar situation with conditional types. This example is very similar to Recipe 5.1. Think of software that retrieves orders based on customer, article, or order ID. You might want to create something like this:
functionfetchOrder(customer:Customer):Order[]functionfetchOrder(product:Product):Order[]functionfetchOrder(orderId:number):Order// the implementationfunctionfetchOrder(param:any):Order|Order[]{//...}
But this is just half the truth. What if you end up with ambiguous types where you don’t know exactly if you get only a Customer, or only a Product. You need to take care of all possible combinations.
functionfetchOrder(customer:Customer):Order[]functionfetchOrder(product:Product):Order[]functionfetchOrder(orderId:number):OrderfunctionfetchOrder(param:Customer|Product):Order[]functionfetchOrder(param:Customer|number):Order|Order[]functionfetchOrder(param:number|Product):Order|Order[]// the implementationfunctionfetchOrder(param:any):Order|Order[]{//...}
Add more possibilities, you end up with more combinations. Here, conditional types can reduce your function signature tremendously.
typeFetchParams=number|Customer|Product;typeFetchReturn<T>=TextendsCustomer?Order[]:TextendsProduct?Order[]:Textendsnumber?Order:never;functionfetchOrder<TextendsFetchParams>(params:T):FetchReturn<T>{//...}
Since conditional types distribute a union, FetchReturn returns a union of return types.
So, there is good reason to use those techniques instead of drowning in too many function overloads. This bears the question: Do we still need function overloads?
Yes, we do.
Different function shapes
One scenario where function overloads are still very handy is if you have different argument lists for your function variants. This means that not only the arguments (parameters) themselves can have some variety (this is where conditionals and variadic tuples are fantastic), but also the number and position of arguments.
Imagine a search function that has two different ways of being called:
-
Call it with the search query. It returns a
Promiseyou can await. -
Call it with the search query and a callback. In this scenario, the function does not return anything.
This can be done with conditional types, but is very unwieldy:
// => (1)typeSearchArguments=// Argument list one: a query and a callback|[query:string,callback:(results:unknown[])=>void]// Argument list two:: just a query|[query:string];// A conditional type picking either void or a Promise depending// on the input => (2)typeReturnSearch<T>=Textends[query:string]?Promise<Array<unknown>>:void;// the actual function => (3)declarefunctionsearch<TextendsSearchArguments>(...args:T):ReturnSearch<T>;// z is voidconstz=search("omikron",(res)=>{});// y is Promise<unknown>consty=search("omikron");
Here’s what we did:
-
We defined our argument list using tuple types. Since TypeScript 4.0, we can name tuple fields just like we would do it with objects. We create a union because we have two different variants of our function signature
-
The
ReturnSearchtype selects the return type based on the argument list variant. If it’s just a string, return a Promise. Otherwise return void. -
We add our types by constraining a generic variable to
SearchArguments, so that we can correctly select the return type
That is a lot! And it features a ton of complex features that we love to see in TypeScript’s feature list: Conditional types, generics, generic constraints, tuple types, union types! We get some nice auto-complete, but it’s nowhere the clarity of a simple function overload:
functionsearch(query:string):Promise<unknown[]>;functionsearch(query:string,callback:(result:unknown[])=>void):void;// This is the implementation, it only concerns youfunctionsearch(query:string,callback?:(result:unknown[])=>void):void|Promise<unknown>{// Implement}
We only use a union type for the implementation part. The rest is very explicit and clear. We know our arguments, we know what to expect in return. No ceremony, just simple types. The best part of function overloads is that the actual implementation does not pollute the type space. You can go for a round of any and just don’t care.
Exact arguments
Another situation where function overloads can make a lot of things easier is when you are in need of exact arguments and their mapping. Let’s look at a function that applies an event to an event handler. E.g. we have a MouseEvent and want to call a MouseEventHandler with it. Same for keyboard events, etc. If we use conditionals and union types to map event and handler, we might end up with something like this:
// All the possible event handlerstypeHandler=|MouseEventHandler<HTMLButtonElement>|KeyboardEventHandler<HTMLButtonElement>;// Map Handler to EventtypeEv<T>=TextendsMouseEventHandler<inferR>?MouseEvent<R>:TextendsKeyboardEventHandler<inferR>?KeyboardEvent<R>:never;// Create afunctionapply<TextendsHandler>(handler:T,ev:Ev<T>):void{handler(evasany);// We need the assertion here}
At a first glance, this looks fine. It might be a bit cumbersome though if you think about all the variants that you need to keep track of.
There’s a bigger problem, though. The way TypeScript deals with all possible variants of event is causing an unexpected intersection as we see in Recipe 12.6. This means that in the function body, TypeScript can’t tell what kind of handler you are passing. Therefore it also can’t tell which kind of event we’re getting. So TypeScript says that the event can be both. A mouse event, and a keyboard event. You need to pass handlers that can deal with both. Which is not how we intend our function to work.
The actual error message is TS 2345: Argument of type KeyboardEvent<HTMLButtonElement> | MouseEvent<HTMLButtonElement, MouseEvent> is not assignable to parameter of type MouseEvent<HTMLButtonElement, MouseEvent> & KeyboardEvent<HTMLButtonElement>.
This is why we need an as any type assertion. Just to make it possible to actually call the handler with the event.
So, the function signature works in a lot of scenarios:
declareconstmouseHandler:MouseEventHandler<HTMLButtonElement>;declareconstmouseEv:MouseEvent<HTMLButtonElement>;declareconstkeyboardHandler:KeyboardEventHandler<HTMLButtonElement>;declareconstkeyboardEv:KeyboardEvent<HTMLButtonElement>;apply(mouseHandler,mouseEv);// worksapply(keyboardHandler,keyboardEv);// woirksapply(mouseHandler,keyboardEv);// breaks like it should!// ^// Argument of type 'KeyboardEvent<HTMLButtonElement>' is not assignable// to parameter of type 'MouseEvent<HTMLButtonElement, MouseEvent>'
But once there’s ambiguity, things don’t work out as it should:
declareconstmouseOrKeyboardHandler:MouseEventHandler<HTMLButtonElement>|KeyboardEventHandler<HTMLButtonElement>;;// This is accepted but can cause problems!apply(mouseOrKeyboardHandler,mouseEv);
When mouseOrKeyboardHandler is a keyboard handler, we can’t reasonably pass a mouse event. Wait a second. This is exactly what the TS2345 error from above tried to tell us! We just shifted the problem to another place and made it silent with an as any assertion.
Explicit, exact function signatures make everything easier. The mapping becomes clearer, the type signatures easier to understand, and there’s no need for conditionals or unions.
// Overload 1: MouseEventHandler and MouseEventfunctionapply(handler:MouseEventHandler<HTMLButtonElement>,ev:MouseEvent<HTMLButtonElement>):void;// Overload 2: KeyboardEventHandler and KeyboardEventfunctionapply(handler:KeyboardEventHandler<HTMLButtonElement>,ev:KeyboardEvent<HTMLButtonElement>):void;// The implementation. Fall back to any. This is not a type!// TypeScript won't check for this line nor// will it show in the autocomplete.// This is just for you to implement your stuff.functionapply(handler:any,ev:any):void{handler(ev);}
Function overloads help us with all possible scenarios. We basically make sure that there no ambiguous types:
apply(mouseHandler,mouseEv);// works!apply(keyboardHandler,keyboardEv);// works!apply(mouseHandler,keyboardEv);// breaks like it should!// ^ No overload matches this call.apply(mouseOrKeyboardHandler,mouseEv);// breaks like it should// ^ No overload matches this call.
For the implementation, we can even use any. Since you can make sure that you won’t run into a situation that implies ambiguity, we can rely on the happy-go-lucky type and don’t need to bother.
The catch-all function body.
Last, but not least there’s the combination of conditional types and function overloads. If we remember the example from Recipe 5.1. We saw that conditional types gave the function body a hard time to map values to the respective, generic return types. Moving the conditional type to a function overload and using a very broad function signature for implementation helps both the users of the function as well as the implementors.
functioncreateLabel<Textendsnumber|string|StringLabel|NumberLabel>(input:T):GetLabel<T>;functioncreateLabel(input:number|string|StringLabel|NumberLabel):NumberLabel|StringLabel{if(typeofinput==="number"){return{id:input};}elseif(typeofinput==="string"){return{name:input};}elseif("id"ininput){return{id:input.id};}else{return{name:input.name};}}
Function overloads are still very useful and for a lot of scenarios the way to go. They’re easier to read, easier to write, and in a lot of cases more exact than what we get with other means.
But it’s not either-or. You can happily mix and match conditionals and function overloads if your scenario needs it.
12.8 Naming Generics
Problem
T and U don’t tell you anything about generic type parameters.
Solution
Follow a naming pattern.
Discussion
TypeScript’s generics are arguably one of the most powerful features of the language. They open a door to TypeScript’s own meta-programming language, which allows for a very flexible and dynamic generation of types. It comes really close to being its own functional programming language.
Especially with the arrival of string literal types and recursive conditional types in the most recent TypeScript versions, we can craft types that do astonishing things. This little type from Recipe 12.2 parses Express-style from route information and retrieves an object with all its parameters:
typeParseRouteParameters<T>=Textends`${string}/:${inferU}/${inferR}`?{[PinU|keyofParseRouteParameters<`/${R}`>]:string}:Textends`${string}/:${inferU}`?{[PinU]:string}:{}typeX=ParseRouteParameters<"/api/:what/:is/notyou/:happening">// type X = {// what: string,// is: string,// happening: string,// }
When we define a generic type, we also define generic type parameters. They can be of a certain type (or more correct: be a certain sub-type):
typeFoo<Textendsstring>=...
They can have default values:
typeFoo<Textendsstring="hello">=...
And when using default values, order is important. This is just one of many similarities to regular JavaScript functions! So since we are almost talking functions, why are we using single-letter names for generic type parameters?
Most generic type parameters start with the letter T. Subsequent parameters go along the alphabet (U, V, W), or are abbreviations like K for key. This can lead to highly unreadable types, however. If I look at Extract<T, U>, it is hard to tell if we extract T from U, or the other way around.
Being a bit more elaborate helps a lot:
typeExtract<From,Union>=...
Now we know that we want to extract from the first parameter everything that is assignable to Union. Furthermore, we understand that we want to have a union type.
Types are documentation, and our type parameters can have speaking names. Just like you would do with regular functions. Go for a naming scheme, like this one:
-
All type parameters start with an uppercase letter. Like you would name all other types!
-
Only use single letters if the usage is completely clear. For example,
ParseRouteParamscan only have one argument, the route. -
Don’t abbreviate to
T(that’s way too … generic!), but to something that makes it clear what we are dealing with. E.g.ParseRouteParams<R>, whereRstands forRoute. -
Rarely use single letters, stick to short words, or abbreviations.
ElemforElement,Routecan stand as it is. -
Use prefixes where I need to differentiate from built-in types. E.g.
Elementis taken, I can useGElement(or stick withElem) -
Use prefixes to make generic names clearer
URLObjis clearer thanObj, for instance. -
Same patterns apply to inferred types within a generic type.
Let’s look at ParseRouteParams again, and be more explicit with our names:
typeParseRouteParams<Route>=Routeextends`${string}/:${inferParam}/${inferRest}`?{[EntryinParam|keyofParseRouteParameters<`/${Rest}`>]:string}:Routeextends`${string}/:${inferParam}`?{[EntryinParam]:string}:{}
It becomes a lot clearer what each type is meant to be. We also see that we need to iterate over all Entries in Param, even if Param is just a set of one type.
Arguably, a lot more readable than before!
There is one caveat however, it’s almost impossible to distinguish type parameters from actual types. There’s another scheme, that has been heavily popularized by Matt Pocock: Using a T prefix.
typeParseRouteParameters<TRoute>=Routeextends`${string}/:${inferTParam}/${inferTRest}`?{[TEntryinTParam|keyofParseRouteParameters<`/${TRest}`>]:string}:Routeextends`${string}/:${inferTParam}`?{[TEntryinTParam]:string}:{}
This comes close to a Hungarian Notation for types.
Whatever variation you use, making sure that generic types are readable to you and your colleagues, and that their parameters speak for themselves, is as important as in other programming languages.
12.9 Prototyping on the TypeScript Playground
Problem
Your project is so big, it’s hard for you to properly fix bugs in typings.
Solution
Move your types to the TypeScript playground and develop them in isolation.
Discussion
The TypeScript playground as shown in Figure 12-1 is a web application that has been with TypeScript since its first release, showcasing how TypeScript syntax is compiled to JavaScript. Its capabilities were originally limited and focused on “breaking the ice” for new developers, but in recent years it has become a powerhouse of online development, rich in features, and indispensable for TypeScript development. The TypeScript team themselves ask people to submit issues including a recreation of the bug using the playground. They also test out new and upcoming features by allowing the nightly version to be loaded into the application. In short: the TypeScript playground is essential for TypeScript development.
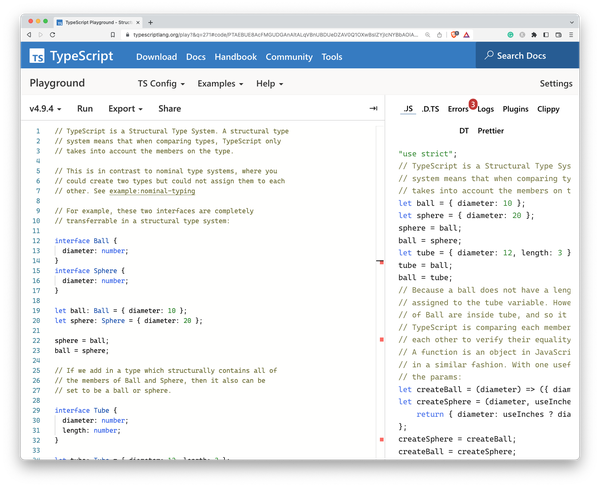
Figure 12-1. The TypeScript playground showing one of the built-in examples
For your regular development practices, the TypeScript playground is a really good way for developing types in isolation, independent from your current project. TypeScript configurations grow big, they become confusing, and it becomes really hard to understand which types contribute to your actual project. If you encounter weird or unexpected behavior in your types, maybe try recreating them in the playground, in isolation, without the rest of your project.
The playground doesn’t feature a full tsconfig.json, but you are able to define the important pieces of your configuration via a user interface, as seen in Figure 12-2. Alternatively, you can set compiler flags using annotations directly in the source code.
// @strictPropertyInitialization: false// @target: esnext// @module: nodenext// @lib: es2015,dom
Not as comfortable, but highly ergonomic as it allows you to share compiler flags much easier.
You are also able to compile TypeScript, get extracted type information, run small pieces of code to see how they behave and export everything to various destinations, including other popular online editors and IDEs.
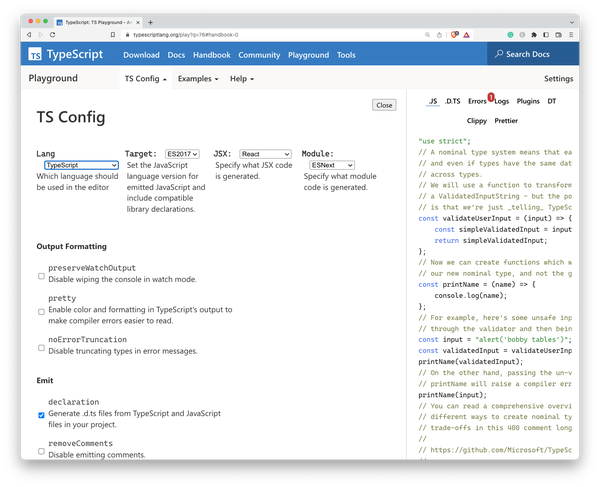
Figure 12-2. Instead of writing an actual tsconfig.json, you set compiler flags using the TSConfig panel
You are able to select various versions to make sure that your bug isn’t dependent on version updates, and you can run various, well-documented examples to learn the basics of TypeScript while trying out actual source code.
As stated in Recipe 12.10, developing JavaScript would be nothing without using dependencies. In the TypeScript playground, it’s possible to fetch type information for dependencies directly from NPM. If you import e.g. React within the TypeScript playground, the playground will try to acquire types:
-
First it will look at the respective package on NPM, and check if there are types defined or
.d.tsfiles somewhere in its contents. -
If not, it will check on NPM if Definitely Typed type information exists and will download the respective
@typespackage.
This is recursive, meaning that if some types require types from other packages, type acquisition will also go through the type dependencies. For some packages, you can even define which version to load.
import{render}from"preact";// types: legacy
Here, types is set to legacy, which loads the respective legacy version from NPM.
There’s more to the ecosystem. An important tool of the TypeScript playground is Twoslash. Twoslash is a markup format for TypeScript files that lets you highlight code, handle multiple files and show the files the TypeScript compiler creates. It’s fantastic for blogs and websites, you basically have an inline TypeScript compiler for code examples, but also fantastic if you need to create complex debugging scenarios.
The compiler flag annotations are handled by Twoslash, but you can also get inline hints on current types by adding a little marker in a comment directly under a variable name.
// @jsxFactory: himport{render,h}from"preact";functionHeading(){return<h1>Hello</h1>}constelem=<Heading/>// ^?// This line above triggers inline hints
You can see the result in Figure 12-3.
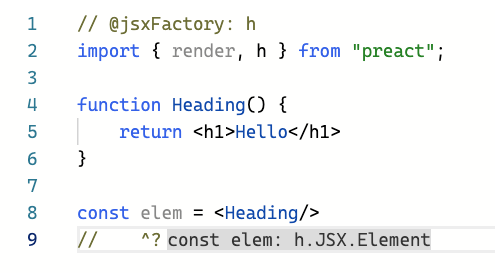
Figure 12-3. Twoslash in Action: Setting compiler flags via annotations
Twoslash is also part of the bug workbench. The bug workbench is a fork of the Playground with an emphasis on creating and displaying complex reproductions of bugs. Here, you can also define multiple files to see how imports and exports work.
exportconsta=2;// @filename: a.tsimport{a}from"./input.js"console.log(a);
Multi-file support is triggered by the first @filename annotation. Everything before this line becomes a file called input.tsx, basically your main entry point.
Last, but not least, the playground can work as your entire demo suite for workshops and trainings. Using Twoslash, you can create multiple files in a GitHub Gist repository, and load the TypeScript files along with documentation as part of a Gist docset, as seen in Figure 12-4.
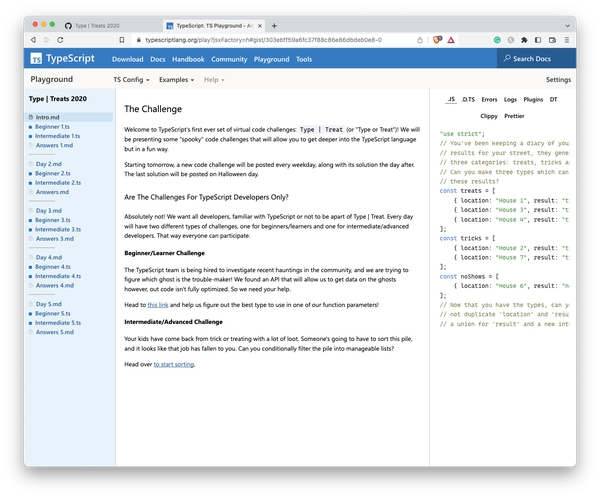
Figure 12-4. A Gist Docset in the Playground
Immensely powerful for immersive learning. From mere reproductions to full-fledged demo suites: The TypeScript playground is the one-stop source for TypeScript developers. Whether you need to file bugs, try out something new, or need work on types in isolation. It’s a great resource to start, and from there you can easily migrate to “real” IDEs and tools.
12.10 Providing Multiple Library Versions
Problem
You write external types for a library and want to maintain type updates relative to library version updates.
Solution
Use reference triple slash directives, as well as modules, namespaces, and interfaces for declaration merging.
Discussion
Programming nowadays would be tough without external libraries that take care of a lot of work for you. JavaScript’s ecosystem is arguably one of the richest when it comes to third-party dependencies, mainly through NPM. Also, most of them come with TypeScript support, either through built-in types or through types from Definitely Typed. According to the TypeScript team, almost 80% of NPM is typed. However, there is still the odd bird standing out. Libraries that are not written in TypeScript, legacy code from your own company that you still need to make compatible with today’s software.
Think of a library called "lib", which exposes a Connector class that you can use to target internal systems. This library exists in multiple versions, and features have been added constantly.
import{Connector}from"lib";// This exists in version 1constconnector=newConnector();constconnection=connector.connect("127.0.0.1:4000");connection.send("Hi!");// This exists in version 2connection.close();
It’s worth noting that this library is used by multiple projects within your organizations, with varying versions. Your task is to write types so your teams get proper auto-complete and type information.
In TypeScript, you can provide multiple versions of a library’s types by creating an ambient module declaration for each version of the library. An ambient module declaration is a file with a .d.ts extension that provides TypeScript with the types for a library that is not written in TypeScript.
By default, TypeScript is greedy including type definitions and globs everything it can. If you want to limit TypeScript’s file access, make sure to use the "exclude" and "include" properties in tsconfig.json.
{"compilerOptions":{// ..."typeRoots":["@types"],"rootDir":"./src","outDir":"dist",},"include":["./src","./@types"]}
We create a folder next to the folders we included in tsconfig.json. Here, we create a file called lib.v1.d.ts, where we store the basic information on how objects are created.
declaremodule"lib"{exportinterfaceConnectorConstructor{new():Connector;}varConnector:ConnectorConstructor;exportinterfaceConnector{connect(stream:string):Connection;}exportinterfaceConnection{send(msg:string):Connection;}}
Note that we use modules to define the name of the module and that we also use interfaces for most of our types. Both modules and interfaces are open to declaration merging, which means that we can add new types in different files, and TypeScript merges them together. This is crucial if we want to define multiple versions.
Also, note that we use the constructor interface pattern (see Recipe 11.3) for Connector.
exportinterfaceConnectorConstructor{new():Connector;}varConnector:ConnectorConstructor;
In doing so, we can change the signature of the constructor, and make sure that an instantiable class is being recognized by TypeScript.
In another file called lib.v2.d.ts, next to lib.v1.d.ts, we re-declare "lib" and add more methods to Connection. Through declaration merging, the close method gets added to the Connection interface.
/// <reference path="lib.v1.d.ts" />declaremodule"lib"{exportinterfaceConnection{close():void;}}
Using triple-slash directives, we refer from lib.v2.d.ts to lib.v1.d.ts, signaling that everything from version 1 is supposed to be included in version 2.
All those files exist in a folder called @lib. Using the configuration we declared earlier, TypeScript won’t pick them up. We can however write a new file lib.d.ts and put it in @types, and from here, refer to the version we want to include.
/// <reference path="../@lib/lib.v2.d.ts" />declaremodule"lib"{}
A simple change from "../@lib/lib.v2.d.ts" to "../@lib/lib.v1.d.ts" will change the version we target, while we still are able to maintain all library versions independently.
If you are curious, try looking into the included library files from TypeScript. They are a treasure trove for external type definitions and there is a lot to learn. If you use your editor to find references to e.g. Object.keys, you will see that this function exists in multiple locations, and based on your TypeScript configuration the right file will be included. TypeScript is so flexible though that you can use the same techniques for your project, even extending TypeScript’s built-in types themselves (see Recipe 9.7).

Figure 12-5. Finding references to built-in types in Visual Studio Code shows you how TypeScript manages multiple versions of ECMAScript and the DOM.
In conclusion, providing multiple versions of a library’s types in TypeScript can be done by creating ambient module declarations for each version of the library, and referencing the appropriate declaration in your TypeScript code. Hopefully, you will be able to use package managers in your project to manage different versions of libraries and their corresponding types, making it easier to manage dependencies and avoid conflicts.
12.11 Knowing When to Stop
Problem
Writing elaborate and complicated types is exhausting!
Solution
Don’t write elaborate and complicated types. TypeScript is gradual, use what makes you productive.
Discussion
I couldn’t help myself not ending the book with some general advice on how to stop at the right time. If you read through the entire book and ended up here, you read through over 100 recipes that gave advice to everyday TypeScript problems. Be it project setup, complicated situations where you need to find the right type, or workarounds when TypeScript runs into a situation where it’s too strict for its own good, you name it.
Solutions can get very complex. Especially when we enter the area of conditional types and everything around them, like helper types, variadic tuple types, and string template literal types. TypeScript’s type system is undoubtedly powerful, especially if you understand that every decision, every feature, has its roots in the fact that JavaScript lies underneath it all. The goal to create a type system that gives you strong, static types for a programming language that is so inherently dynamic, is an amazing achievement. I have nothing but the deepest admiration for the bright minds in Redmond who made all of this possible.
However, there’s an undeniable fact that things can get very complicated at times. Types can be hard to read or create, and the fact that the type system is its own, Turing-complete meta-programming system that needs testing libraries doesn’t help there. And just as developers are, they take pride in understanding every aspect of their craft and tools, often preferring a complex type solution over simpler types that don’t give the same type safety but are ultimately easier to read and understand.
There’s a project that goes into the nitty-gritty of the type system called Type Challenges. It’s a fantastic project of brain teasers that really show what’s possible with the type system. I enjoyed the odd free hour to fiddle around with some of the more challenging riddles, getting great ideas of how to explain the type system better. And while they are fantastic to train a developer’s mind, most of them lack a significant grasp of real-world, everyday situations.
And it’s in situations like that where we often overlook that TypeScript has a wonderful capability that you don’t often see in mainstream programming languages: It’s gradual adoption of types. Tools like any, generic type parameters, type assertions and the fact that you can just write simple JavaScript with a couple of comments makes the barrier to entry so much lower. The latest effort from the TypeScript team and TC39 is to lower the barrier even more by adding type annotations to JavaScript, a proposal that is currently in discussion. The goal of this proposal is not to make JavaScript type-safe, but to remove compile steps if we want to have simple, easy-to-understand type annotations. JavaScript engines can treat them as comments, type checkers can get real information on the program’s semantics.
We as developers, project leaders, engineers, and architects, should make use of this feature. Simple types are always better types, easier to understand, and much easier to consume.
The TypeScript website changed its claim from “JavaScript that scales” to “JavaScript with syntax for types”, which should give you an idea of how to approach TypeScript in projects: Write JavaScript, annotate where necessary, write simple but comprehensive types, and use TypeScript as a way to document, understand, and communicate your software.
I think TypeScript follows the pareto principle: 80% of type safety comes from 20% of its features. This doesn’t mean that the rest of it is bad or unnecessary. We just spent 100 recipes to understand situations where we effectively need TypeScript’s more advanced features. It should just give you an idea of where to put effort. Don’t run into advanced TypeScript trickery on every occasion. Monitor if loser types are a problem, estimate the effort to change types in your program, and make well-informed decisions. Also know that in a refinement process (see Recipe 12.2), the reason for multiple steps is to easily make a stop.