19.12 Adding, Changing, and Removing HTML Elements
The term node comes up quite often in connection with the DOM and always causes confusion. The principle is simple: At the top of the DOM tree, there’s the document object, followed by the root of the DOM tree, which is usually the html element. The head and body elements follow below that. The html element is the parent element for the head and body elements. The head and body elements contain other child elements. You already know the principle. All these elements are referred to as nodes in the DOM. Not only are the HTML elements nodes for the JavaScript in the DOM, but the HTML attributes and text contents are also connected and are real nodes in the DOM tree.
Regardless of the node type, all nodes in the document tree have basic properties and methods of the node object. This node object is an interface that allows you to access the individual nodes in the entire document tree, so it’s the central interface in the DOM. Therefore, in this section, you’ll get to know some basic properties and methods of the node interface.
So far, you’ve primarily only learned about and used manipulation via innerHTML. This is relatively easy in practice, but it has the disadvantage that an element must be present that can be replaced or changed. In the following sections, you’ll learn how to use the DOM methods that allow you to directly intervene in the DOM of an HTML document using the node interface.
You’ll learn how to navigate through the individual nodes of the tree. Likewise, you’ll learn how to add new nodes (HTML elements) to the tree or remove or replace existing nodes. In particular, this includes DOM manipulation.
At the beginning of this chapter (Section 19.1), you already learned about the HTML DOM tree and that all nodes in a tree have a certain relationship to each other. You also know from Section 19.2 that the document object is always the topmost object in the DOM tree. The document object is also a kind of start element where you can begin to target the nodes of a DOM tree. For this purpose, the document object provides the getElementById(), getElementsByTagName(), getElementsByClassName(), getElementsByName(), querySelector(), and querySelectorAll() methods that allow you to search for elements by ID, a specific tag name, a class name, a CSS selector, or a name attribute. I already covered this in Section 19.4.
We should also mention two options that allow you to access the entire document:
-
document.body
Access to the entire body element in the HTML document. -
document.documentElement
Access to the entire HTML document, that is, the head and body parts.
Paste the following into your HTML document to see what’s contained in document.body and/or document.documentElement:
...
<script>
  console.log(document.body.innerHTML);
  console.log(document.documentElement.innerHTML);
</script>
...
19.12.1 Creating and Adding a New HTML Element and Content
Creating a new node or HTML element isn’t difficult. To do this, you just need to create a new HTML element in the document object using the createElement() method. Text content, on the other hand, can be created using the createTextNode() method. A new node created in this way is initially not yet connected to the HTML document. You still need to explicitly append the created node to the DOM tree using appendChild(). Here’s a simple example, which I’ll explain in more detail afterward:
...
<body>
<article class="article-01">
  <h1>Add node</h1>
  <p>First paragraph text</p>
  <p>Second paragraph text</p>
</article>

<button id="new-p">New paragraph</button>
<script src="js/script.js"></script>


</body>
...
Listing 19.42 /examples/chapter019/19_12_1/index.html
document.querySelector('#new-p').onclick = function() {
    let pNew = document.createElement("p");
    let tNew = document.createTextNode("A new paragraph");
    pNew.appendChild(tNew); // <p>A new paragraph</p>

    document.querySelector('.article-01').appendChild(p_new);
}
Listing 19.43 /examples/chapter019/19_12_1/js/script.js
When you click the button in the example, you create a new p element via createElement("p"). Then you create another text content with createTextNode(), and position the text content into the p element with p_new.appendChild(tNew), creating the following:
<p>A new paragraph</p>
Finally, you need to paste the entire construct in pNew into the HTML document. Therefore, in this example, you look for an element where the value of class is equal to article-01, and append the created element with appendChild(pNew) in the article element after the second paragraph text as the third paragraph, as you can see in Figure 19.17.
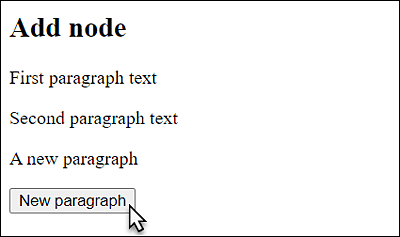
Figure 19.17 A Newly Created Paragraph Text Was Added
19.12.2 Targeting HTML Elements Even More Exactly in the DOM Tree
To do more than just look up the position in the DOM tree based on a root element and append newly created elements at the end, as you did in the previous section, you need to be able to navigate through the DOM tree. For this purpose, several DOM properties are available, which are listed in Table 19.10.
|
Property |
Description |
|---|---|
|
Returns the parent node. This access is useful when an element can be found unambiguously, but not the parent element. |
|
|
Returns an array with all child nodes. |
|
|
Returns the first child node. |
|
|
Returns the last child node. |
|
|
Returns the next node on the same level, that is, the sibling node. |
|
|
Returns the preceding node on the same level (sibling node). |
Table 19.10 Properties You Use to Navigate through the DOM Tree
With these properties, you could already dare a small climb in the DOM tree, but it’s not really reliable yet. Because, for example, line breaks are also read as new nodes and are virtually regarded as text elements within an HTML element, you can’t avoid checking the nodes. For this purpose, Table 19.11 contains additional properties that allow you to analyze the individual nodes.
|
Property |
Description |
|---|---|
|
Returns the type of the node; it’s arguably one of the most important analysis functions when navigating and manipulating the DOM tree due to different DOM implementations of web browsers. A numerical code from 1 to 12 is returned, of which the values 1 and 3 are most frequently required: 1 gets returned for an element node and 3 for a text node. There are also constants defined in the DOM API for the values you can use instead: The values and constants for 5, 6, and 12 are obsolete and will therefore not be mentioned any further here. |
|
|
Returns the name of the node as a string. For an HTML element, this is a tag name (usually capitalized), whereas for an attribute it’s the attribute name. The text node simply returns #text, and the document node returns #document. |
|
|
Returns the content of a text node (e.g., innerHTML) or the value of the attribute node. If the node is an HTML element, the value is undefined. |
|
|
Allows you to check whether a node has other child nodes (= true) or not (= false). |
Table 19.11 Properties for Analyzing Nodes
Here’s a somewhat more complex example that searches for a node, traverses the included individual elements, and outputs their properties:
...
<body>
<article class="article-01">
  <h1>Article 1: Traverse node</h1>
  <p>First paragraph text</p>
  <p>Second paragraph text</p>
</article>
...
<script src="js/script.js"></script>


</body>
...
Listing 19.44 /examples/chapter019/19_12_2/index.html
let root = document.querySelector('.article-01');
if (root) {
    let traverse = root.childNodes;
    let text = traverse.length + " Elements are " +
        root.nodeName + " contained in:" + "<ol>";
    for (let i = 0; i < traverse.length; i++) {
        text += "<li>" + "<b>nodeName</b>: " + traverse[i].nodeName +
            "; <b>nodeType</b>: " + traverse[i].nodeType;
        if (traverse[i].firstChild !== null) {
            text += "; <b>nodeValue:</b> " + traverse[i].firstChild.nodeValue;
        }
        text += '</li>';
    }
    text += "</ol>" + "Parent node: " + root.parentNode.nodeName;
    document.querySelector('#result').innerHTML = text;
} else {
    alert("No child nodes available!!!");
}
Listing 19.45 /examples/chapter019/19_12_2/js/script.js
After first checking whether the root node with the class of value article-01 could be found at all, you pass a list of child nodes root.childNodes to the traverse variable if successful. The first information you put into the text string is the number of elements found and the name of the root node. In the subsequent for loop, all nodes are traversed and the information of each node gets appended to the string text.
Checking a traverse[i].firstChild node for non-zero was done because a line break is also considered a text node, and we don’t really want that information. Otherwise, if it isn’t a line break, you’ll find the contents of the text node in traverse[i].firstChild. nodeValue.
You can see the example during execution in Figure 19.18, and you’ll notice that a total of seven nodes were found where the parent element had the class attribute that equals article-01. Look a little closer at the following HTML lines:
...
<article class="article-01">
  <h1>Article 1: Traverse node</h1>
  <p>First paragraph text</p>
  <p>Second paragraph text</p>
</article>
...
You’ll notice that there should actually only be three nodes. The nodes where nodeName equals #text and the value of nodeType equals 3 are again line breaks. You can see that it’s very important to check the nodes to see if they are an element node or a text node. In practice, you can use getElementsByTagName() for this, which usually returns element nodes.
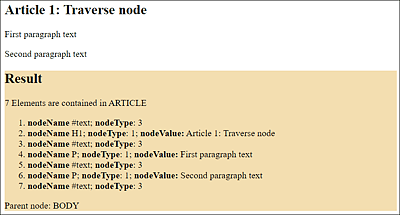
Figure 19.18 Traversing a Root Node
You can entirely omit such empty line breaks from the analysis when going through the individual elements:
let root = document.querySelector('.article-01');
if ( root ) {
  let traverse = root.childNodes;
  let text = "The following element nodes are "
           + root.nodeName  + " contained in:" + "<ul>";
  for (let i=0; i<traverse.length; i++) {
    if (traverse[i].firstChild !== null ) {
      text += "<li>" + "<b>Node name</b>: " + traverse[i].nodeName + "; "
           + "<b>Content</b>: " + traverse[i].firstChild.nodeValue + "</li>";
    }
  }
  text += "</ul>" + "Parent node: " + root.parentNode.nodeName;
  document.querySelector('#result').innerHTML = text;
}
else {
  alert("No child nodes available!!!");
}
Listing 19.46 /examples/chapter019/19_12_2/js/script-2.js
You can see the changed example during execution in Figure 19.19.
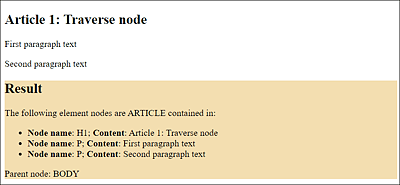
Figure 19.19 Rewritten Version for Traversing the Root Node, Which Doesn’t Take into Account the Line Breaks in the Output in the Dialog Box
19.12.3 Adding a New HTML Element Even More Targeted to the DOM Tree
You can use the appendChild() method to add a new node as the last child node of the root element. If you want to insert the new node at any position, the insertBefore(new, old) method is useful, which inserts a new node before old below the root node.
The following example shows how you can insert a new node (here, a new paragraph text) right after an h1 heading using the insertBefore() method:
...
<article class="article-01">
  <h1>Article 1: Place node in between</h1>
  <p>First paragraph text</p>
  <p>Second paragraph text</p>
</article>
<button id="add">Insert node</button>
<script src="js/script.js"></script>

...
Listing 19.47 /examples/chapter019/19_12_3/index.html
document.querySelector('#add').onclick = function() {
    let pNew = document.createElement("p");
    let tNew = document.createTextNode("A new paragraph");
    p_new.appendChild(tNew);

    let root = document.querySelector('.article-01');
    if (root) {
        let traverse = root.childNodes;
        for (let i = 0; i < traverse.length; i++) {
            if (traverse[i].nodeName.toUpperCase() === "H1") {
                root.insertBefore(pNeu, traverse[i].nextSibling);
                break; // end loop
            }
        }
    }
}
Listing 19.48 /examples/chapter019/19_12_3/js/script.js
First, you look for the root node again by using class="article-01". Then, in a for loop, you go through the child nodes of the root node you’ve found. If you then find a node in nodeName that contains the h1 element, you insert the newly created node (here, pNew) after the h1 element. To make sure that the new paragraph doesn’t get inserted before the h1 heading, you must also use nextSibling, which positions the new node as the next node (i.e., after the h1 element) on the same layer. You can see the example during execution in Figure 19.20.
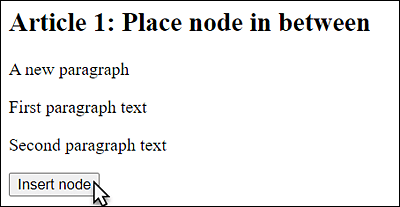
Figure 19.20 Positioning the New Node in a Targeted Manner. Here, a New <p> Element Was Inserted after the <h1> Heading
19.12.4 Deleting an Existing HTML Element from the DOM Tree
If you want to remove an already existing child node from the DOM tree, you can do this by using the removeChild(child) method. The node to be deleted can be an entire fragment with further nodes, which also deletes all subnodes, or a child node standing alone. In the example, when a button is clicked, the first paragraph with the p element is supposed to be deleted.
...
<article class="article-01">
  <h1>Article 1: Remove node</h1>
  <p>First paragraph text</p>
  <p>Second paragraph text</p>
</article>
<script src="js/script.js"></script>

...
Listing 19.49 /examples/chapter019/19_12_4/index.html
document.querySelector('#remove').onclick = function() {
    let root = document.querySelector('.article-01');
    if (root) {
        let traverse = root.childNodes;
        for (let i = 0; i < traverse.length; i++) {
            if (traverse[i].nodeName.toUpperCase() === "P") {
                root.removeChild(traverse[i]);
                break; // end loop
            }
        }
    }
}
Listing 19.50 /examples/chapter019/19_12_4/js/script.js
Here, you first search for the root node using class="article-01" and then traverse its child nodes. In this process, you remove the p element via removeChild() right after the first occurrence. If, on the other hand, you want to delete all p elements at once, you only need to remove the break statement in the example.
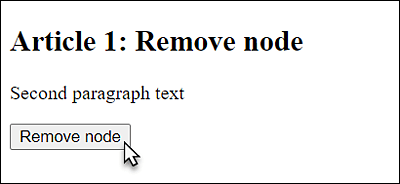
Figure 19.21 A <p> Element Has Been Removed
19.12.5 Replacing an HTML Element in the DOM Tree with Another One
You can replace a node by using the replaceChild(new, old) method, which replaces the old node with the new node. In the process, the replaced node gets deleted. Again, you can replace entire fragments with many child nodes or a standalone child node. In the following example, each time the button is clicked, the heading gets replaced. To keep track of how many times this replacement has been performed or how many times the button has been clicked, a global variable is used that counts and is included in the heading when the replacement is made. Here’s the corresponding example:
...
<article class="article-01">
  <h1>Article 1: Replace node</h1>
  <p>First paragraph text</p>
  <p>Second paragraph text</p>
</article>

<button id="replace">Replace node</button>
<script src="js/script.js"></script>

...
Listing 19.51 /examples/chapter019/19_12_5/index.html
let counter = 0;
document.querySelector('#replace').onclick = function() {
    let hNew = document.createElement("h1");
    let tNew = document.createTextNode("Article " + ++counter + ": New heading");
    hNew.appendChild(tNew); // <p>A new paragraph</p>.

    let root = document.querySelector('.article-01');
    if (root) {
        let traverse = root.childNodes;
        for (let i = 0; i < traverse.length; i++) {
            if (traverse[i].nodeName.toUpperCase() === "H1") {
                root.replaceChild(h_new, traverse[i]);
                break; // end loop
            }
        }
    }
}
Listing 19.52 /examples/chapter019/19_12_5/js/script.js
You can see the example during execution in Figure 19.22.
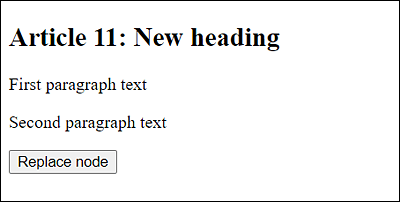
Figure 19.22 Replacing Nodes: The Heading Has Already Been Changed for the 11th Time
19.12.6 Cloning a Node or Entire Fragments of the DOM Tree
If you want to copy an entire fragment of a DOM tree, you’re better off using the cloneNode() method than creating individual elements via createElement(). You can use the cloneNode() method to create an exact copy of the node. Depending on whether you set the parameter of cloneNode(val) to true or false, all child nodes will either be cloned as well (= true) or not (= false). Here’s an example that shows how an entire fragment can be cloned:
...
<article class="article-01">
  <h1>Article 1: Clone node</h1>
  <p>First paragraph text</p>
  <p>Second paragraph text</p>
</article>
<button id="clone">Clone node</button>
<script src="js/script.js"></script>

...
Listing 19.53 /examples/chapter019/19_12_6/index.html
document.querySelector('#clone').onclick = function() {
    let root = document.querySelector('.article-01');
    if (root) {
        let new_root = root.cloneNode(true);
        new_root.setAttribute("class", "article-02");
        let button = document.querySelector('#clone');
        root.parentNode.insertBefore(new_root, button);
        button.parentNode.removeChild(button);
    }
}
Listing 19.54 /examples/chapter019/19_12_6/js/script.js
You can see the example during execution in Figure 19.23. Here, you clone the entire node whose class is equal to article-01, which is the article element, along with its child nodes <h1> and the two <p> elements. Before you can place the node somewhere else, in this example, the class was changed to article-02 with the method setAttribute() because, otherwise, you would have two elements with class="article-01", which isn’t wrong but something you might not want. This depends on your specific project, of course, but I wanted to demonstrate the setAttribute() method here. In the example, the cloned node gets inserted after the previous article and before the button. The button got deleted at the end.
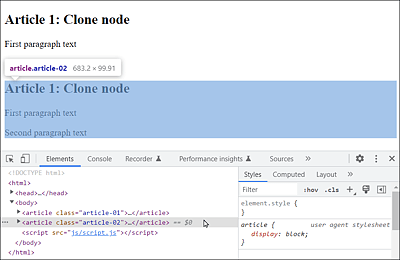
Figure 19.23 A Second Article Was Cloned from the First Article
19.12.7 Different Methods to Manipulate the HTML Attributes
As you’ve already seen in the previous section with the setAttribute() method, it’s possible to change the attributes of the nodes. Table 19.12 contains a brief overview of the existing methods, of which setAttribute() and getAttribute() are probably most commonly used in practice.
|
Method |
Description |
|---|---|
|
Returns a string with the value of the name attribute. If no such attribute exists, null will be returned. |
|
|
This method sets the name attribute to the value value. If an attribute with name already exists in an element, the value will be changed to value. If the attribute doesn’t exist yet, it will be created. |
|
|
Removes the name attribute from an element. |
|
|
Checks whether an element node contains the name attribute. |
Table 19.12 Methods That Can Be Used to Work with the Attributes of Nodes
Here’s an example that demonstrates these methods in practice.
.demo {
    background: black;
    color: white;
    padding: 1em;
    margin-bottom: 1em;
    border: 1px solid red;
}

.default {
    border: 1px solid black;
    background: silver;
    padding: 1em;
    margin-bottom: 1em;
}
Listing 19.55 /examples/chapter019/19_12_7/css/style.css
...
<article id="article-01" class="default">
  <h1>Article 1: Manipulate attributes</h1>
  <p>First paragraph text</p>
  <p>Second paragraph text</p>
</article>
<article id="article-02">
  <h1>Article 2: Manipulate attributes</h1>
  <p>First paragraph text</p>
  <p>Second paragraph text</p>
</article>
<button id="set">Set attribute</button>
<button id="copy">Copy attribute</button>
<button id="remove">Delete attribute</button>
<script src="js/script.js"></script>

...
Listing 19.56 /examples/chapter019/19_12_7/index.html
document.querySelector('#set').onclick = function() {
    let root = document.querySelector('#article-01');
    if (root) {
        root.setAttribute("class", "demo");
    }
}

document.querySelector('#copy').onclick = function() {
    let root1 = document.querySelector('#article-01');
    if (root1) {
        let art01_style = root1.getAttribute("class");
        if (art01_style != null) {
            let root2 = document.querySelector('#article-02');
            if (root2) {
                root2.setAttribute("class", art01_style);
            }
        }
    }
}

document.querySelector('#remove').onclick = function() {
    let root1 = document.querySelector('#article-01');
    if (root1) {
        root1.removeAttribute("class");
    }
    let root2 = document.querySelector('#article-02');
    if (root2) {
        root2.removeAttribute("class");
    }
}
Listing 19.57 /examples/chapter019/19_12_7/js/script.js
Three event handler functions have been written here, all of which are executed when the button gets clicked. The first function changes or sets the class of an article (via id="article-01") to the value demo using the setAttribute() method and the class attribute, resulting in class="demo". The original default class="default" is overwritten.
The second function gets the value of the class attribute using the getAttribute() method of the first article (id="article-01") and sets this value also for the second article (id="article-02") using setAttribute(). The last function deletes the class attribute for the first (id="article-01") and the second article (id="article-02") via the remove Attribute() method. All three functions can be performed using the three buttons shown in Figure 19.24. Of course, you can apply and execute these methods on any other HTML attribute as well.
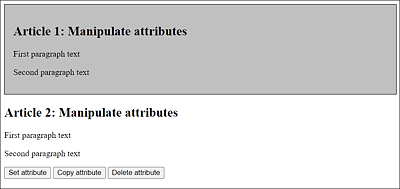
Figure 19.24 Manipulating the Attributes of an Element Node
19.12.8 The <template> HTML Tag
For recurring repetitions on a website, such as lines of a table, list elements, or images, templates are often used. The processing of such templates was mostly done on the server side. PHP programmers use template systems such as Plates or Twig for this purpose. Because JavaScript itself doesn’t provide a template system, it’s often necessary to create and assemble HTML elements by using createElement(). A solution to this is the template HTML element. For example:
<!-- Rows template -->
<template id="template-row">
<tr>
<td></td>
<td></td>
<td></td>
</tr>
</template>
All elements between the <template> tag don’t display and aren’t part of the HTML document. In addition, this element can’t be accessed via document.getElementById(). The content of the <template> tag won’t get used until the fragment has been added to the DOM.
The following example demonstrates the implementation using a table by adding new rows to a table via the <template> tag:
...
<h1>Scheduling overview</h1>
<table id="mytable">
<thead>
<tr>
<td>Time</td>
<td>Day</td>
<td>Date</td>
</tr>
</thead>
<tbody>

<!-- The rows are added here -->

</tbody>
</table>

<!-- Rows template -->
<template id="template-row">
<tr>
<td></td>
<td></td>
<td></td>
</tr>
</template>
...
Listing 19.58 /examples/chapter019/19_12_8/index.html
So, without further ado, the template element of a table row with three columns is inactive, and nothing gets displayed yet. To use this template now, you need to clone it and add it to the DOM. The corresponding JavaScript code follows:
...
<script>
let data = [
   ['12pm','Monday','Photography Workshop in Munich'],
   ['7pm', 'Monday', 'Dinner with customer X'],
   ['9am', 'Tuesday', 'Meeting with Y'],
   ['12pm', 'Tuesday', 'Lunch with Y at the Ritz'],
   ['3pm', 'Wednesday', 'Self-Development (Seminar)']
];

let t = document.querySelector('#template-row');
td = t.content.querySelectorAll('td');

data.forEach (function(dataRow) {
   td[0].textContent = dataRow[0];
   td[1].textContent = dataRow[1];
   td[2].textContent = dataRow[2];

   let tb = document.querySelector('tbody');
   let clone = document.importNode(t.content, true);
   tb.appendChild(clone);
});
</script>
...
Listing 19.59 /examples/chapter019/19_12_8/index.html
The data for the rows in the table here comes from the data array with five rows and three columns. Then querySelector() is used to select the template with the template-row ID, and thereupon all td elements are put into td. Via data.forEach(), the data in data is processed row by row and inserted column by column as child elements in the tbody element. You can see the result of this process in Figure 19.25.
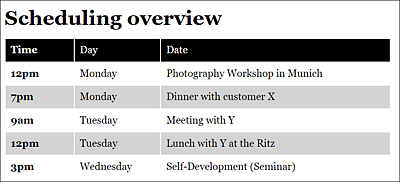
Figure 19.25 The Data of the Table Was Inserted into the DOM Using the <template> Element and JavaScript