19.13 HTML Forms and JavaScript
Although HTML input types and attributes now do most of the work that you would have had to do with JavaScript some time ago, there are always reasons to get your hands dirty to check entries that have been made or options selected. For this reason, this section will describe how you can access the individual values of a form element using JavaScript.
Basically, evaluating form elements with JavaScript is quite simple. If a certain event occurs, you can respond to it accordingly. For example, with a single-line input field, you can respond appropriately when the field loses focus and the user moves to the next field. To do that, you only need to respond to onblur using an event handler. With regard to selection lists, on the other hand, reading only makes sense if they’ve been changed, which is why you can respond to onchange with an event handler and with multiline text fields. Radio buttons and checkboxes are usually grouped, so you can respond with an event handler for a click event (onclick), and then you should check all elements that belong to the group.
19.13.1 Reading Text Input Fields with JavaScript
You can get the value of a text input field such as <input type="text"> directly from the value attribute. To respond to changes, an event handler is useful for the JavaScript event onblur, which gets triggered when the input field loses its focus. This is the case when the user clicks on another input field or changes the field using the (Tab) key. That’s the moment to use JavaScript and check the text input field. Let’s take a look at a simple example:
...
<form>
  <label>Name</label>
  <input type="text" placeholder="Your name" id="lname"><br>
  <input type="submit">
</form>
<p></p>
<script src="js/script.js"></script>
...
Listing 19.60 /example/chapter019/19_13_1/index.html
document.querySelector('#lname').onblur = function() {
    let txt = "<b>Your input:</b> " + this.value;
    // Check saved value of text field in txt
    document.querySelector('p').innerHTML = txt;
};
Listing 19.61 /Beispiel/Kapitel019/19_13_1/js/script.js
In this example, if you enter text in the input field with lname as the ID and press the (Tab) key or click outside the text input field, causing the input field to lose focus, the entered text gets output below it. In practice, you perform a check at this point or continue processing the input that has been entered instead of just outputting the text here. this is the object that just called the JavaScript function.
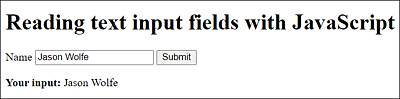
Figure 19.26 Reading the Content of an “input” Input Field “type="text"” with JavaScript
19.13.2 Reading Selection Lists with JavaScript
For the select selection lists, you also get the value of the option element via the HTML attribute value. By default, the text between <option> and </option> or else that of the value attribute in the opening <option> tag will get returned if it was used instead. Here, it’s useful to respond to the JavaScript event onchange, which responds when the select selection list changes. Here’s another short example:
...
<form>
  <label>Your selection</label>
  <select id="chapter">
    <option value> ... Select chapter ... </option>
    <option>HTML5—Introduction</option>
    <option value="Page 324">CSS3—Introduction</option>
    <option value="Page 498">JavaScript—Introduction</option>.
  </select>
</form>
<p></p>
<script src="js/script.js"></script>
...
Listing 19.62 /examples/chapter019/19_13_2/index.html
document.querySelector('#chapter').onchange = function() {
    let txt = "<b>Your selection:</b> " + this.value;
    // Check saved value of text field in txt
    document.querySelector('p').innerHTML = txt;
};
Listing 19.63 /examples/chapter019/19_13_2/js/script.js
In this example, as soon as you change the value of the dropdown list (onchange), the new value between <option> and </option> or, if specified, the value of the attribute value in the opening <option> tag, will be output underneath it in the p element.
“onchange” Also for <textarea>
The JavaScript event onchange is usually also used for multiline text between <textarea> and </textarea> to check if the content has been changed once the textarea element has lost its focus.
19.13.3 Reading Radio Buttons and Checkboxes with JavaScript
The reading of the values of a radio button (type="radio") and a checkbox (type="checkbox") must be evaluated using the JavaScript event onclick. For each input field of a group with radio buttons or a group with checkboxes, you need to check whether it was selected via a click event.
A related group of radio buttons or checkboxes usually has a common name attribute and can also be addressed in a group using JavaScript. Unlike radio buttons, checkboxes can have more than one field selected, so here you must use JavaScript and the checked property to verify that a field in the group is active or checked.
Here’s an example that demonstrates how you can use JavaScript to determine the values of a group of radio buttons or checkboxes when something has been changed:
...
<form>
  <p>Please select a room:</p>
  <p>
    <input type="radio" name="room" value="budget">Budget<br>
    <input type="radio" name="room" value="standard"
           checked>Standard<br>
    <input type="radio" name="room" value="deluxe">Deluxe
  </p>
  <p id="printRoom"></p>
  <p>
    <input type="checkbox" name="extra" id="c1"
           value="breakfast">
    <label for="c1">Breakfast</label><br>
    <input type="checkbox" name="extra" id="c2" value="lunch">
    <label for="c2">Lunch</label><br>
    <input type="checkbox" name="extra" id="c3" value="dinner">
    <label for="c3">Dinner</label>
  </p>
  <p class="output"></p>
</form>
<script src="js/script.js"></script>
...
Listing 19.64 /examples/chapter019/19_13_3/index.html
// Evaluate radio buttons
let roomType = document.querySelectorAll('input[name="room"]');
for (let i = 0; i < roomtyp.length; i++) {
    roomType[i].onclick = function() {
        let txt = "<b>Selected for room : </b>" + this.value;
        document.querySelector('.output').innerHTML = txt;
    }
}

// Evaluate checkboxes
let formPack = document.querySelectorAll('input[name="extra"]');
for (let i = 0; i < formPack.length; i++) {
    formPack[i].onclick = function() {
        let msg = "<b>Selected : </b>";
        for (let j = 0; j < formPack.length; j++) {
            if (formPack[j].checked) {
                msg += formPack[j].value + " ";
            }
        }
        document.querySelector('.output').innerHTML = msg;
    }
}
Listing 19.65 /examples/chapter019/19_13_3/js/script.js
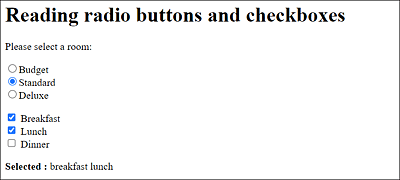
Figure 19.27 Reading Radio Buttons and Checkboxes with JavaScript
19.13.4 Intercepting Buttons with JavaScript
If you want to prevent the user from submitting the entered form data in the web browser to the server by clicking a button, you can use an event listener (Section 19.7.3) to respond to the submit event and have another script executed. Let’s take a look at a simple example:
...
<form>
  Text01 <input type="text"  id="t1">
  <label for="t1"></label><br>
  Text02 <input type="email" id="t2">
  <label for="t2"></label><br>
  Text03 <input type="date" id="t3">
  <label for="t3"></label><br><br>
  <input type="submit"><input type="reset">
</form>
<p></p>
<script src="js/script.js"></script>

...
Listing 19.66 /examples/chapter019/19_13_4/index.html
document.querySelector('form').addEventListener(
    'submit', checkInput);
document.querySelector('form').addEventListener(
    'reset', checkReset);

function checkInput() {
    let x = confirm("Are you sure you want to submit the data?");
    if (x) {
        /* Submit data */
    } else {
        /* Do not submit */
        event.preventDefault();
    }
}

function checkReset(event) {
    let x = confirm("Do you want to reset the fields?");
    if (x) {
        /* Reset */
        document.querySelector('p').innerHTML = "Fields reset";
    } else {
        /* Do not reset */
        event.preventDefault();
        document.querySelector('p').innerHTML = "Reset canceled";
    }
}
Listing 19.67 /examples/chapter019/19_13_4/js/script.js
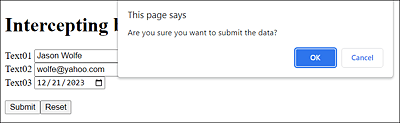
Figure 19.28 You Can Also Respond to “submit” and “reset” Buttons with JavaScript
19.13.5 Controlling the Progress Indicator <progress> with JavaScript
You’ve already come across the progress display with the progress element in Chapter 7, Section 7.5.5. With reference to an HTML form, this element is useful for showing the progress of form element input. The following example shows such an adjustment of the progress bar in accordance with the filled input fields. Let’s look at a simple example:
...
<form onchange="progress()">
  Text01 <input type="text"  id="t1"><br>
  Text02 <input type="email" id="t2"><br>
  Text03 <input type="date" id="t3"><br><br>
  <input type="submit"><input type="reset">
</form>
<p>Progress: <progress id="bar" value="0" max="3">Progress</progress></p>
<script src="js/script.js"></script>

...
Listing 19.68 /examples/chapter019/19_13_5/index.html
function progress() {
    let fields = 0;
    for (let i = 0; i < document.forms[0].elements.length; i++) {
        if (document.forms[0].elements[i].value !== '') {
            fields++;
        }
    }
    document.querySelector('#bar').value = fields;
    document.querySelector('#bar').innerHTML="Progress (" + fields + " of 3): ";
}
Listing 19.69 /examples/chapter019/19_13_5/js/script.js
The example checks each change in the form (onchange) and then calls the handler function progressive(). The individual elements will be traversed, and a check will be performed for each element as to whether the content (value) is or isn’t an empty string. No empty string in the example means that this text field has already been filled in, and therefore the count variable fields is incremented with each filled text field. This value is used at the end in the progress bar for value of the progress element, where we’ve set the maximum value to 3. In the example, we also rely on bubbling and don’t set up the same handler for the event type onchange in each input element within the form individually. In Figure 19.29, you can see the example during execution.
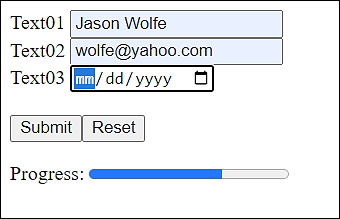
Figure 19.29 Controlling the Progress Bar from the <progress> Element with JavaScript