17.3 JavaScript Output
Previously, you used a standard alert() dialog for JavaScript output. In addition to that dialog, there are other ways to generate output. In this section, you’ll learn what other options you have and where you can use them.
17.3.1 Standard Dialogs (and Input Dialog)
In addition to the standard dialog alert(), there are two more dialogs: confirm() and prompt(). The confirm() dialog is the classic OK-cancel dialog with two buttons, while prompt() serves as a dialog for entering text. However, these standard JavaScript dialogs are rarely used in practice because their layout depends on the underlying web browser, and the options to apply them are rather limited. Furthermore, the standard dialogs have the disadvantage that the web browser can ignore them if they are displayed repeatedly. You can find an example of the two dialogs confirm() and prompt() in /examples/chapter017/17_3_1/index.html.
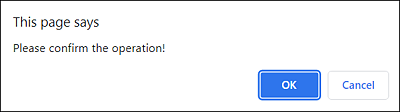
Figure 17.5 The Standard Dialog confirm() (in Google Chrome)
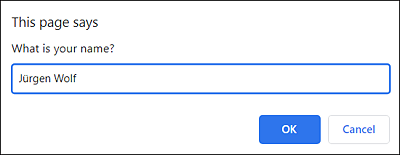
Figure 17.6 The Standard Dialog prompt() (in Google Chrome)
In practice, it’s better to use ready-made JavaScript libraries or frameworks that provide dialogs which match the design.
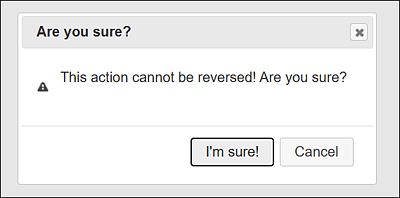
Figure 17.7 The Dialog Was Created Using the jQuery UI Library and Looks the Same in any Web Browser
17.3.2 Outputting to the Console
The easiest way to write something in the web console is to use the console object provided by the runtime environments of the web browsers you use. Although the console object isn’t included in the standard ECMAScript, it’s supported by any JavaScript runtime environment.
log(), which is a function (or method) of the console object, allows you to generate a simple console output. However, such a log output in the console isn’t intended for the users, but should help you as a JavaScript developer to understand the course of individual program sections or to track down errors. Here’s a simple example that demonstrates the log() method in use.
function showConsole() {
    console.log('Hello JavaScript Console!');
}
showConsole();
Listing 17.5 /examples/chapter017/17_3_2/js/helloConsole.js
You include the JavaScript as usual in the HTML document by using the script element. When you call the web page, basically nothing happens because the JavaScript uses the console as output. For this reason, you need to open the console of the corresponding web browser. You can find it among the developer tools or development tools of the web browser, which you can often call via (Ctrl) + (Shift) + (I). There, you’ll usually also find the Console tab with the output of the JavaScript.
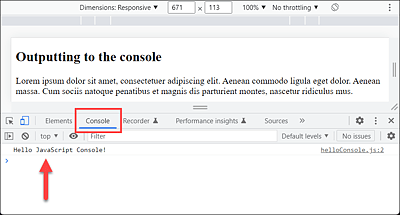
Figure 17.8 The Output of the JavaScript to the Console of the Web Browser
You can do more than just check the output of JavaScripts in the web browser console. You can also make entries. For example, for testing, you can also type the showConsole() function and manually execute this function from helloConsole.js. Of course, this also requires the web page to be running and the JavaScript to be loaded. From this point of view, the console window is an important tool for web developers, so I recommended studying it a bit more.
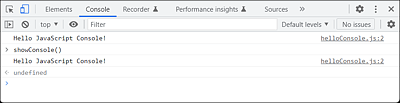
Figure 17.9 The Console Is Often Used during Development for Quick Outputs
Logging Outputs Only during Development!
You should only use the output via the console object during development. Even though visitors usually don’t see these outputs anyway, you should stop using outputs to the console when the website is finished. For this reason, many web developers use special logging libraries, which can be used to switch logging information on or off at any time with the appropriate configuration.
Many runtime environments provide other categories of output besides console. log(). However, not all runtime environments provide all functions. Nevertheless, in addition to console.log(), console.info(), console.warn(), and console.error() are often available. All functions can be used like console.log(), except that the output in the web console often changes style, which can be useful if you want to filter out (error) messages depending on the category. You can also type the examples directly into the console for testing purposes:
console.log('A log message');
console.warn('A warning message');
console.info('An information');
console.error('An error message');
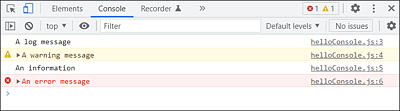
Figure 17.10 The Individual Outputs in the Console Usually Differ Visually
17.3.3 Outputting to the Website
The output with standard dialogs isn’t really elegant, and the output via the console object is only for web developers. In practice, therefore, you’ll often generate output for users of the website. In that case, there’s no way around the HTML elements or attributes. For example, you can do anything from a classic input/output directly into a text field to a DOM manipulation where you dynamically modify a web page or parts of it at runtime to produce output. How you can do this with JavaScript is covered separately in Chapter 18.
The JavaScript in Listing 17.6, included in the HTML document in Listing 17.7, shows such an example. As soon as you click the button via the button element, a click event gets triggered, whereupon the JavaScript with the changeText() function gets executed via onClick="changeText()". The function changes the content of the first p element it finds and replaces the text in between with "The button was pressed! (1x)", where the value of counter is increased by 1 after each new confirmation:
let counter = 1;
function changeText() {
    document.querySelector('p').innerHTML =
        "The button was pressed! (" + counter + "x)";
    counter++;
}
Listing 17.6 /examples/chapter017/17_3_3/js/pushButton.js
<!DOCTYPE html>
<html>
<head>
    <meta charset="UTF-8">
    <title>JavaScript test</title>
</head>

<body>
    <h1>A JavaScript during execution</h1>
    <p>Test JavaScript</p>
    <button type="button" onclick="changeText()">
      Press button
    </button>
    <script src="js/pushButton.js"></script>
</body>
</html>
Listing 17.7 /examples/chapter017/17_3_3/index.html
At this point, you don’t have to worry about the JavaScript code and how to use it in the HTML document. This example simply demonstrates a classic web development process of using JavaScript to access HTML elements to customize output for users.
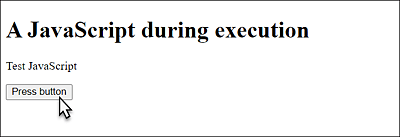
Figure 17.11 The HTML Document with a Button
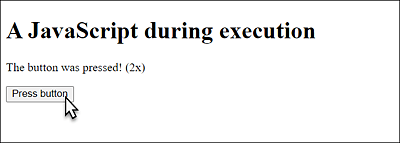
Figure 17.12 When the Button Is Pressed, a JavaScript Gets Executed That Manipulates the Content of the First <p> Element It Finds
17.3.4 Running JavaScript without a Web Browser
In the following sections and the next chapter, you’ll mainly use pure JavaScript code to learn the language. The output is predominantly done by using console.log(). Instead of using an HTML document here where you include the JavaScript with the script element for execution, only to then view the output in the console, there’s a more convenient way to run JavaScript without a web browser. For this purpose, you need to install Node.js (from https://nodejs.org) on your machine. Once you’ve installed Node.js, you can execute a JavaScript in the command line using the node command as follows:
$ node script.js 
Figure 17.13 Node.js Allows You to Run JavaScripts without the Web Browser
Prerequisite for this example: The file name is script.js, and you’re in the JavaScript script.js directory in the command line. Of course, it can even be more convenient if you use Node.js in conjunction with Visual Studio Code, where you can find the terminal and the code editor right under the same hood.
No DOM with Node.js
Logically, there is no DOM available with Node.js either because unlike JavaScript in the web browser, you aren’t dealing with a web page here.
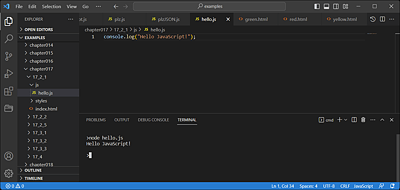
Figure 17.14 The Perfect Duo for Writing JavaScript: Node.js + Visual Studio Code
17.3.5 Annotating JavaScript Code with Comments
In practice, it can be useful and sometimes necessary to add comments to the JavaScript code or to comment out a JavaScript code completely. You have the option to write a one-line or a multiline comment.
A one-line comment must be introduced with //. Everything after the // characters up to the end of the line will be ignored and used as a comment. This is also true if you write a JavaScript statement after //:
// I am a comment
// console.log('I am commented out');
If your comment spans multiple lines or you want to comment out a multiline block of JavaScript code, you need to introduce that multiline comment with /* and end it with */. Let’s take a look at an example:
/*
  This is a comment,
  which can spreads across
  several lines.
*/