7.6 Sending Form Data Using PHP
Using a real example, I’ll now demonstrate how data from an HTML form entered in a web browser gets sent to the web server and is processed there. To do this, we’ll use a simple form mailer in PHP, without me going into more detail about PHP here. I’ve deliberately kept this section very simple, as I don’t presume that you have PHP knowledge. My only concern is that you understand how the data from an HTML form gets transferred to the web server for further processing.
Styling Forms Using CSS
I’ve already styled the form we’ll be using in the following example via CSS. To learn how to style forms yourself using CSS, see Chapter 14, Section 14.7.
7.6.1 Transferring the Data from the Web Browser for Further Processing
When a user fills in the input fields of an HTML form and clicks the Submit button to send the data, the data is transferred to an application on the web server for further processing. You’ve specified which application that is via the action attribute in the opening <form> tag. In practice, that’s often a script (usually in PHP), which is able to process the form data transmitted by the web browser. To avoid becoming too theoretical, let’s create a simple form mailer for this purpose:
...
<form id="myForm" method="post" action="form-mail.php">
  <fieldset>

    <div>
      <label for="name">Name:</label>
      <input type="text" name="name" id="name"
             placeholder="Your name" required>
      <label id="error1"></label>
    </div>
    <div>
      <label for="mail">Email:</label>
      <input type="email" name="mail" id="mail"
             placeholder="Email address" required>
      <label for="mail" id="error2"></label>
    </div>
    <div>
      <label for="nachricht">Your message:</label>
      <textarea name="message" id="message"
                placeholder="Enter message here ..."
                rows="8" required></textarea>
      <label for="message" id="error3"></label>
    </div>
    <div>
      <input name="submit" type="submit" value="Submit">
      <input name="Reset" type="reset" value="Reset">
    </div>
   <div>
     <label for="gdpr" id="error4">GDPR consent:</label>
     <input type="checkbox" id="gdpr" name="gdpr" required />
     <label>This website may store the information submitted to respond to
            my request. (<a href="#" target="_blank">
            Privacy Policy</a>).
     </label>
    </div>
  </fieldset>
</form>
...
Listing 7.23 /examples/chapter007/7_6/index.html
The data in this HTML form will be submitted to a PHP script named form-mail.php, which in this example is located in the same directory as the HTML file containing the HTML form on the web server.
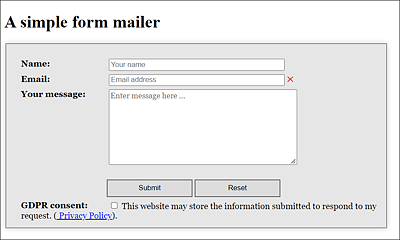
Figure 7.28 A Simple HTML Form Mail
You can use the action attribute in the opening <form> tag to specify where the form’s data should go. The web browser compiles an HTTP request (a request variant) from the input in the form. Such a request usually consists in a simplified way of the method name, the path to the requested resource, and the HTTP version, for example:
GET http://address.com/script.php HTTP/1.1
In addition to the script to be called, you can also specify an HTTP request method, if you send form elements via HTTP. The method you use to submit this string to the web server is specified by the method attribute in the opening <form> tag. If you don’t specify a method, the default setting, that is, the GET method (method="get"), will be used. There are several HTTP request methods, the most important of which are GET and POST.
7.6.2 The “POST” Method
The POST method (method="post") is primarily used for larger amounts of text. Here, when content is requested, the data is transferred from the form in a data block of name-value pairs. Unlike the GET method, this HTTP request method sends the message in the separate body of the HTTP request and is therefore not visible in the URL. In our form mailer, the POST method was used for the method attribute. An advantage of POST is that the length of the data is usually unlimited. And if you plan to upload files, this is also possible only with the POST method.
7.6.3 The “GET” Method
With this HTTP request method, the web browser appends the form data to the address specified via the HTML attribute action using a ? character at the end as a query string. With regard to our example, the URL looks as follows after sending with the GET method:
http://www.internetaddress.com/form-mail.php?name=Jason+Wolf&mail=wolf%40
pronix.com&message=Hello+Jason%21%0D%0A%0D%0AGreat+website%21%0D%0A%0D%0A
Greetings%0D%0AJohn&send=send&gdpr=on
What looks quite chaotic here at first has a structure after all. The question mark separates the URL from the query string that contains the data. An = in the query string separates the name from the values, and an & separates the individual name-value pairs. If you split the URL, including the query string, at these points, the whole thing looks a bit clearer:
http://www.internetaddress.com/form-mail.php
name=Jason+Wolf
mail=wolf%40pronix.com
message=Hello+Jason%21%0D%0A%0D%0AGreat+website%21%0D%0A%0D%0ARegards%0D%0AJohn
send=send
gdpr=on
All other cryptic characters are just encodings. For example, a space is replaced by + or %20. The @ sign is displayed as %40, and so on. If you also decode these characters, you’ll get a full overview of the name-value pairs that are transmitted with the form to the web server as an HTTP request:
The GET method is more commonly used for small amounts of data, such as a search query. If the amount of data is more extensive or you don’t want the GET parameters to be displayed in readable form in the URL, you can use the POST method. In addition, the length of the data is limited with GET. However, you can bookmark the event page of a GET form because all the necessary information is available in the URL and query string.
GDPR Consent
If you use a form mailer, then you should also add the GDPR consent as a checkbox, as it was done in the example. The European Union stipulates that users must actively agree to the storage of the transmitted data. A link to the privacy policy should also be added.
7.6.4 Processing the Data Using a PHP Script
In the example, the form data is transferred to the PHP script, form-mail.php. Even though this book doesn’t cover programming with PHP scripting, the corresponding listing is shown here with a brief explanation. If you want to try this example on a web server or web host, you need to make sure that the script is executable for users, which is why you may need to adjust the execution permissions for the form-mail.php file. Likewise, PHP must be usable on your web host.
<?php
// Data for the configuration
$mailto      = 'youraddress@address.com';
$mailFrom    = 'form-mailer PHP script';
$mailSubject = 'Feedback from PHP form';
$returnPage  = 'http://serveraddress/thankyou.html';
$returnError = 'http://serveraddress/error.html';
$mailContent = '';

// Read form data and create mail from it
if(isset($_POST)) {
  foreach($_POST as $name => $value) {
   $mailContent .= $name . " : " . $value . "\n";
  }
}
// Send email
$mailSent = mail( $mailto, $mailSubject, $mailContent,
                  "From: " . $mailFrom );
// Check email dispatch
if($mailSent === TRUE) {
  header("Location: " . $returnPage);
}
else {
  header("Location: " . $returnError);
}
exit();
?>
Listing 7.24 /examples/chapter007/7_6/form-mail.php
I intentionally kept the script very short. Initially, you should adjust the data for the configuration. At the very least, you should assign your email address to the $mailTo variable so that you can receive the submitted form data. In the foreach loop, the script’s task is to read the submitted POST data with the name-value pairs (here, with $name and $value) and create content for the email with $mailContent. This email is sent using the mail() function to the address in the $mailTo variable, with the subject in $mailSubject and the contents of the $mailContent variable with $mailFrom as the sender.
Next, you want to check the return value of the mail() function you saved in $mailSent. The value can be either TRUE (in case of success) or FALSE (in case of an error). Depending on whether or not the form was successfully sent, a corresponding redirection to the address you specified in $returnPage or $returnError takes place. It’s recommended to specify a full URL. For this purpose, the thankyou.html file was added, which gets displayed if the form could be sent successfully:
...
<form id="thankyou" action="http://serveraddress/">
  <fieldset>
  <legend>Thank you</legend>
    <div>
      <label>We have received your message!</label><br><br>
      <input type="submit" value="Back to home page">
    </div>
  </fieldset>
</form>
...
Listing 7.25 /examples/chapter007/7_6/thanks.html
The error.html file gets displayed if an error occurs after submitting the form.
...
<form id="thankyou" action="index.html">
  <fieldset>
    <legend>Error during data transmission</legend>.
    <div>
      <label>The data could not
             be sent to us!</label><br><br>
      <input type="submit" value="Back to the form">
    </div>
  </fieldset>
</form>
...
Listing 7.26 /examples/chapter007/7_6/errors.html
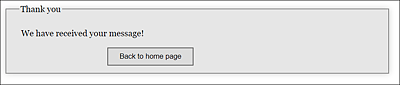
Figure 7.29 The Form Has Been Successfully Submitted
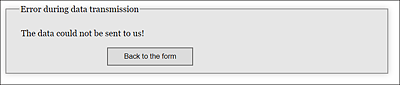
Figure 7.30 An Error Occurred after Submitting the Form
This very simple example can also be used for other forms and is suitable for any number of input fields. However, I haven’t considered input fields here where multiple selections can be made at the same time (e.g., <select multiple>). In addition, this script isn’t suitable for uploading files because the submitted files would have to be checked.
When using transmitted and security-critical data, you should also include a check. For example, it would have been possible to use $_POST['mail'] to pass the sender to $mailFrom right away without any problem, but there are certainly users who could use this line to manipulate the email header.