4.4 HTML Elements for Text Markups
You apply HTML elements for text markup within plain text for individual letters, words, or parts of sentences. Thus, the described elements don’t create a new paragraph or line break, but mark out specific passages in a continuous text according to the semantics defined for the element. You can find all text markups used here in the HTML document /examples/chapter004/4_4/index.html.
Text Formatting via CSS
Even though many of the elements presented here cause a slight visual change of the text in the web browser, you shouldn’t use these HTML elements for text formatting. CSS is responsible for text formatting. These HTML elements rather serve a clean semantic text markup. Thanks to semantic text markup, you can lay the foundation for later text formatting with CSS. If you use sensible text markup in body text, you can later format your text more easily and logically with CSS.
|
HTML Element |
Meaning |
|---|---|
|
<abbr> |
Marking abbreviations or acronyms. |
|
<cite> |
Marking text as source text of a working title. |
|
Marking up computer code within a paragraph of text. |
|
|
<pre> |
Marking up preformatted text. All spaces and line breaks get displayed as specified in the text. |
|
<kbd> |
Marking up text as keyboard input. |
|
<samp> |
Marking up text as screen output of a program. |
|
<dfn> |
Defining a term. |
|
<var> |
Marking up text as a variable. |
|
<bdo> |
Changing the text direction for bidirectional text. |
|
<bdi> |
Defining a section for bidirectional text. |
|
<em> |
Highlighting text you would emphasize in spoken language. |
|
<strong> |
Highlighting words or passages that are particularly important in terms of content. |
|
<i> |
Marking up words or passages with technical terms, thoughts, and foreign words. |
|
<b> |
Marking up meaningful names or keywords. |
|
<mark> |
Highlighting text with a marker. |
|
<q> |
Marking up words or passages as cited or spoken text. |
|
<u> |
Marking up text underlined as proper name or incorrect words or passages. |
|
<s> |
Marking up text as no longer valid or obsolete. |
|
<ins> |
Marking up text as newly added in the revised sense. |
|
<del> |
Marking up text as deleted in the revised sense. |
|
<sub> |
Marking text as subscript. |
|
<sup> |
Marking text as superscript. |
|
<time> |
Marking up dates and times |
|
<small> |
Marking up text as small print, such as for copyright information, licensing information, or legal notes. |
|
<ruby>, <rp>, and <rt> |
Specifying Ruby annotations. |
|
<span> |
Marking up a general section within a paragraph of text. |
Table 4.4 Brief Overview of the Elements Covered for Text Markups
4.4.1 Marking Up Abbreviations or Acronyms Using <abbr>
The abbr element (abbr = abbreviation) can be used for abbreviations or acronyms. It’s also helpful to use the global HTML attribute title in which you write out the abbreviation or acronym so that a web browser can display the full meaning when hovering over it, as you can see in Figure 4.30. This reproduces the code snippet of the following example:
...
<p>The <abbr title="world wide web">WWW</abbr> is teeming with
   abbreviations.
</p>
...
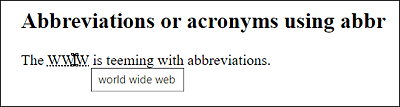
Figure 4.30 The Global “title” Attribute Displays the Meaning of the Abbreviation “WWW” When You Hover the Mouse Cursor over the Word
Anyone who writes abbreviations between <abbr> and </abbr> is passing useful information to the web browser, language-checking software, translation systems, screen readers, or even the search engines for indexing. The extent to which this information is useful and actually used can’t always be predicted. Nevertheless, the abbr element is very useful for logical text markup.
4.4.2 Marking Up Text as the Source of a Working Title Using <cite>
You can use the cite element when you include the title of a book, movie, painting, piece of music, exhibition, and so on in the body text. However, you should only mark up the working title and not the name or main character of the title. Again, you can usually still use the global HTML attribute title to specify more information about the working title when the user hovers over it with the mouse pointer. Most web browsers display everything between <cite> and </cite> in italics.
...
<p>According to the book <cite>HTML and CSS—The Comprehensive
   Handbook</cite> it should read:
</p>
...
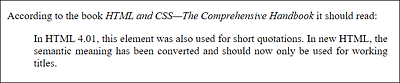
Figure 4.31 In This Example, We Wrote the Working Title of a Book between <cite> and </cite>
4.4.3 Marking Up Computer Code Representation Using <code> and <pre>
You should use the code element to indicate computer code within body text. Most web browsers often display this area using a monospace font such as Courier, as shown in Figure 4.32, which renders the following code snippet in the web browser:
...
<h2>Computer code with <code>code</code></h2>
<p>The <code>code</code> element does not contain any attributes.</p>
...
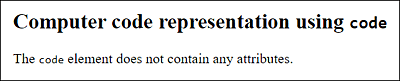
Figure 4.32 The <code> Element Is Suitable for Marking Up Language Elements or Parts of a Source Code of a Particular Language
If you want to format multiple lines of computer code, you should note the code elements in between <pre> and </pre>. The pre element (pre = preformatted) represents preformatted text. In the section between <pre> and </pre>, several whitespace characters won’t get combined to one space, but everything is output as it was entered in the editor. Because that section is output in a monospace font, the pre element is very suitable for outputting source text across multiple lines. This isn’t to say that <pre> is only suitable for marking up source code. It’s therefore recommended that you specify the content between <pre> and </pre> more precisely with appropriate text markup. So, for source code, you should use <code>; for keyboard input, <kbd>; and for displaying a program output, <samp>.
In the following example, the text preformatted between <pre> and </pre> is output as it was written. Specifying <code> and </code> between <pre> and </pre> isn’t mandatory, but it makes the text markup even more precise. You can see the following example at execution in Figure 4.33:
...
<p>Here is a source code snippet of a C program:</p>
<pre><code>#include <stdio.h>
int main(void)
{
puts("Hello World!");
return 0;
}</code></pre>
...
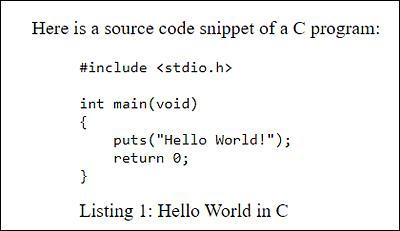
Figure 4.33 The Text Preformatted between <pre> and </pre> Gets Output Exactly as It Was Entered
The Masking Characters “<” and “>”
To display < or > characters in HTML that aren’t to be used as HTML, the character entities < for < and > for > were used here.
4.4.4 Keyboard Input Using <kbd> and Program Output Using <samp>
The kbd element (kbd = keyboard) should be used to mark up continuous text as keyboard input. The samp element, on the other hand, should be used for the screen output of programs. Most often, these two elements are also rendered in a monospace font (usually Courier) in the web browser, as you can see in Figure 4.34, which shows the following example running in the web browser:
...
<p>You can use <kbd>Strg</kbd> + <kbd>A</kbd> to mark up the entire text.</p>
<pre>term#1> <kbd>gcc -o Wall hello hello.c</kbd>
term#1> <kbd>./hello</kbd>
<samp>Hello World!</samp>
term#1></pre>
...
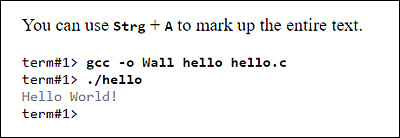
Figure 4.34 The Web Browsers Themselves Decide How to Display the Text Between <kbd> and <kbd> for Input or <samp> and </samp>
In Figure 4.34, the kbd elements have been made bold, and the samp elements have been made gray by using CSS to help you see what has been used where.
4.4.5 Marking Up Text as a Definition Using <dfn>
Text that you write between <dfn> and </dfn> is supposed to represent a definition. Usually, you mark up a word or a text passage, which you then explain in the text that follows. However, the dfn element shouldn’t mark up the definition itself, but the defined term. Let’s take a look at a simple example:
...
<p>A <dfn>smartphone</dfn>—as opposed to a
   cell phone—provides more
   computer functionality and better connectivity.
</p>
...

Figure 4.35 In this Paragraph Text, the Term “Smartphone” Was Described, Which Is Why It Was Placed between <dfn> and </dfn>
In common practice, you can also use another element such as <abbr> inside <dfn> and </dfn>, as shown in the following example:
...
<p>A <dfn><abbr>smartphone<abbr></dfn>—as opposed to
   a cell phone—provides more
   computer functionality and better connectivity.
</p>
...
You can also use the global attribute title inside the opening <dfn> tag. The value of title should be the same as the content of the dfn element.
4.4.6 Marking Up Text as a Variable Using <var>
You can use the var element to mark up the text in between as a variable. Such a variable can be, for example, part of an application, a mathematical expression, or an identifier of a variable in a programming language:
...
<p>The radius <var>r</var> is equal to
   half the diameter <var>d</var>.
</p>
...
4.4.7 Changing the Text Direction Using <bdo> and <bdi>
The bdo element (bdo = bidirectional override) allows you to change the text direction. This is useful, for example, when you want to display text that is written from right to left (e.g., Hebrew or Arabic). By default, the text is displayed from left to right. To change the text direction, you must use the global HTML attribute dir. The attribute value rtl makes the text run from right to left, whereas ltr makes it run from left to right.
You don’t need to put every Hebrew or Arabic word between <bdo dir="rtl"> and </bdo>. When you use Unicode in HTML, the text direction is usually automatically taken into account according to the language, provided you use a Unicode-capable web browser. You should only use the bdo element if the correct text direction doesn’t work.
To illustrate this, here’s a code snippet in which in the first paragraph text—a palindrome for fun—was put between <bdo> and </bdo>, and the text alignment was changed via the attribute dir into the value rtl (right to left). The second paragraph, on the other hand, displays the Hebrew word “shalom”, which usually doesn’t require changing the text direction. You can see the result of these lines in Figure 4.36:
<p><bdo dir="rtl">Never odd or even</bdo></p>
<p></p>
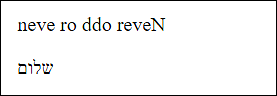
Figure 4.36 Example Executed with <bdo>
The situation is different in the following HTML lines:
<p>1:(as-salaam alaykum)</p>
<p>2:
<p>Howdy: 3</p>
The first two examples would probably not lead to the desired result here. Although as-salaam alaykum in Arabic and shalom in Hebrew are correctly written from right to left, the following colon and number have been given a different writing direction. Originally, this was supposed to look like the third paragraph with Howdy.
Here, the writing behind the Arabic characters continued from right to left, so that the colon and the number behind it also retained the writing direction. Only the translation of the Arabic or Hebrew meaning was reproduced in the correct place.
To be on the safe side, the bdi element (bdi = bidirectional isolation) was introduced for this purpose. Using the bdi element, you can mark up the boundaries of text direction changes in a Unicode-enabled web browser more accurately. Thus, in the preceding example, you only need to put the Arabic or Hebrew characters between <bdi> and </bdi>.
After that, it looks as shown in Figure 4.37:
<p><bdi></bdi>: 1 (as-salaam alaykum)</p>
<p><bdi></bdi>: 2 (shalom)</p>
<p>Howdy: 3</p>
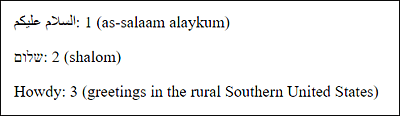
Figure 4.37 Thanks to the Containment of the Arabic and Hebrew Script between <bdi> and </bdi>, the Colon and the Decimal Number Now Display after the Script
4.4.8 Emphasizing Text Using <em>, <strong>, <i>, and <b>
To emphasize text, you can use either the em element (em = emphasis) or the strong element. The em element should be used for words or passages that you would emphasize when speaking.
If you want to bring a word or passage more into focus, you should use the strong element. In contrast to the em element, the strong element is used to mark certain places in the text with a special signal or warning effect. The strong element should definitely be used for words or passages that are particularly important in terms of content.
Let’s take a look at the following example:
...
<p><em>Bear</em>! Who the hell is this <em>Bear</em>!</p>
<p><strong>Caution!</strong> <em>Bear</em> could be standing behind you!</p>
<p><strong>Delivery date in <strong><em>summer 2022</em></strong></strong></p>
...
In this example, it’s semantically clear from the emphasis on bear in the first paragraph in Figure 4.38 that it isn’t the animal that is referred to here, but a person with the surname “Bear”. In the second paragraph, the word Caution! was marked with a special importance. In the last paragraph, an em element was nested within a strong element to emphasize summer 2022 more strongly in terms of content in addition to its particular importance.
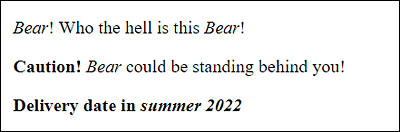
Figure 4.38 Different Ways to Emphasize or Highlight a Text Using <em> and <strong>
Here, you could also still nest the same HTML elements to increase the emphasis or importance of em or strong elements, at least semantically.
Because web browsers usually render <em> with italic and <strong> with bold font, you shouldn’t make the mistake of replacing these elements with <i> and <b>, respectively, because these elements (i.e., <em> and <i> or <strong> and <b>) are rendered quite similarly in the web browser. As mentioned at the beginning, HTML isn’t used to format the text, but these HTML elements are about giving the text a meaningful significance.
The i element is recommended to mark special technical terms, a thought, scientific names, or foreign language words. The b element, on the other hand, should be used for meaningful names or keywords to draw attention to something.
Using <i> and <b>
Standard HTML recommends using the b or i elements only if no other HTML tag fits to mark up the text or passage. The days when these elements were used purely for formatting are over because CSS is used for that purpose.
4.4.9 Highlighting Text Using <mark>
You should use the mark element to mark up words or passages in a continuous text. The easiest way to compare such a markup is with a highlighter. In practice, this HTML element should be suitable for visually highlighting the search term found during a search. This works only if the content is generated dynamically. The element is also very suitable for highlighting code fragments of a source code.
The following code snippet demonstrates the mark element whose execution is shown in Figure 4.39:
...
<p>In 2021, profits have increased by
<mark>100 percent</mark>.
</p>
<p>Here is a source code snippet of a C program:</p>
<pre><code>#include <stdio.h>
int main(void)
{
<mark>puts("Hello world!");</mark>
return 0;
}</code></pre>
...
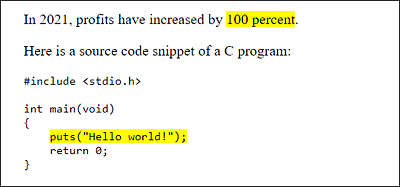
Figure 4.39 Web Browsers That Recognize the New Element Usually Mark the Text Placed between <mark> and </mark> with Yellow Background Color
Even though the mark element predominantly applies yellow background color to the text, you shouldn’t use it to apply a background color to a text. You should rather use <mark> only if it makes sense in terms of content and no other semantic HTML element is suitable. If you want to format the text background, you should use the span element (Section 4.4.17) with CSS instead.
4.4.10 Placing Text between Quotes Using <q>
While you can use the blockquote element to quote an entire paragraph text, the q element allows you to quote something in the middle of the text or mark it as spoken text. Text or passages you insert between <q> and </q> should be placed between quotes by the web browser. You shouldn’t use the q element if you simply want to enclose a word or passage in quotation marks. That wouldn’t be the semantic sense of the q element.
If you use a quote or spoken text from another source, you can use the cite attribute with a URL to the source. Because the implementation of the cite attribute is still poor in web browsers, you may want to consider using a hypertext link.
You can also nest the q element. Such nested q elements usually get another matching quotation mark. In this country, for example, the outer quotation marks are double and the inner ones are single. This is demonstrated in the following example, the execution of which you can see in Figure 4.40:
...
<p>Wolf asked: <q cite="http://tom-bear.com/">
   <em>Bear</em>! Who the hell is this <em>Bear</em>!</q>
</p>
<p>Fox replied: <q>Caution! <q><em>Bear</em></q> could be
   standing behind you!</q>
</p>
...
As you can see in Figure 4.40, this example quoted spoken text in the first paragraph. The second paragraph demonstrates the nesting of q elements. The inner q element was placed between single quotes and the outer one between double quotes.
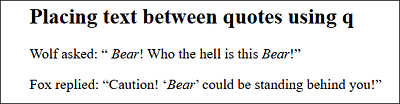
Figure 4.40 Placing Text between Quotes Using the <q> Element
For Advanced Users: Setting Custom Quotation Marks
The problem with the q element is that the quotes set by the web browser may not always be the ones you want. In this case, an intervention with CSS is a good idea. Thus, the following CSS line could be used to change the first and second nested characters of the q element:
q {quotes: '»' '«' '›' '‹';}
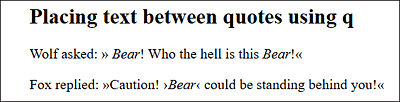
Figure 4.41 The Quotes of the <q> Element Have Been Changed with CSS
4.4.11 Underlining or Crossing Out Text Using <u> and <s>
Both the u element (u = underline) and the s element (s = strikethrough) were marked as deprecated with HTML 4.01 and were supposed to be removed from the standard. With the new HTML standard, they have acquired a new semantic meaning and are thus again an official part of HTML.
You should use the s element to mark content as obsolete or no longer correct. The web browsers display the text between <s> and </s> as strikethrough. If you want to display a document edit where you want to mark a word or passage from the not yet finished document as deleted, you should use the del element instead.
According to its new meaning, the u element is to be used for underlining proper names, as is common, for example, in Chinese writing (see http://en.wikipedia.org/wiki/Proper_name_mark). Most readers are unlikely to use Chinese proper names, so another recommended example of the u element is to knowingly indicate misspelled words or passages containing errors. Web browsers usually display the u element with an underscore. In addition to the u element, there’s the ins element, which is also rendered as underlined but is intended to indicate newly inserted content (Section 4.4.12).
Here’s a short example, the execution of which you can see in Figure 4.42:
...
<p>You can place a text in the middle with
<s><code><center></code> or</s> the
CSS feature <code>text-align</code> and the value
<var>center</var>.
</p>
<p>
<u>
</u>= I am from Germany.</p>
<p>Also, <u class="spell-checker">spellig errors</u>
can be marked with it.
</p>
...>
As you can see in Figure 4.42, in the first paragraph text, the content <center> or was crossed out. In the second paragraph text, a Chinese proper name (Germany = ![]() ) is underlined. Finally, in the final paragraph, a spelling error was underlined with a red dashed line. The color changes and the style of the underline were adjusted with CSS in the example.
) is underlined. Finally, in the final paragraph, a spelling error was underlined with a red dashed line. The color changes and the style of the underline were adjusted with CSS in the example.
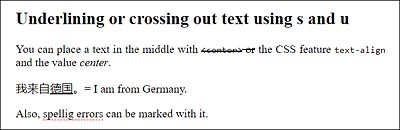
Figure 4.42 Underlining or Crossing Out Text Using <u> and <s>
In any case, it’s important that you use both elements for their intended content and not for text decoration. If you want to underline or strike through text for purely decorative reasons, you should use CSS to do so.
4.4.12 Marking Changes of Text Using <ins> and <del>
The ins element is rendered by web browsers similar to the u element, while the del element is rendered similar to the s element. Nevertheless, the semantic meaning of the two elements is different and therefore not interchangeable.
The del element (del = delete) allows you to mark a content-related (active) editing of a text as deleted in the revised sense. It’s used to inform readers that this part has been revised or further developed. Instead of removing the text completely, you want to make sure that the previous versions of the text remain visible. The web browser usually crosses out this text.
The ins element (ins = insert) is the counterpart of the del element and should be used when something new gets inserted into the document. Here again, you mark a further development of the previous version of the text. The web browsers usually display this text with an underscore.
You can see the execution of the following example with the elements del and ins in Figure 4.43.
...
<del>
  <p>The singer performs on 1/1/2024 in the concert hall!</p>
</del>
<ins>
  <p>The concert was canceled,
     because the singer is sick!</p>
</ins>
...
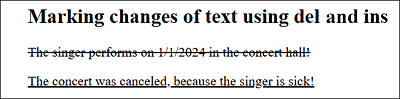
Figure 4.43 The <del> Element Used to Delete a Paragraph Text and Insert a New Paragraph with a New Message between <ins> and </ins>
Again, you should use the del and ins elements only if they fit the semantics. If you want to cross out or underline the text in a purely decorative way, CSS should be the first choice.
Text Underline Can Be Confusing!
The frequent use of underscores with <ins> or <u> may confuse the user because hypertext links with <a> are usually also represented with an underscore. It’s therefore also recommended to change the formatting with CSS, so that the individual elements are displayed in a clearly distinguishable manner.
4.4.13 Displaying Text as Superscript or Subscript Using <sup> and <sub>
These two markups are mainly used for simple mathematical and chemical formulas to lower text with the sub element (sub = subscript) and to raise it with the sup element (sup = superscript).
Here’s a code snippet as an example, the execution of which you can see in Figure 4.44:
...
<p><sup>[1]</sup> Reaction scheme: 2 H<sub>2</sub>O
→ 2 H<sub>2</sub> + O<sub>2</sub></p>
<p><sup>[2]</sup> Calculate circular area: A = π * r
<sup>2</sup></p>
...
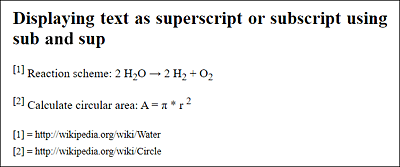
Figure 4.44 The <sub> and <sup> Elements Were Used Several Times for Superscript and Subscript Numbers and Footnotes, Respectively
4.4.14 Marking Dates and Times Using <time>
The time element was introduced to mark up dates and times. When displayed in a web browser, text placed between <time> and </time> is usually not visually noticeable at all. The goal and purpose of the time element is rather that date and time are uniquely coded for machines and can also be displayed in a readable way for humans. You can specify the machine-readable form in the HTML attribute datetime, while the human-readable form is usually written between <time> and </time>. Here’s a brief example:
...
<p>We met on my <time datetime="2023-11-12">
   44th birthday</time> at <em>Bear’s place</em>.
   <time datetime="20:00">at 8 pm.</time>
</p>
...
The specification 44th birthday can be any other text such as Wednesday or November 12 as long as the value of datetime is a precise date of the Gregorian calendar. The same applies to the time at 8 pm.
Valid Machine-Readable Date and Time Information
A date readable by machines is specified as YYYY-MM-DD. YYYY is the year (e.g., 2023), MM is the month (e.g., 11 for November), and DD is the day in the month (e.g., 12). If you also want to note the time, you must place a capital T between the date and the time and then enter the time behind it in the form HH:MM where HH stands for hours and MM for minutes. In a newer version of time, this T can be omitted and a space can be used instead. Optionally, you can specify the time zone offset from UTC (Coordinated Universal Time). UTC is a designation for Universal Time. Here, you must specify a + followed by HH:MM, for example:
2023-10-10T21:00+01:00
For this example, you enter October 10, 2023, as the date. The time is exactly 9 pm, and the +01:00 at the end means UTC + 1 hour. Many other different forms of presentation are possible in this context. For more information, you should visit www.w3.org/TR/2011/WD-html5-20110525/text-level-semantics.html#the-time-element. For further and future developments of the time element, you may find the following website useful: http://wiki.whatwg.org/wiki/Time_element.
Alternatively, you can specify the date, time, and time zone (if needed) in datetime at once:
...
<p>We met on my
   <time datetime="2023-11-12T20:00+00:00">44th birthday
   </time> at <em>Bear’s place</em> at 8pm.
</p>
...
So, if you use a valid datetime attribute with the time element, you can write whatever you want between <time> and </time>. Without specifying the datetime attribute, you must specify a valid date format and/or a valid time format—that is, the machine-readable version—between <time> and </time>, such as the following:
The time element has been improved and made much more flexible over time after its first release. For example, the following specifications are also possible:
...
<p>On every <time datetime="11-12">birthday</time>
   I got flowers.
</p>
...
This refers to November 12. Another option would be to specify the following for datetime if you don’t remember the exact day of the date:
<p>The concert in the photo was recorded sometime in
   <time datetime="2023-08">August</time>
   this year.
</p>
Here, a date in August 2023 is meant. It’s possible to use only the year (e.g., datetime="2023").
Another improvement is that you can use a time duration. Here’s an example of how such a duration is represented:
<p>the rock festival lasted <time datetime="P3D">3
   days</time>.
</p>
The letter P stands for period, the D for day, and the 3 for three days. You can still specify a time period from a combination with H for hours, M for minutes, and S for seconds (e.g., datetime="P1D5H10M" = 1 day, 5 hours, and 10 minutes).
Here’s What Doesn’t Work (Yet)!
It isn’t yet possible to specify a time before Christ (BC), neither can you specify a time period based on two date ranges. For this purpose, you still need to use two time elements.
What Should I Use <time> for in Practice?
If you use the time element, it will be easier for other programs to index this data. For example, it’s easier for a script in blog articles to extract the date using the time element, rather than using any other techniques to look for and read this data. By having the date and/or time information in a machine-readable form, there’s the advantage for search engines to make use of it when searching for items of a certain period or date.
If you then also use the datetime attribute, you can provide readers with a reader-friendly alternate display between <time> and </time>. Basically, you should put a (readable) date and/or time between <time> and </time> because the web browser won’t display an automatic value in between if you don’t put anything there.
Another possibility is that future web browsers provide the option to enter a date into the calendar at the request of the visitor. In addition, the web browser could convert the time used into the visitor’s time zone if the appropriate value was specified with datetime. And he could convert the season according to the Buddhist time calculation, which is valid, for example, in Thailand or Laos.
In Figure 4.45, you can see again all time elements described and used here. I underlined the places where <time> was used with a dotted line using CSS for better visibility. Here, the date on which the article was written was additionally indicated behind the article title. To use the time element in a semantically correct way, the specification of an exact time must be used and observed. For example, you should avoid the following incorrect usage:
These are the results from <time>last week</time>.
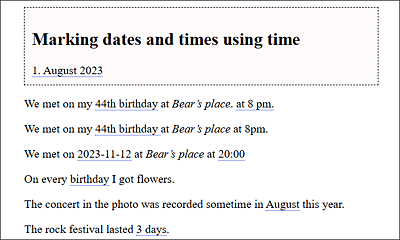
Figure 4.45 To Clarify What Is between <time> and </time>, a Dotted Underline Has Been Added
4.4.15 Marking the Small Print Using <small>
You should use the small element for words or text passages in which you want to display some small print. This can be copyright information, license information, legal notes, and so on.
Here’s a short code snippet with the small element; its execution is shown in Figure 4.46.
...
<article>
<header>
<h2>Small print with small</h2>
<small>© John Doe;
<time datetime="2024-01-01">January 1, 2024</time></small>
</header>
<p>The shipment can be delivered in <time datetime="P2D">2 days</time>.
<small>(Due to high demand
it can also take longer (+1 day)).</small>
</p>
</article>
...
Again, you should use this element only if it semantically fits the content and not to make text look smaller. For visual adjustments, you should use CSS.
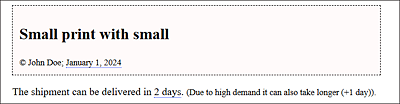
Figure 4.46 A Copyright Was Placed in the Head of an Article as well as Small Printed Information between <small> and </small>
4.4.16 Using <ruby>, <rp>, and <rt> for Annotations about Pronunciation
The Ruby annotation is probably of little interest to most readers. This is an annotation system in which the text appears with the annotation in one line, as used in Japanese and Chinese texts. If you want to know more about this notation, see https://en.wikipedia.org/wiki/Ruby_character.
Here, we’ll only briefly describe the use of the Ruby annotation with the existing HTML elements. For this purpose, here’s a simple example in which Asian characters have been omitted:
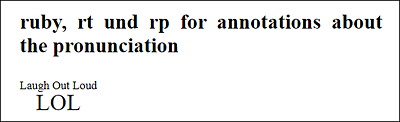
Figure 4.47 The Text between a Ruby Annotation Is Displayed as Text with Annotation in One Line
The example features LOL with annotations (which is nonsense here, of course). All characters, including annotations, are written between <ruby> and </ruby>. Then the character is noted as element content (here: LOL). The parentheses of the annotations are created with the (optional) rp element (rp = Ruby parenthesis). The text is then marked with the rt element (rt = Ruby text). Thus, the annotation is written between <rt> and </rt>.
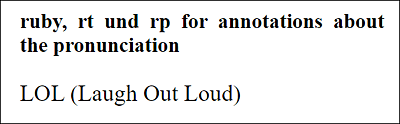
Figure 4.48 The Optional <rp> Element Is Used to Put Parentheses around the Ruby Text (with the <rt> Element) for Web Browsers That Don’t Understand <ruby>
Web Browser Support for <ruby>
Web browser support in current web browsers is now quite good. In some web browsers, however, an add-on may need to be installed.
4.4.17 Grouping Ranges of Individual Text Passages Using <span>
While you can use the div element (Section 4.2.7) to group entire groups into one block, you can use the span element to mark up individual passages of text inside the body text with CSS. Visually, text placed between <span> and </span> doesn’t change at all. In addition, the span element in conjunction with a JavaScript is quite useful when searching for global attributes used within it to directly update the element content. Here’s a rather theoretical example:
<p>Current temperature <span id="temp">64</span> F</p>
Here, you could use a JavaScript to read the global id with the value temp and further process or update the element content. Let me also show you this CSS example:
<p>Formatting with <span style="text-decoration:overline;">
   CSS</span> and the span element.</p>
Here, the text is preceded by a stroke that has been implemented via style statements directly in the HTML tag span with the HTML attribute style.

Figure 4.49 The <span> Element Has No Default Formatting; Besides Designing with CSS, It Can Also Be Used to Identify Unique Elements.
However, as with the div element, you should only use this element if there’s no semantically more suitable HTML element available.
Example of All Text Markup Elements
Once again, note that you can find an example with all the text markup elements demonstrated here on the web page for the book (www.rheinwerk-computing.com/5695/) and at https://html-examples.pronix.de/examples/chapter004/4_4/index.html.