4 The Visible Part of an HTML Document
This chapter describes the displayable elements of HTML that you can use between <body> and </body>. For designing or laying out websites, you should use CSS instead. Before you learn how to make a website more beautiful, you need to have the basic knowledge of how to create a single web page using HTML and mark it up with the appropriate elements.
Even if you’ve already created web pages in HTML 4.01 (or even earlier) and are already familiar with the handling of HTML elements, it’s worth working through this chapter because semantic elements have been added with the current HTML and many existing elements have been given a different semantic meaning.
Here’s what you’ll learn in this chapter:
-
Splitting an HTML document into separate and meaningful sections with new HTML elements such as <section>, <article>, <aside>, or <nav>
-
Using headings in a certain order and implementing a header and/or footer with the new <header> and <footer> elements
-
Splitting and grouping text content with HTML elements
-
Semantic tagging of text such as single letters, words, or parts of sentences with HTML elements
-
Using and displaying unordered and ordered lists via <ul> and <ol>
4.1 HTML Elements for Structuring Pages
In this chapter, you’ll learn about the various HTML elements that you can use to divide a web page into useful sections. If you’ve used HTML 4.01 so far, you’ll find many new elements here, as the current HTML also introduces a new content model to combat the rampant use of div elements with class attributes.
|
HTML Element |
Meaning |
|---|---|
|
<body> |
Displayable content section of the HTML document |
|
<section> |
Subdivision of the HTML document into different sections |
|
Subdivision of content into a self-contained topic-specific block |
|
|
<aside> |
Marginal information of a content such as a sidebar or for additional information about an article |
|
<nav> |
Element used to mark up navigation(s) such as a sitemap or the main navigation of the website |
|
<h1>, <h2>, <h3>, |
Headings of the first through sixth order |
|
<header> |
Header of a content |
|
<footer> |
Footer of a content |
|
<address> |
Contact information for the author of the content |
Table 4.1 Quick Overview of the Section Elements Covered Here
4.1.1 Using <body>: The Displayable Content Section of an HTML Document
Everything you write between the opening <body> tag and the closing </body> tag is referred to as the HTML document body. Between <body> and </body>, you can write all HTML elements, such as text, hypertext links, images, tables, and lists, to define the structure of the web page. All elements written between <body> and </body> are rendered by the web browser and displayed accordingly.
<!doctype html>
<html lang="en">
  <head>
    <title>Title of the document</title>
    <meta charset="UTF-8">
  </head>
  <body>
    This is the content of the document, which is to be
    rendered and displayed by the web browser.
  </body>
</html>
4.1.2 Introducing the Section Elements of HTML
The following sections introduce the section elements of HTML, that is, <section>, <article>, <aside>, and <nav>. If you’re perhaps just getting into HTML, using section elements is still a bit confusing or disappointing at first because they change almost nothing visually. Primarily, these elements only serve to divide the content into semantic (i.e., meaningful) areas.
Even if these new elements don’t seem to make sense to you yet, just remember that they aren’t of interest to the normal user of the website, but are mainly used to give meaning to the content, which is particularly useful for the developer, the search engines, and the screen readers.
Dividing Content into Topic-Based Sections Using <section>
The <section> element allows you to divide the content of a document into topic-based sections. This is helpful, for example, if you want to divide a document into individual chapters or even subchapters—just like this book was divided into individual sections. Even on an ordinary homepage, you can use this element to create individual content and sense sections, such as a section with the description about the owner of the website, another section with news, and one with contact information. Here’s a simple example, the result of which you can see in Figure 4.1:
...
  <body>
    <section>
       <h1>Chapter 1</h1>
       <p>The first chapter</p>
    </section>
    <section>
        <h1>Chapter 2</h1>
        <p>The second chapter</p>
        <section>
            <h2>Chapter 2.1</h2>
            <p>A subchapter of Ch. 2</p>
        </section>
    </section>
  </body>
...
Listing 4.1 /examples/chapter004/4_1_3/index.html
In this example, the <section> element has been used to divide the document into meaningful sections—in this case, Chapter 1 and Chapter 2—with each chapter consisting of a heading <h1> and paragraph text <p>. Furthermore, it’s possible to nest <section> elements, as shown within the <section> element of Chapter 2, Section 2.1.
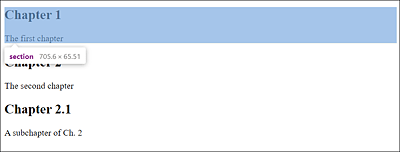
Figure 4.1 Between <section> and </section>, You Can Divide the Content of a Document into Meaningful and Logical Units
Dividing Content into a Self-Contained Block Using <article>
You should use the article element to summarize a piece of content in a self-contained topic-specific block. The article element is in itself quite similar to the <section> element, which you use to divide the content into meaningful sections. However, it’s recommended that you use the article element for a standalone composition, which would be ideal for individual news items, blog or forum entries, or comments on a blog post or news, for example.
Here’s an example of an HTML code snippet that shows you what such a blog entry with the article element could look like. The result is shown in Figure 4.2.
...
  <body>
  <h1>My Blog</h1>
  <p>Latest reports on HTML</p>
  <article>
     <header>
       <h2>New HTML elements on the horizon</h2>
     </header>
     <p>Published on <time>2023-05-05</time></p>
     <p>As already suspected ...</p>
     <footer>
       <a href="comments.html">View comments ...</a>
     </footer>
  </article>
  </body>
...
Listing 4.2 /examples/chapter004/4_1_4/index.html
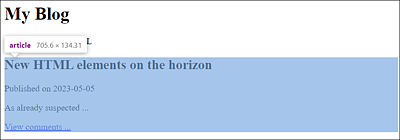
Figure 4.2 The Example Shows a Meaningful and Logical <article> Composition of a Blog Entry
Everything between <article> and </article> is the composition of a self-contained block consisting of a heading, a timestamp, the actual content section, and a footer. It’s up to you to decide which HTML elements you want to use to create such a composition with <article>, but the example shown here already makes sense semantically.
What to Use: <article> or <section>?
You’re probably wondering which of the two elements you should use for a semantic separation of content because the two are somewhat similar in some respects. Nevertheless, the HTML specification also makes a differentiation here and recommends using <article> if certain semantics are to be used multiple times, as is the case with a news or blog entry. Thus, <article> is a self-contained block—a composition of repeatedly used content following the same pattern—whereas <section> is suitable for a separation into content sections, which should contribute to a better overview of the entire document.
Adding Content with Additional Information Using <aside>
With <aside>, you can usually supplement or expand content with additional information. Strictly speaking, you can use the aside element for two different semantic things: a sidebar or an additional piece of information (e.g., a citation) to a content item, for example, within an article element.
Referring to the /examples/chapter004/4_1_4/index.html example from Section 4.1.2.2, for example, you would use <aside> for a separate logical section in the document:
...
  <body>
  <h1>My Blog</h1>
  <p>Latest reports on HTML</p>
  <article>
...
  </article>
  <aside>
  <h3>Partner websites</h3>
      <ul>
      <li><a href="#">Blog XY</a></li>
      <li><a href="#">Magazine X</a></li>
      <li><a href="#">Website Z</a></li>
    </ul>
  </aside>
  </body>
...
Listing 4.3 /examples/chapter004/4_1_5/index.html
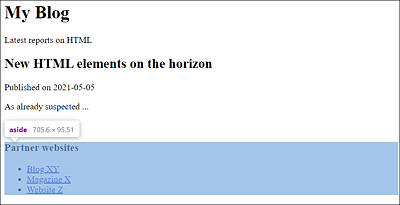
Figure 4.3 The <aside> Element Is Used as a Separate Logical Section in the HTML Document
Note
The # character in HTML is a reference to a jump mark in the same document, but it has no meaning yet in this example and was used instead of a real destination address.
In addition to the option just shown, using <aside> as a sidebar would also be suitable as additional information in the form of a quote or within an article element. In the example that contains the blog entry, it would be suitable within the article element for an entry with further links to the blog entry.
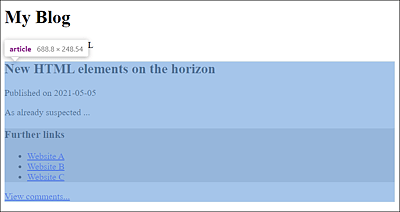
Figure 4.4 The <aside> Element (Colored Here) Was Noted as Additional Information inside an <article> Element
Let’s take a look at the following code snippet in this regard:
...
  <body>
...
  <article>
    <header>
      <h1>New HTML elements on the horizon</h1>
    </header>
    <p>Published on <time>2023-05-05</time></p>
    <p>As already suspected ...</p>
    <aside>
    <h3>Further links</h3>
      <ul>
        <li><a href="#">Website A</a></li>
        <li><a href="#">Website B</a></li>
        <li><a href="#">Website C</a></li>
      </ul>
    </aside>
    <footer>
      <a href="comments.html">View comments...</a>
    </footer>
  </article>
  <aside>
...
  </aside>
  </body>
...
Listing 4.4 /examples/chapter004/4_1_5/index2.html
Declaring Content as a Page Navigation Bar Using <nav>
As you might guess from its name, the nav element enables you to divide navigation elements into blocks. We’re not talking about web link collections here, but about a list of links for a sitemap or the main navigation of your own website. Like the aside element, you can use the nav element for its own section or within another HTML element to combine a group of links into a block.
To use the blog entry again as an example, the nav element would be suitable for summarizing the main navigation or the list of related links from similar articles within the same web page. In any case, you should use the nav element for entire blocks of links. The following code snippet demonstrates the nav element in a small theoretical blog:
...
  <body>
  <nav>
    <a href="#">Blog</a> |
    <a href="#">Links</a> |
    <a href="#">About me</a> |
    <a href="#">Legal Notes</a>
  </nav>
  <h1>My Blog</h1>
  <p>Latest reports on HTML</p>
  <article>
...
    <aside>
    <h3>Similar articles</h3>
      <nav>
        <ul>
          <li><a href="#">HTML6 will not exist</a></li>.
          <li><a href="#">W3C and WHATWG agree</a></li>
          <li><a href="#">What comes after the Living Standard?</a></li>
        </ul>
      </nav>
    </aside>
...
  </article>
  <aside>
  <h3>Sitemap</h3>
    <nav>
    <ul>
      <li><a href="#">Blog</a>
        <ul>
          <li><a href="#">HTML</a></li>
          <li><a href="#">CSS</a></li>
        </ul>
      </li>
      <li><a href="#">Links</a></li>
      <li><a href="#">About me</a>
        <ul>
          <li><a href="#">Bio</a></li>
          <li><a href="#">Portfolio</a></li>
        </ul>
      </li>
      <li><a href="#">Legal Notes</a></li>
    </ul>
    </nav>
  </aside>
  </body>
...
Listing 4.5 /examples/chapter004/4_1_6/index.html
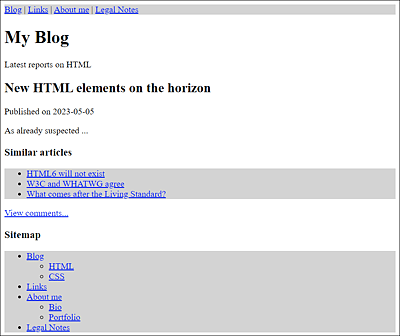
Figure 4.5 The <nav> Element (Colored Here) Can Be Used to Divide a Separate (Navigation) Section or to Group Blocks of Links within Other HTML Elements
In the first example, <nav> was used to define a main navigation as a separate section of the HTML document. In the second example, the nav element was used to link a block of links to similar articles on the same web page. In the last example, a sitemap of the web page was summarized via the nav element.
In addition, the last two examples were grouped within <aside> and </aside>. In them, bulleted lists (ul and li elements) were used within the nav element.
Using <nav> Only for Main Navigation?
The specification suggests using the nav element specifically for the main navigation. That doesn’t include external additional links or affiliate links to external websites. Likewise, it’s not recommended to put legal stuff such as copyright, contact information, and legal notes in the nav section; instead, use the footer section for that purpose (see Section 4.1.4).
In the /examples/chapter004/4_1_6/index.html example, this means you only have two main navigation points with Blog and Links within the nav element and would write About me and Legal Notes outside of it (e.g., in the footer). I don’t see any point in separating this because there’s no difference between the first two links (Blog and Links) and the other two links (About me and Legal Notes) as both are linked to different websites, and both belong to the internal website in this case. So, it’s up to you to what extent you want to follow these recommendations. In any case, you should refrain from using the nav element for external links to third-party websites and, if possible, use it only selectively and sensibly on your own website.
4.1.3 Using Headings with the HTML Elements from <h1> to <h6>
The HTML element for headings of a certain order is <h1> to <h6>. The number (1 to 6) represents the heading level. Thus, everything you write between <h1> and </h1> is used as a top-level heading, everything between <h2> and </h2> belongs to a second-level heading, and so on down to the lowest level with <h6> and </h6> as a sixth-level heading.
The HTML elements <h1> through <h6> should not be misused to emphasize a text, but rather to define the content structure of a document. Consider the following HTML structure:
...
  <h1>Heading 1</h1>
  <h2>Heading 1.1</h2>
  <h3>Heading 1.1.1</h3>
  <h2>Heading 1.2</h2>
  <h2>Heading 1.3</h2>
  <h3>Heading 1.3.1</h3>
  <h1>Heading 2</h1>
...
Based on this sequence of headings, the following content structure (or document outline) will be mapped:
1. Heading 1
   1.1. Heading 1.1
      1.1.1. Heading 1.1.1
   1.2. Heading 1.2
   1.3. Heading 1.3
      1.3.1. Heading 1.3.1
2. Heading 2
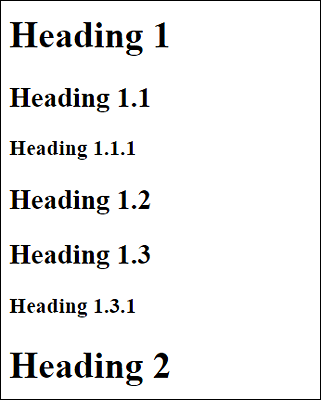
Figure 4.6 This Is What the Web Browser Will Make of It
What Happens to the Headings in the Section Elements?
You’re probably wondering what happens to the content structure of headings when you use the section elements from Section 4.1.2. That question is well justified. If you use the <section>, <article>, <aside>, or <nav> section elements, the content structure of the headings will also be affected. Within each new section element, the heading level count starts from the beginning, but always at a lower hierarchy level. The following HTML code illustrates this:
...
  <body>
  <h1>My Blog</h1>
  <p>A simple blog ...</p>
  <section>
    <h1>News on HTML</h1>
    <article>
      <h1>A preview of the new HTML elements</h1>
      <p>It looks like ...</p>
    </article>
  </section>
  <section>
    <h1>News on CSS</h1>
    <article>
      <h1>New Styles at Last</h1>
      <p>After a long time of development ...</p>
    </article>
  </section>
  </body>
...
Listing 4.6 /examples/chapter004/4_1_7/index.html
Here, five <h1> headings of the first order were used. If you look at the HTML code, you can see several sections. Next to the top section with <body>, you can find two additional <section> elements, each of which contains an <article> element in which headings of the first order have also been defined.
This is a blog that’s been divided into two content sections with <section> containing the topics HTML and CSS. Within these sections, you can find the news articles included within <article>.
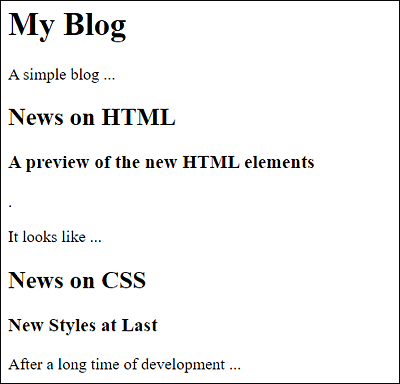
Figure 4.7 All Headings with <h1> Are Adjusted and Output Corresponds to the Section due to the Section Elements of HTML That Are Based on the Outline Algorithm
Due to the use of the new HTML elements <article> and <section>, the following content structure (or document outline) results:
1. My Blog
   1. News on HTML
      1. A preview of the new HTML elements
   2. News on CSS
      1. New Styles at Last
Document Outline for Advanced Users
The term outline or document outline refers to the structure of the document, which can be generated and represented by the headings, among other things—as in the case of the table of contents of this book, for example. The document outline can be quite useful. For example, the web browser might offer you a table of contents, letting you jump from one heading to another. Search engines can also use such a table of contents to create better page previews or even improve search results. Screen reader users probably have the biggest advantage here because they can be guided through deeply nested hierarchies and sections.
In Figure 4.8, you can see the JavaScript HTML5 outliner (h5o) to test the document outline during execution. Here, the document outline is displayed in the upper-right corner, and you can jump to the individual headings via hypertext links.
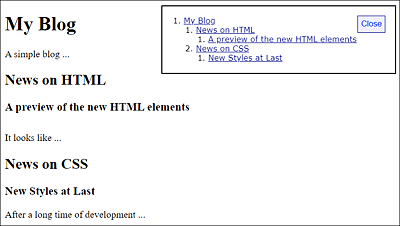
Figure 4.8 JavaScript h5o from Google during Execution
Section elements such as <section>, <article>, <aside>, and <nav> allow you to refine the document outline even more, as you’ve seen in the example, /examples/chapter004/4_1_7/index.html.
Even if not all web browsers support document outlines directly, it won’t do any harm to pay attention to a proper outline of the HTML document because basically that’s no extra work. Screen reader users will thank you for it, and search engine robots may reward you for it because a good document outline can improve a page index, which in turn could mean a higher ranking in search results. Besides, a neatly structured web page is easier to read than an unstructured one.
Keeping Track of the Document Outline
When the website becomes more extensive and the document contains many headings and perhaps different sections, it often isn’t easy to keep track of whether the document outline still makes sense and is neatly structured with regard to its contents. Outlining tools that output the headline structure of the web page in the existing structure can assist you here. For example, Google offers the JavaScript h5o, mentioned in the previous section, at https://h5o.github.io. Alternatively, you can find an online service at http://gsnedders.html5.org/outliner/. Meanwhile, the validation checker at https://validator.w3.org/nu/#textarea also provides an outline option for HTML documents.
4.1.4 Creating a Header Using <header> and a Footer Using <footer>
The <header> and <footer> are two additional semantic HTML elements that you can use for implementing a header and footer in an HTML document. Like section elements, these elements initially have no visual effect on the HTML document apart from a line break. Again, these are initially just elements that you can use to give a piece of content a better and cleaner structure. The styling here is usually done via CSS. However, unlike section elements such as <section>, <article>, <aside>, or <nav>, these two elements don’t affect the hierarchical structuring (or document outline) of the document.
You should use the header element for introductory elements such as a page heading, the name of the web page, or a navigation bar of the HTML document. There may well be other HTML elements between <header> and </header>. However, you mustn’t nest any other header elements in it. Although it seems obvious, <header> doesn’t necessarily have to be in the header, and you can use it more than once in the document.
Invalid Positions of <header>
A <header> tag mustn’t be used inside a footer, address, or another header element.
The counterpart to the header element for the header section is the footer element for the footer or also the footer section, which also doesn’t necessarily have to be the last element in the document. Useful content for the footer of a website is often legal information, legal notes, or terms and conditions, but you can also use a sitemap or a special navigation bar here. You can’t use any other <footer> tag within a footer
Here’s an example that demonstrates the header and footer elements in a meaningful structure:
...
  <body>
  <header>
    <hr /><small>Blog Version 1.0</small>
    <h1>My Blog</h1>
    <p>A simple blog...</p><hr />
  </header>
  <h2>News on HTML</h2>
  <article>
    <h3>A preview of the new HTML elements</h3>
    <p>It looks like ...</p>
  </article>
  <footer>
    <hr /><a href="#">Legal</a> |
    <a href="#">Legal Notes</a> |
    <a href="#">T&Cs</a> |
    <a href="#">About me</a><hr />
  </footer>
  </body>
...
Listing 4.7 /examples/chapter004/4_1_8/index.html
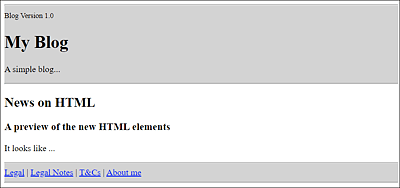
Figure 4.9 The Header and Footer with the <header> and <footer> Elements (Shown in Gray for Clarity)
Between <header> and </header>, you can find a summary of the entire information for the header section of a web page. In the example, this is the version of the blog, the headline, and a short description of the website. This is followed by the articles of the blog. Finally, the footer between <footer> and </footer> contains forwarding hyperlinks with legal information and so on.
4.1.5 Marking Contact Information Using <address>
You should use the address element only for contact information about the author of the HTML document or article. If the address element is used within the body element, it should only contain the contact information for the owner or author of the entire document or article. If the address element is positioned inside an article element, the contact information for the author of the document should be written there. Usually, the web browser displays this text in italics with a new line before and after the address element.
The best location for this contact information for the author, an organization, or the person responsible for the document or article is usually likely to be at the end of the article or at the end of the document (e.g., between <footer> and </footer>).
Here’s an example in which the address element was used for contact information about the author of an article at the end inside the footer element. You can see the example at execution in Figure 4.10.
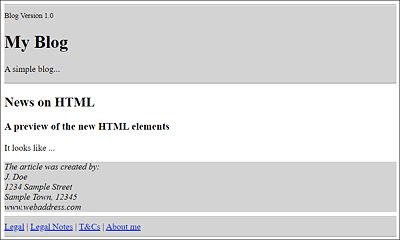
Figure 4.10 Contact Information for the Author of the Article Has Been Placed at the End of the Article between <footer> and </footer> Using the <address> Element
...
  <article>
    <h3>A preview of the new HTML elements</h3>
    <p>It looks like ...</p>
    <footer>
      <address>The article was created by:<br>
        J. Doe<br>
        1234 Sample Street<br>
        Sample Town, 12345<br>
        www.webaddress.com
      </address>
    </footer>
  </article>
...
Listing 4.8 /examples/chapter004/4_1_9/index.html