14.2 Managing Databases
While we do delegate most of the hands-on exercises to the book’s labs, we will make a brief digression here about installing and working with MySQL, SQLite, and MongoDB.
Running the SQLite lab exercises for PHP and Node, you don't actually have to install anything (though it helps to install an editor for the database), since it is a file-based, in-memory database.
To run the PHP exercises in this chapter's lab, you will need access to MySQL. If you have installed XAMPP to run your PHP, MySQL is already installed. If not, you can still install the free MySQL Community Edition on your development machine. Alternately, you might have access to MySQL on a laboratory web server provided by your university or college. If you already have an account on a third-party hosting environment, you likely can access or add MySQL instances to your account. Finally, various cloud platforms provide the ability to add or access MySQL instances. Figure 14.3 illustrates some of these possibilities.
Figure 14.3 Multiple ways to access MySQL are available

To run the Node exercises in this chapter, you will either need to install MongoDB or make use of a cloud service such as MongoDB Atlas.
The details for installing these products is out of scope for this chapter. What this section (and the accompanying labs) will do is provide a quick overview of the tools available to administer and manage your database on your development machine. The tools available to you range from the original command-line approach, through to the modern workbench, where an easy-to-use toolset supports the most common operations.
14.2.1 Command-Line Interface
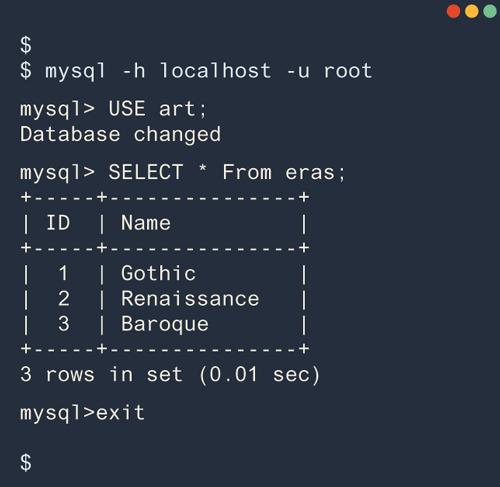
The MySQL command-line interface is the most difficult to master, and has largely been ignored in favor of visual GUI tools. The value of this particular management tool is its low bandwidth and near ubiquitous presence on Linux machines. To launch an interactive MySQL command-line session on your development machine, you must specify the host and username as shown below:
mysql -h localhost -u rootOnce you run this command, you will see the MySQL prompt, which allows you to enter any SQL query, terminated with a semicolon (;). These queries are then executed and the results displayed in a tabular text format. A screenshot of a series of such interactions is illustrated in Figure 14.4.
Figure 14.4 MySQL command-line interface
In addition to the interactive prompt, the command line interface can be used to import and export entire databases or run a batch of SQL commands from a file. To import commands from a file called commands.sql, for example, we would use the < redirection operator:
mysql –h localhost –u root < commands.sqlAlthough every MySQL operation can be done from the command line, many developers prefer using an easier-to-use management tool that assists with SQL statement generation, while providing a more visual and helpful suite of tools.
14.2.2 phpMyAdmin
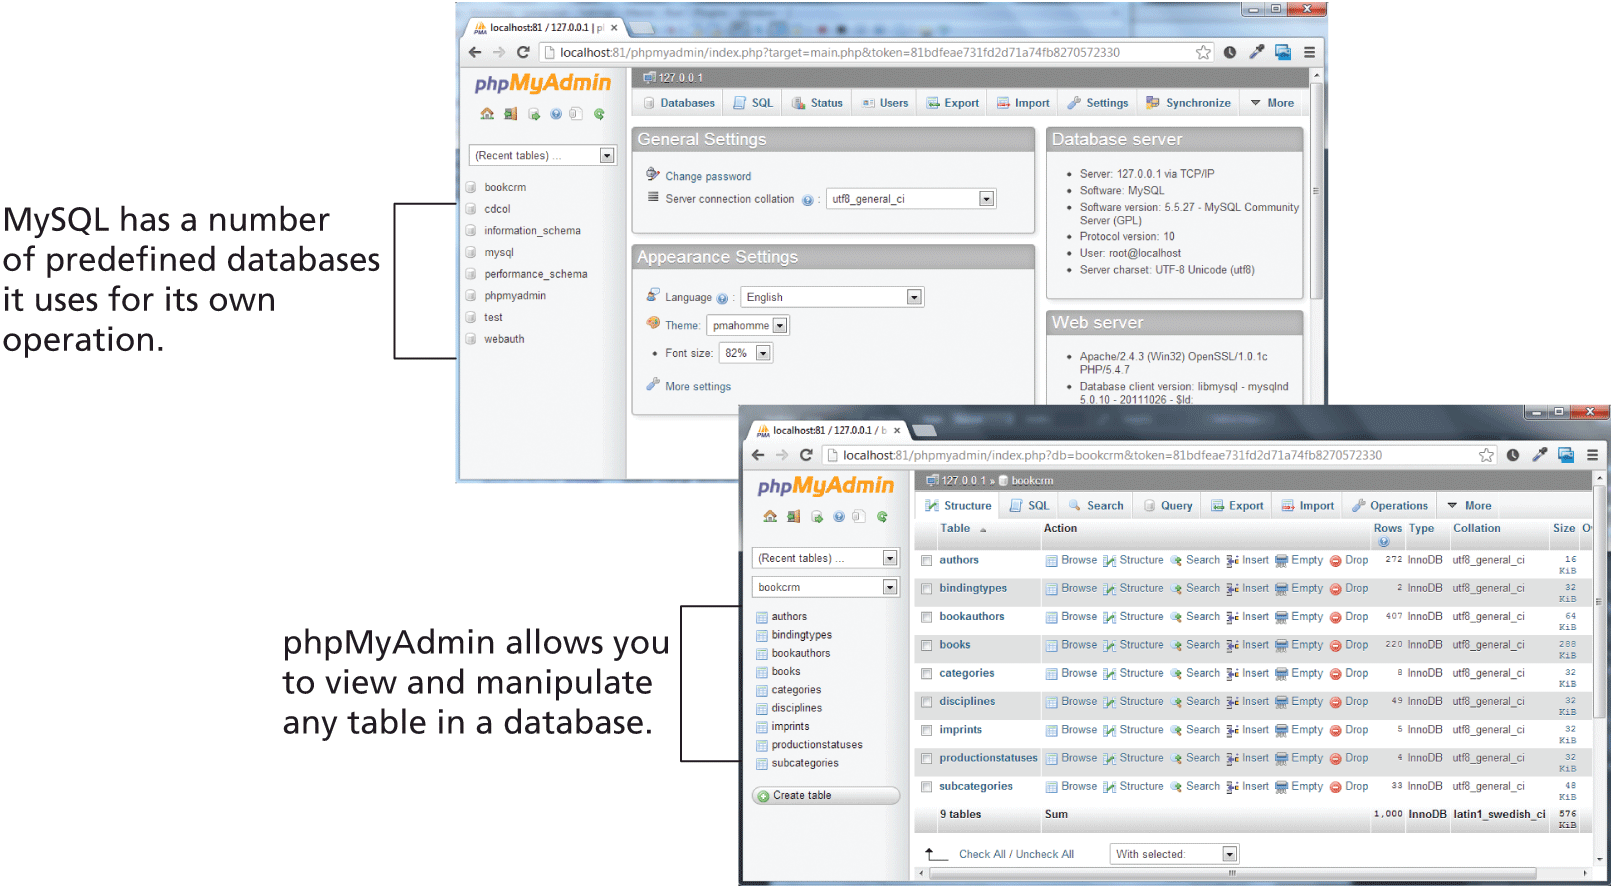
A popular web-based front-end (written in PHP) called phpMyAdmin allows developers to access management tools through a web portal.1 In addition to providing a web interface to execute SQL queries, phpMyAdmin (shown in Figure 14.5) provides a clickable interface that lets you navigate your databases more intuitively than with the command line.
Figure 14.5 phpMyAdmin
The package is freely downloadable and can be installed on any server configured to support PHP with the MySQL extensions. If you are using XAMPP, phpMyAdmin is already installed and can be accessed via the Admin button for MySQL in the XAMPP control panel (the web server has to be started first). You can also install phpMyAdmin on your development machine even without XAMPP, where it can be launched by navigating to the URL http://localhost/phpmyadmin.
Just as with the command-line interface, configuring phpMyAdmin requires that we define a connection to the MySQL server. During the installation of phpMyAdmin you edit config.inc.php, where there are clearly defined places to put the host, username, and password as shown in Listing 14.1.
Listing 14.1 Excerpt from a config.inc.php file for a phpMyAdmin installation
$cfg['Servers'][$i]['host'] = 'localhost';
$cfg['Servers'][$i]['controluser'] = 'DBUsername';
$cfg['Servers'][$i]['controlpass'] = 'DBPassword';
$cfg['Servers'][$i]['extension'] = 'mysqli';
 Note
Note
From phpMyAdmin, you can create new databases, view data in existing databases, run queries, create users, and other administrative tasks. The separate lab exercises guide you through the process of using both the command-line interface and the phpMyAdmin web interface. One of the walkthroughs demonstrates how to run a SQL script, using the Import button in phpMyAdmin.
This particular script contains a number of data-definition commands that create one of the three sample databases used in one of the end-of-chapter case studies as well as the SQL commands for inserting data. You can run this script at any time to return the database back to its original state. The lab also comes with the creation scripts for the other case study databases.
14.2.3 MySQL Workbench
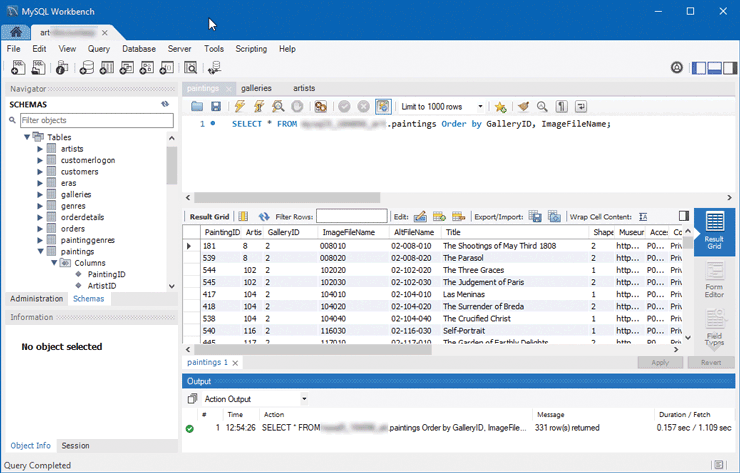
The MySQL Workbench is a free tool from Oracle to work with MySQL databases.2 Like phpMyAdmin, it provides a visual interface for building and viewing tables and queries. It can be installed on any machine from which the MySQL server permits connections. Being a native application written just for MySQL, it does not rely on a particular server configuration and provides better user interfaces than phpMyAdmin. It can also auto generate an entity relationship diagram (ERD) from an existing database structure, or you can design an ERD and have it become the basis for a MySQL database. A screenshot of the application is shown in Figure 14.7.
Figure 14.7 MySQL Workbench
 Pro Tip
When a PHP management tool tries to connect to a MySQL server, it is subject to the firewalls in place between it and the server. On a local installation this is not a problem, but when connecting to remote servers, there are often restrictions on the MySQL port (3306).
To overcome these limitations, it is possible to use an SSH tunnel, which is where you connect to a machine that is authorized to access the database using SSH, then connect on port 3306 from that machine to the MySQL server.
14.2.4 SQLite Tools
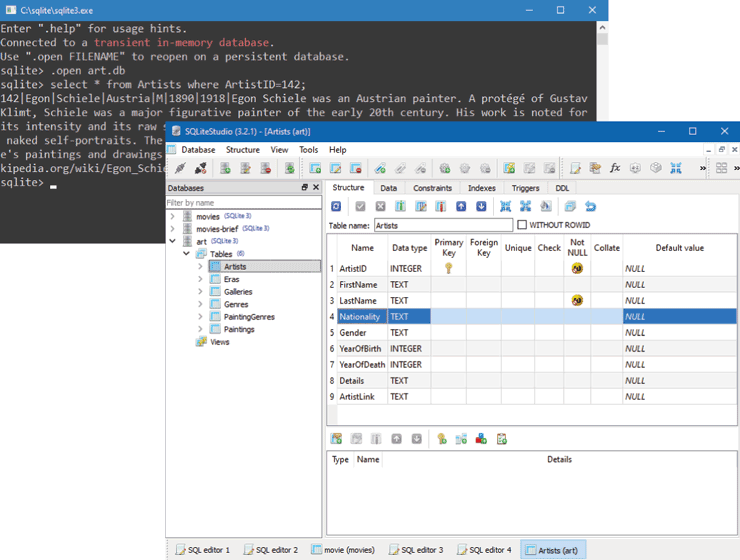
Since SQLite is an in-process file-based database engine, no additional software is required to read an existing SQLite database file. However, depending on the version of PHP on your development machine, you may need to perform other installation steps. For Node, you only need to use npm to install the sqlite3 package. If you wish to create or modify a SQLite database, you will likely want to install the sqlite3 command-line tool or the SQLiteStudio application3 (see Figure 14.8).
Figure 14.8 SQLite Tools
14.2.5 MongoDB Tools
To make use of MongoDB with Node, you will need to have access to an installation of MongoDB. Like with MySQL, you can install it on your development computer. We also recommend making use of MongoDB Atlas4, which is a cloud-based provisioning approach for MongoDB instances. The Free Tier gives you up to 2 GB of storage, which will be more than enough for learning purposes. The one complication is with populating the Atlas instance with data. The web interface only allows you to add a single JSON object at a time. If you wish to populate your database from a JSON file, you will need to use the command-line tool mongoimport, which is only available once you install MongoDB on your local machine. Alternately, you can make use of MongoDB Compass5, a stand-along GUI program analogous to MySQL Workbench that allows you to query and manipulate the data in your MongoDB database, regardless of whether it is local or on the cloud.