6.6 Chapter Summary
This chapter has covered the essential concepts and terms in web media, which include not just image files but also audio and video files as well. The chapter focused on the most important media concepts as well as the four different image formats. The chapter also covered HTML5’s support for audio and video files.
6.6.1 Key Terms
lossless compression
6.6.2 Review Questions
How do pixels differ from halftones?
How do raster images differ from vector images?
Briefly describe the RGB, CMYK, and HSL color models.
What is opacity? Provide examples of three different ways to set it in CSS.
What is color depth? What is its relationship to dithering?
With raster images, does resizing images affect image quality? Why or why not?
Describe the main features of the JPEG file format.
Explain the difference between lossy and lossless compression.
Describe the main features of the GIF file format.
Describe the main features of the PNG file format.
What is anti-aliasing and what issues does it create with transparent images?
Describe the main features of the SVG file format.
Explain the relationship between media encoding, codecs, and container formats.
How many colors do you typically need for a website?
Why is using the HSL color model a sensible choice when picking colors for a website?
6.6.3 Hands-On Practice
Project 1: Resizing
Difficulty Level: Basic
Overview
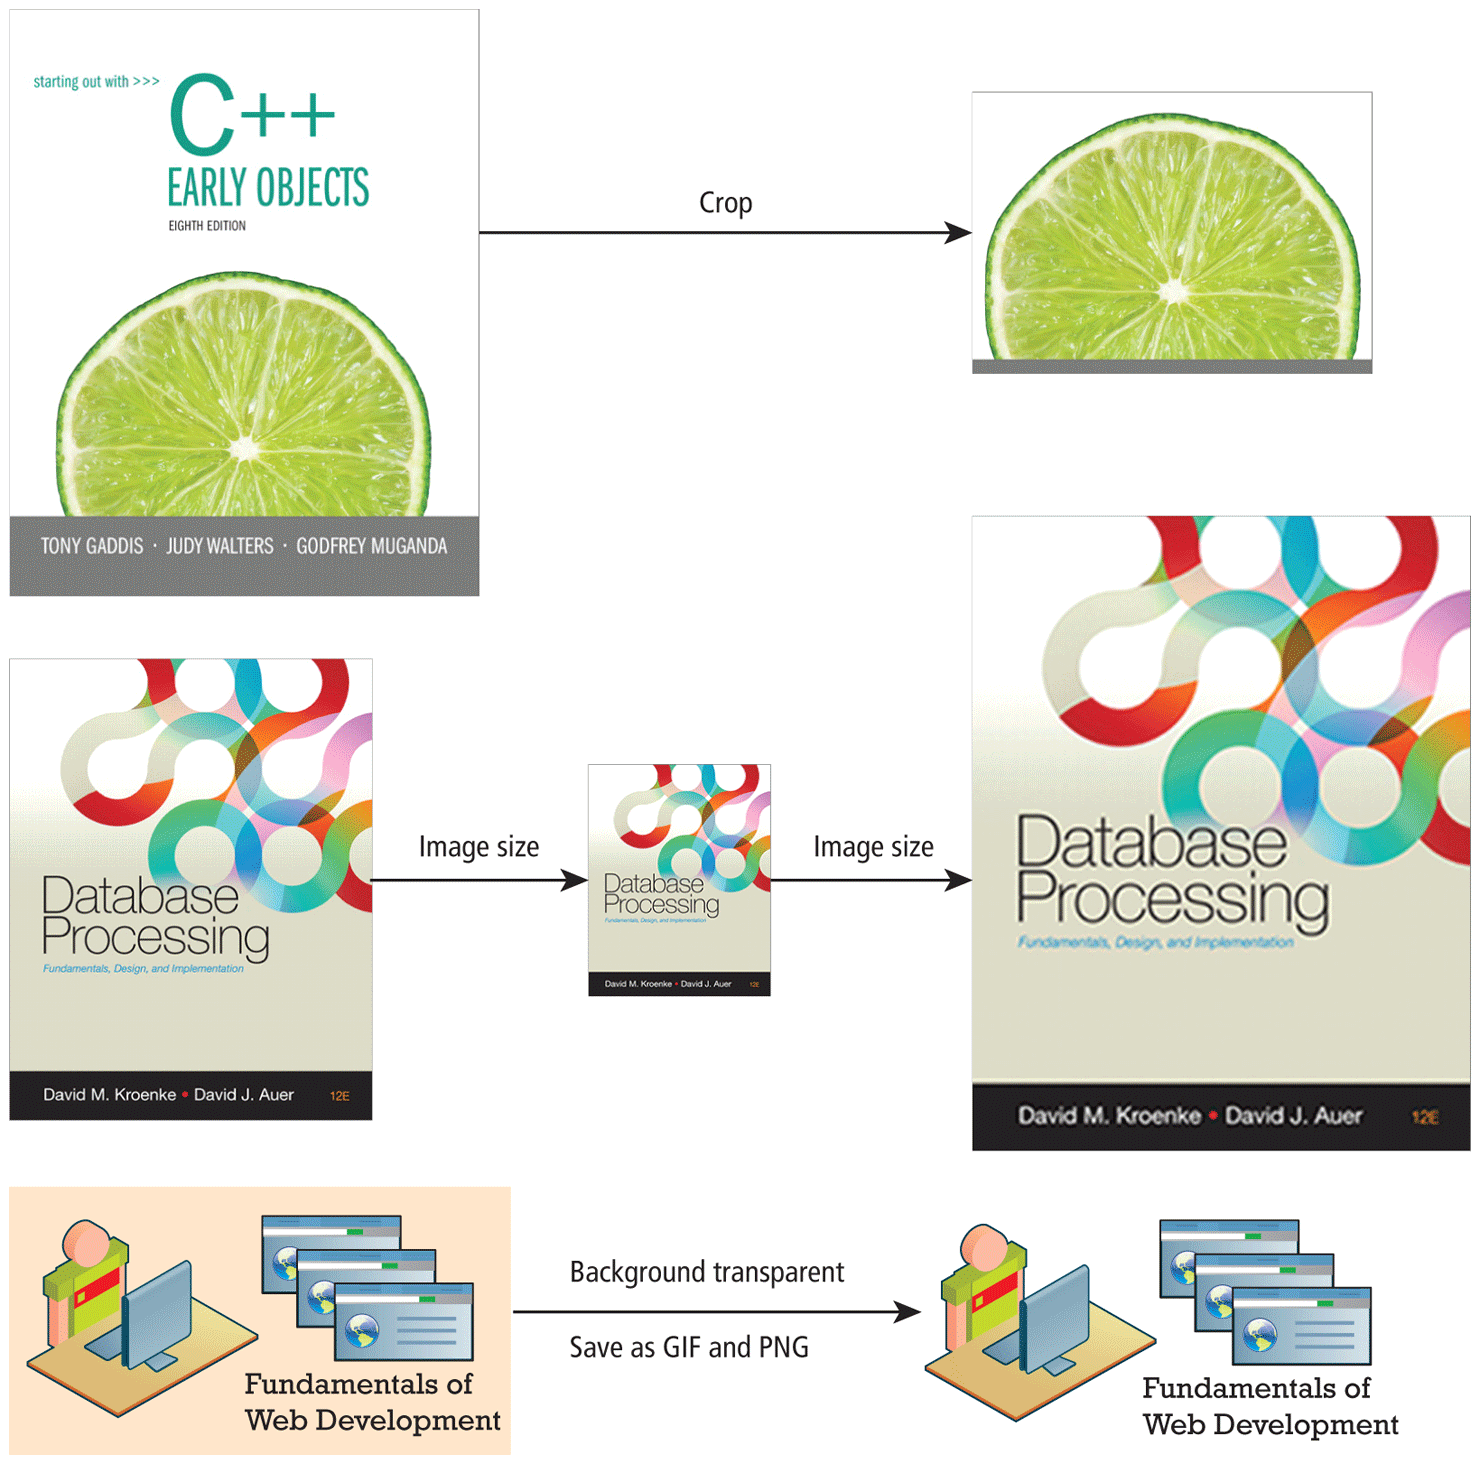
Perform the crop and resize activities shown in Figure 6.39 using whatever graphical editor you are using in your course. Open-source tools such as the Gnu Image Manipulation Program (GIMP) are free alternatives to commercial tools like Adobe’s Photoshop.
Instructions
Crop ch06-proj1-crop.jpg as indicated in Figure 6.39.
Save the cropped file as cropped.jpg.
Resize ch06-proj1-medium.jpg to . Save resized file as small.jpg. Resize small.jpg to and save file as big-from-small.jpg. Notice the dramatic loss of quality when you make a small raster image larger!
Reopen ch06-proj1-medium.jpg and resize to . Save file as big-from-medium.jpg.
Open both big-from-small.jpg and big-from-medium.jpg. Compare the quality. Notice how making a small raster image larger gives you much lower quality.
Open ch06-proj1-alias.tif. Save as a GIF and as a PNG with the background color set as the transparent color.
Figure 6.39 Completed Project 1
Testing
Create a simple HTML file that displays each of these created images. Use CSS to set the background color to blue.
Project 2: Art Store
Difficulty Level: Intermediate
Overview
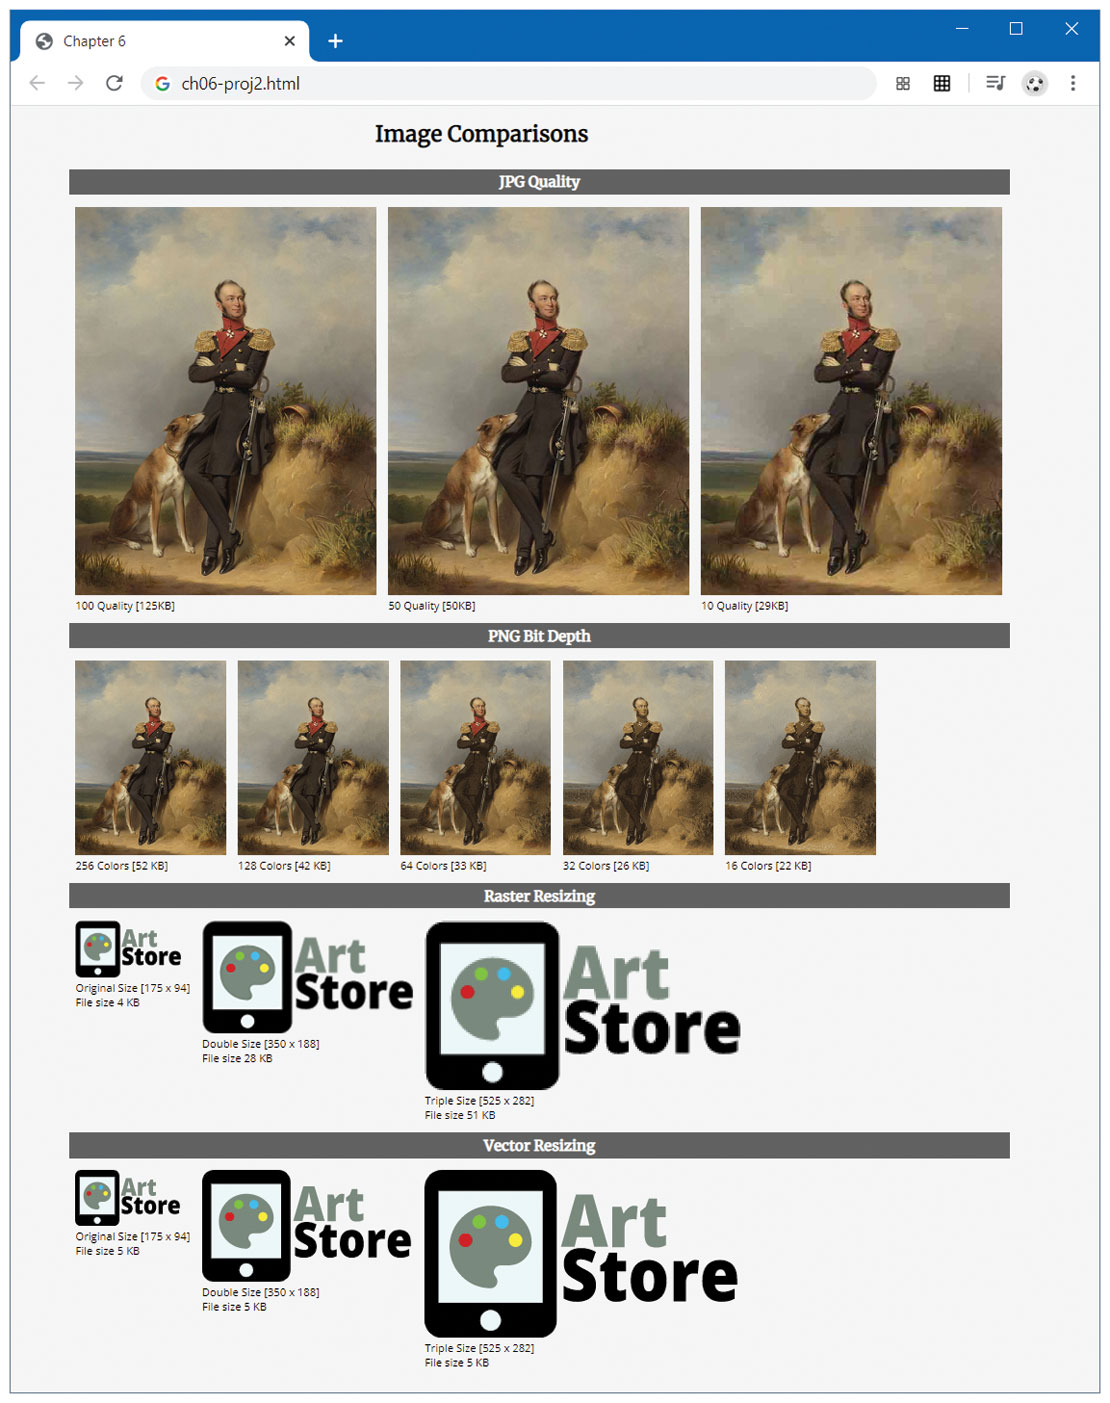
Use a graphical editor to experiment with different quality settings and color depth values.
Instructions
Open
artwork-original.tifin editor. Save three different JPG versions, one with maximum quality (100, or 10 if editor is using a 10-point scale), one with medium quality (50), and one with the lowest quality setting (10). Name the filesartwork-quality100.jpg,artwork-quality50.jpg, andartwork-quality10.jpg.Open
artwork-original.tifin the editor again. Resize to . Save five different PNG-8 (that is, 8-bit) versions, each with different color depths: 256 colors, 128 colors, 64 colors, 32 colors, and 16 colors. Name the filesartwork-256colors.png,artwork-128colors.png, etc.Open
logo-raster.pngin the editor. Resize this image: one at pixels, the other at pixels. Name the fileslogo-raster-2x.pngandlogo-raster-3x.png. Notice the dramatic loss of quality when you make a small raster image larger!Resize
ch06-proj1-medium.jpgto . Save resized file assmall.jpg. Resizesmall.jpgto and save file asbig-from-small.jpg. Notice the dramatic loss of quality when you resize an image that has been resized!Edit
ch06-proj2.htmland add the appropriate<img>tags for your new images to the<figure>elements so the page will appear as shown in Figure 6.40. Edit the<figcaption>for each to reflect the actual file size.Edit
ch06-proj2.htmland add the appropriate<img>tags for thelogo-vector.svgfile. Resize it using thewidthattribute of the<img>elements.
Testing
View
ch06-proj2.htmlin the browser. It should look similar to that shown in Figure 6.40.
Figure 6.40 Completed Project 2
Project 3: Share Your Travel Photos
Difficulty Level: Intermediate
Overview
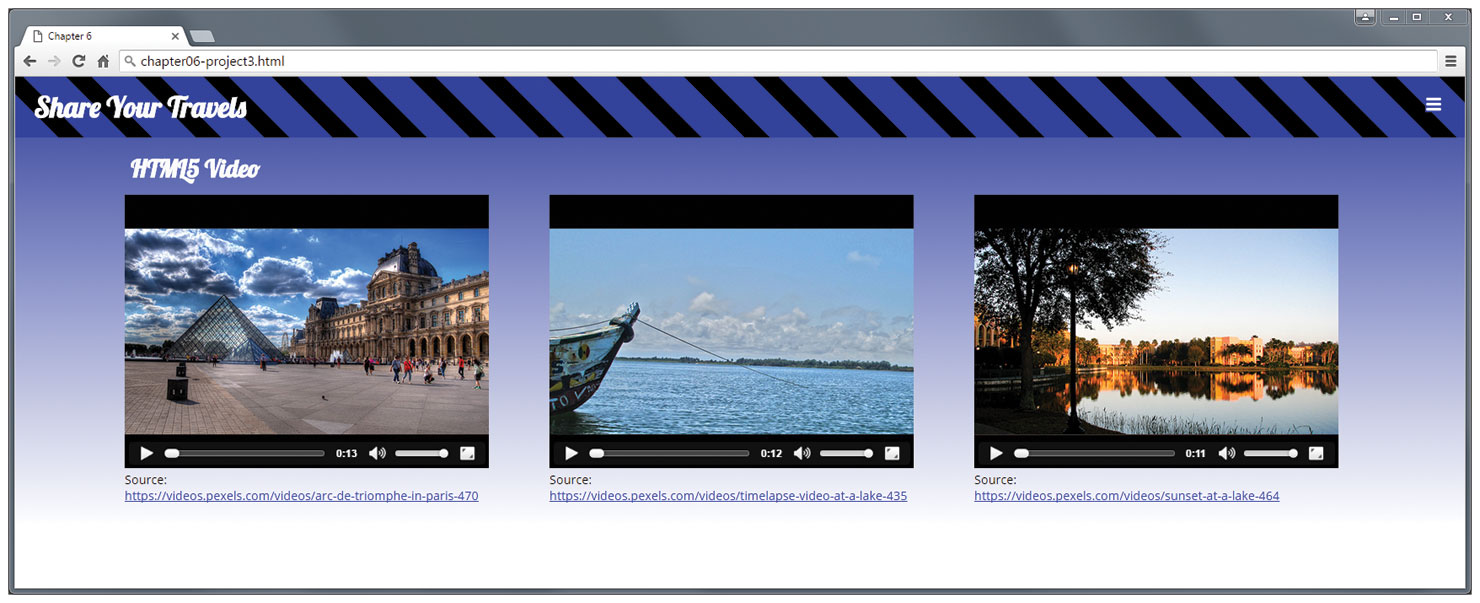
Use the <video> element along with CSS gradients. The final result will look similar to that shown in Figure 6.41.
Figure 6.41 Completed Project 3
Instructions
Open
ch06-proj3.htmlin the browser.Add a
<video>element to a<figure>element that will play eitherparis.mp4,paris.webm, orparis.ogvin the element. (The files are in themediafolder). Do the same for the lake and sunset videos. Test in different browsers.Modify the CSS file to add a gradient to the
<header>element and to the<body>element.
Testing
View
ch06-proj3.htmlin the browser. It should look similar to that shown in Figure 6.41.