5.8 Chapter Summary
This chapter examined the remaining essential HTML topics: tables and forms. Tables are properly used for presenting tabular data, though in the past, tables were also used for page layout. Forms provide a way to send information to the server and are thus an essential part of almost any real website. Both forms and tables have accessibility issues, and this chapter also examined how the accessibility of websites can be improved through the correct construction of tables and forms. Finally, this chapter covered some practical principles for designing and styling forms.
5.8.1 Key Terms
5.8.2 Review Questions
What are the elements used to define the structure of an HTML table?
Describe the purpose of a table caption and the table heading elements.
How are the
rowspanandcolspanattributes used?Create a table that correctly uses the
caption,thead,tfoot, andtbodyelements. Briefly discuss the role of each of these elements.What are the drawbacks of using tables for layout?
What is the difference between HTTP
GETandPOST? What are the advantages and disadvantages of each?What is a query string?
What is URL encoding?
What are the two different ways of passing information via the URL?
What is the purpose of the
actionattribute?In what situations would you use a radio button? A checkbox?
What are some of the main additions to form construction in HTML5?
What is web accessibility?
How can one make an HTML table more accessible? Create an example accessible table with three columns and three rows in which the first row contains table headings.
What are the most common types of user input validation?
Discuss strategies for handling validation errors. That is, what should your page do (from a user experience perspective) when an error occurs?
What strategies can one adopt when designing a form that will help reduce validation errors?
What problem does CAPTCHA address?
Validation checks should occur at multiple levels. What are the levels, and why is it important to do so?
What are some design precepts worth following when creating dta-input forms?
How is Git different than GitHub?
What does it mean that PHP is dynamically typed?
5.8.3 Hands-On Practice
Project 1: Book Rep Customer Relations Management
difficulty level: Beginners
Overview
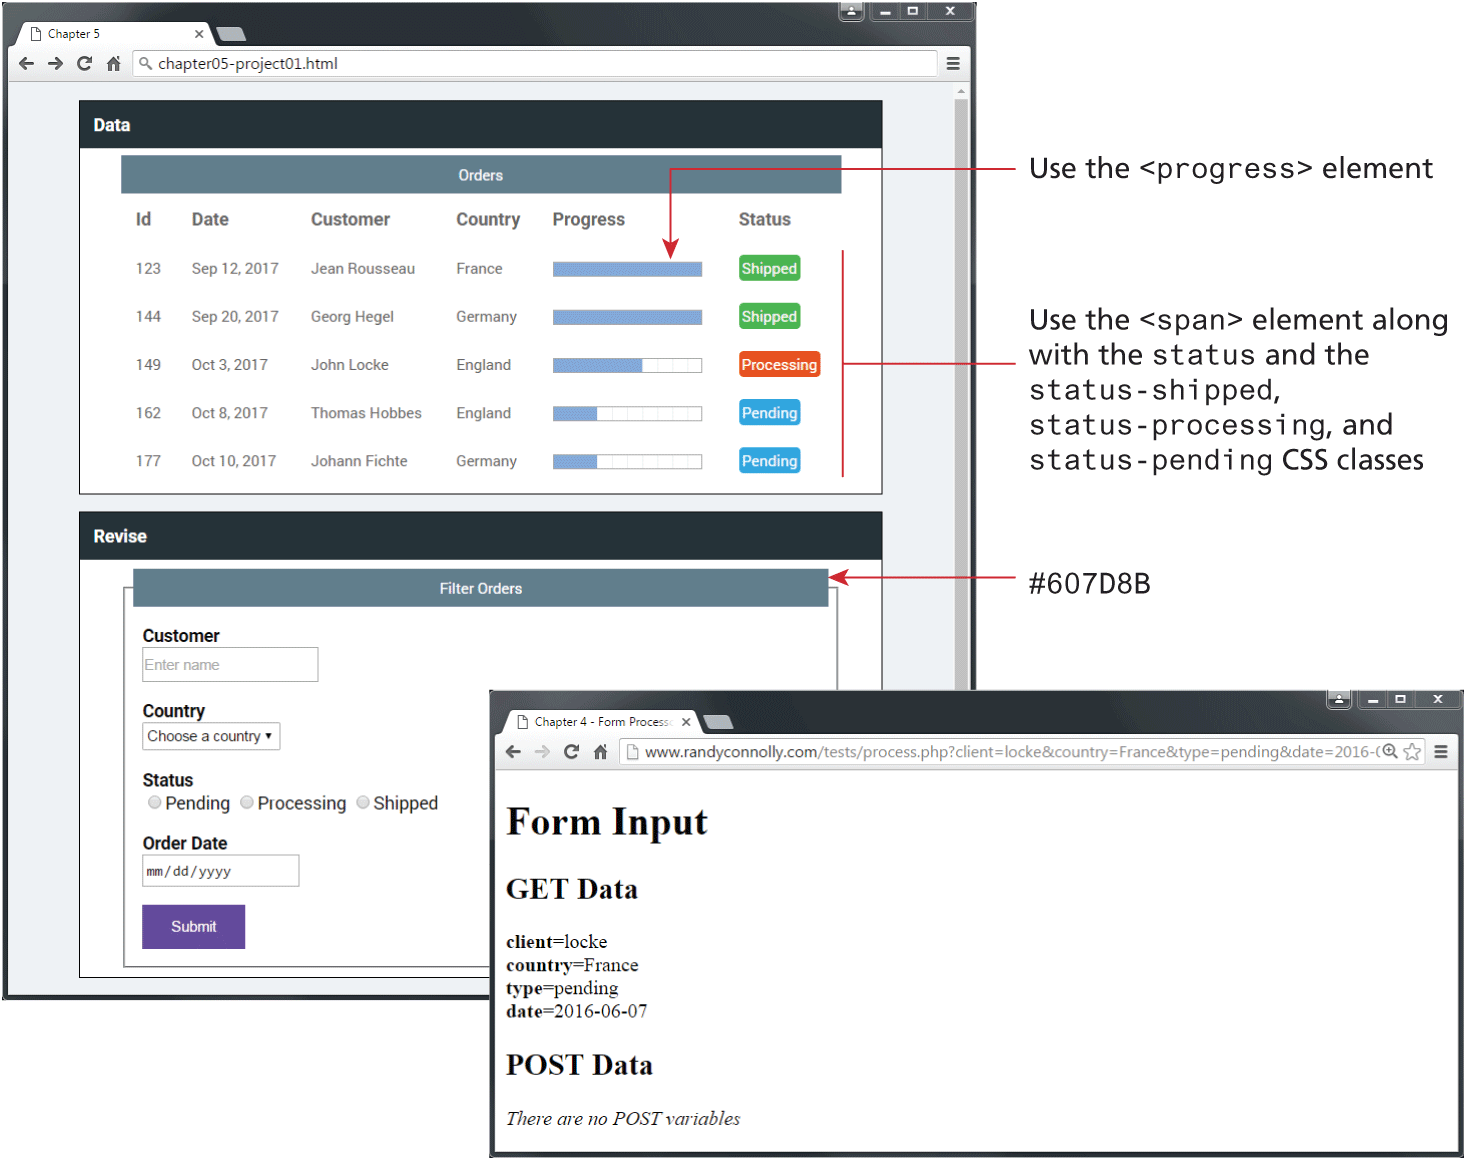
Edit ch05-proj1.html and ch05-proj1.css so the page looks similar to that shown in Figure 5.43.
Instructions
Within the first
<section>element, create the order table. Be sure to add a<caption>. The color status values are created using markup similar to<span class="status status-pending">Pending</span>. The CSS classesstatusandstatus-pendinghave already been defined for you.Style the table using CSS.
Within the second
<section>element, create the form. Be sure to use the<fieldset>and<legend>elements for the form. As well, be sure to use the appropriate accessibility features in the form.Set up the form’s
methodattribute toGETand its action attribute to https://www.randyconnolly.com/tests/process.php.
Guidance and Testing
Test the form in the browser. Verify that the output from
process.phpmatches that shown in Figure 5.43.Change the form method to
POSTand retest.
Figure 5.43 Completed Project 1
Project 2: Art Store
Difficulty Level: Intermediate
Overview
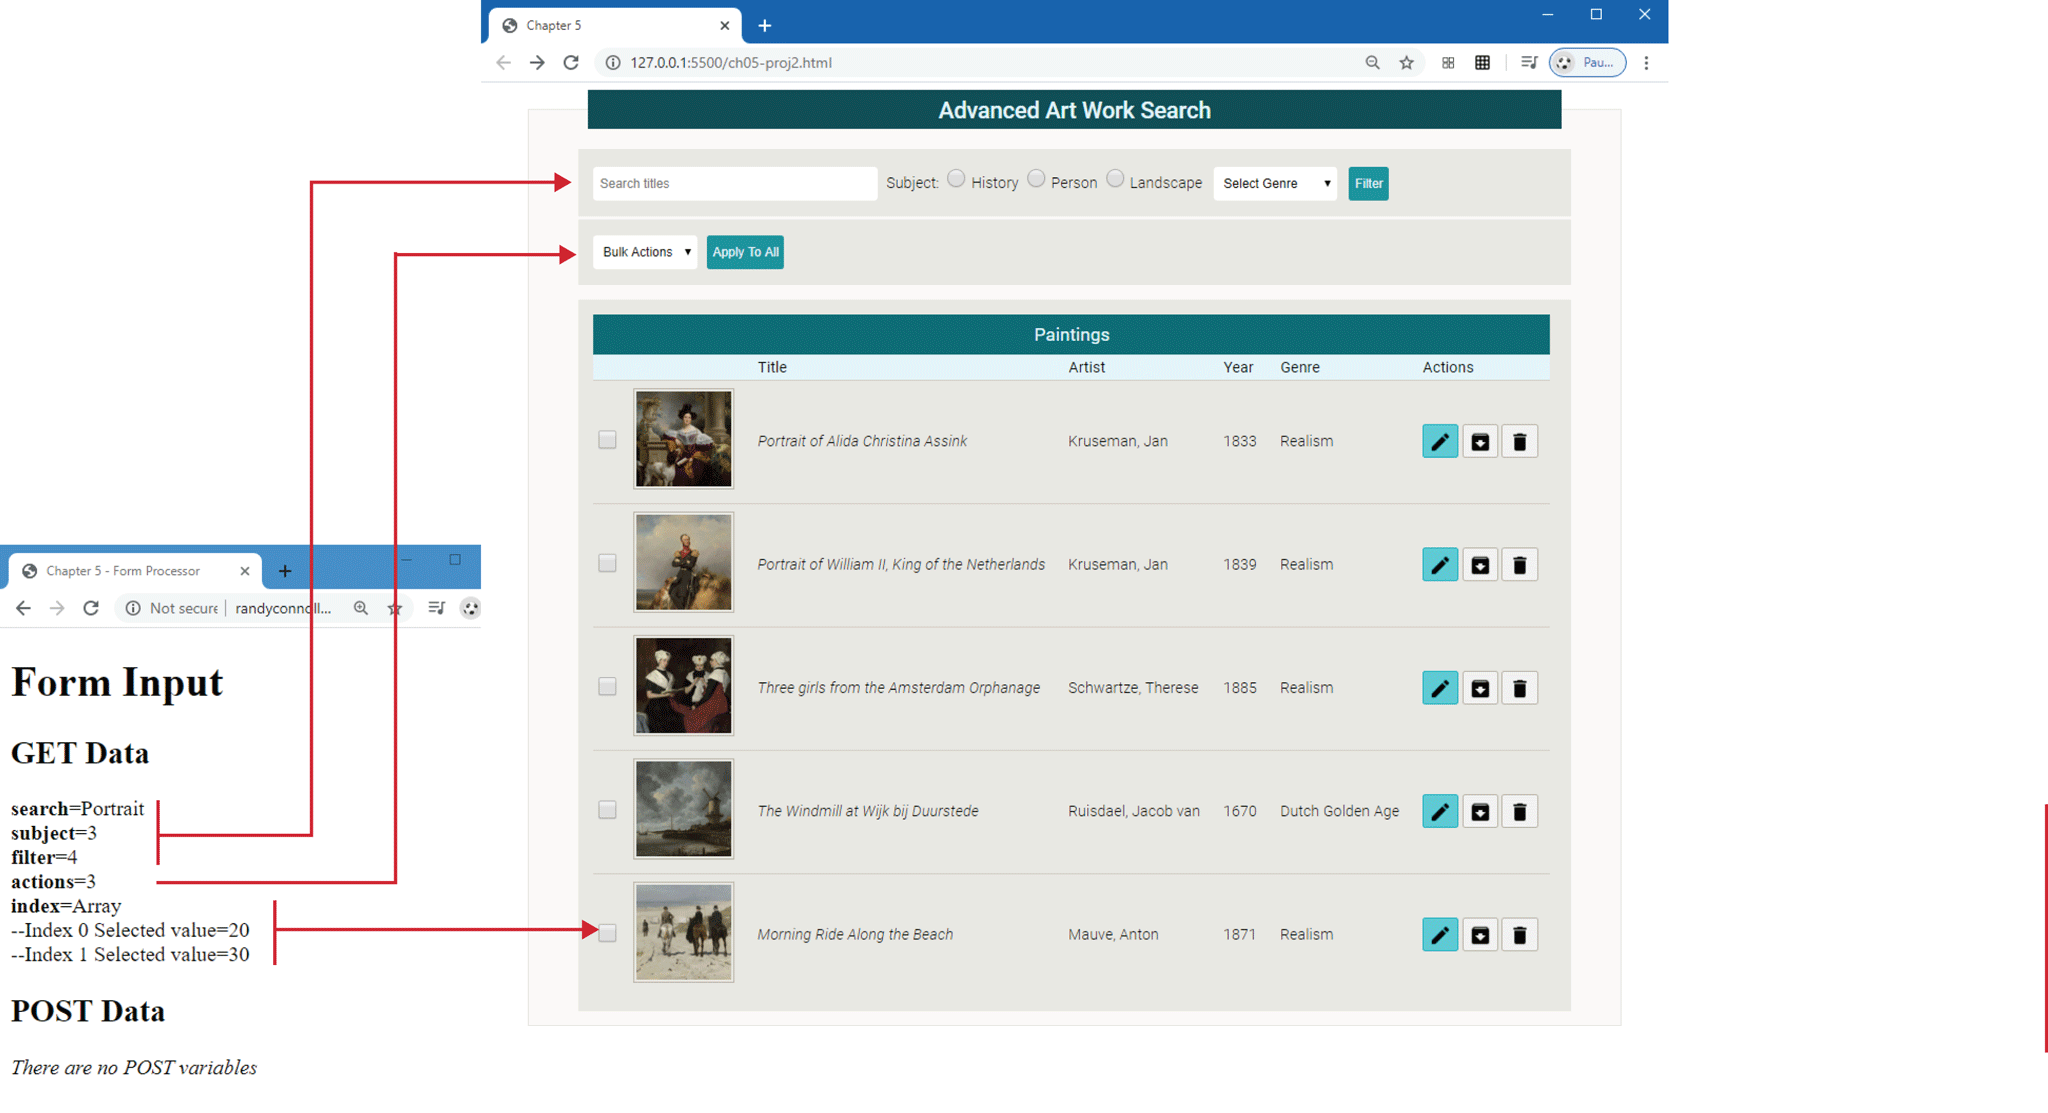
Edit ch05-proj2.html and ch05-proj2.css so the page looks similar to that shown in Figure 5.44.
Instructions
The form at the top of this page consists of a text box, a list of radio buttons, and two drop-down lists. For the Genre list, make the other choices “Baroque,” “Renaissance,” and “Realism.” For the Bulk Actions list, make the others choices “Archive,” “Edit,” “Delete,” and “Collection.” The drop-down list items should have numeric values starting with 0. Notice the placeholder text in the search box.
Create a table of paintings that looks similar to that shown in Figure 5.44. Be sure to make the table properly accessible.
The checkboxes in the table should be an array of elements—for example,
<input type="checkbox" name "index[]" value="10" />. The name and values are arbitrary, but each checkbox needs to have a unique value.The action buttons in each row are a series of
<button>containers with thetype="button"attribute (this prevents them from submitting the form) and an image within the button.Set the form’s
methodattribute toGETand itsactionattribute to https://www.randyconnolly.com/tests/process.php.While some of the styling has been provided, you will have to add some additional CSS styling. A selection of colors are defined within variables-palette-7.css.
Guidance and Testing
Test the form in the browser. Verify that the output from process.php matches that shown in Figure 5.44.
Figure 5.44 Completed Project 2
Project 3: Share Your Travel Photos
Difficulty Level: Intermediate
Overview
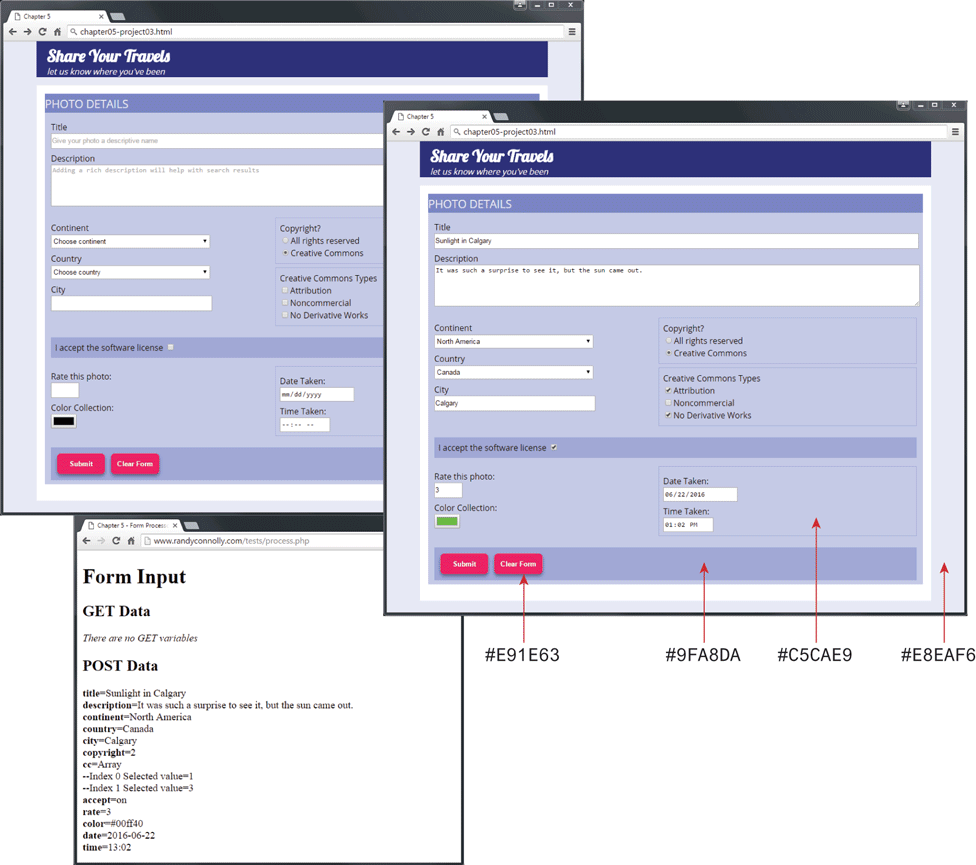
Edit ch05-proj3.html and ch05-proj3.css so the page looks similar to that shown in Figure 5.45.
Create the form and position the elements by placing them within a table. While we do not believe that this is best practice, legacy (i.e., older) sites often use tables for layout, so it may be sensible to get some experience with this approach. In the next chapter, you will learn how to use CSS for layout as a better alternative.
For the drop-down lists, add a few sensible items to each list. For the checkbox list, they should be an array of elements (see step 3 of Project 2). Notice also that this form makes use of a number of HTML5 form elements.
Figure 5.45 Completed Project 3
Guidance and Testing
Test the form in the browser. Verify that the output from process.php (see step 4 of Project 1) matches that shown in Figure 5.45. Because this form uses HTML5 input elements that are not supported by all browsers, be sure to test in more than one browser.