3.7 Chapter Summary
This chapter has provided a relatively fast-paced overview of the significant features of HTML5. Besides covering the details of most of the important HTML elements, an additional focus throughout the chapter has been on the importance of maintaining proper semantic structure when creating an HTML document. To that end, the chapter also covered the new semantic elements defined in HTML5. The next chapter will shift the focus to the visual display of HTML elements and provide the reader with a first introduction to CSS.
3.7.1 Key Terms
3.7.2 Review Questions
What is the difference between XHTML and HTML5?
Why was the XHTML 2.0 standard eventually abandoned?
What role do HTML validators play in web development?
What are the main syntax rules for XML?
What are HTML elements? What are HTML attributes?
What is semantic markup? Why is it important?
Why is removing presentation-oriented markup from one’s HTML documents considered to be a best practice? Where is the proper place to locate presentation/formatting?
What is the difference between standards mode and quirks mode? What role does the
doctypeplay with these modes?What is the difference between the
<p>and the<div>element? In what contexts should one use the one over the other?Describe the difference between a relative and an absolute reference. When should each be used?
What are the advantages of using the new HTML5 semantic elements? Disadvantages?
Are you allowed to use more than one
<heading>element in a web page? Why or why not?How are the
<main>, <section>, and <article>elements related? Be sure to describe the semantic role for each of these elements.How does the
<figure>element differ from the<img>element? In what situations does it make sense to use or not use<figure>?
3.7.3 Hands-On Projects
Hands-on practice projects are provided at the end of most chapters throughout this textbook and relate the content matter back to a few overarching examples: an art store, a travel website, a stock portfolio application, an analytics dashboard, a book catalog, and a movie browser. Not every chapter includes each example. These projects come with images, databases, and other files. The starting files can be found at the GitHub repository for the book: https://github.com/funwebdev-3rd-ed. The finished versions are available for instructors from the Pearson site for the book. Larger versions of the figures for these three projects are included with the starting files.
Project 1: Simple Single Page
Difficulty Level: Beginner
Overview
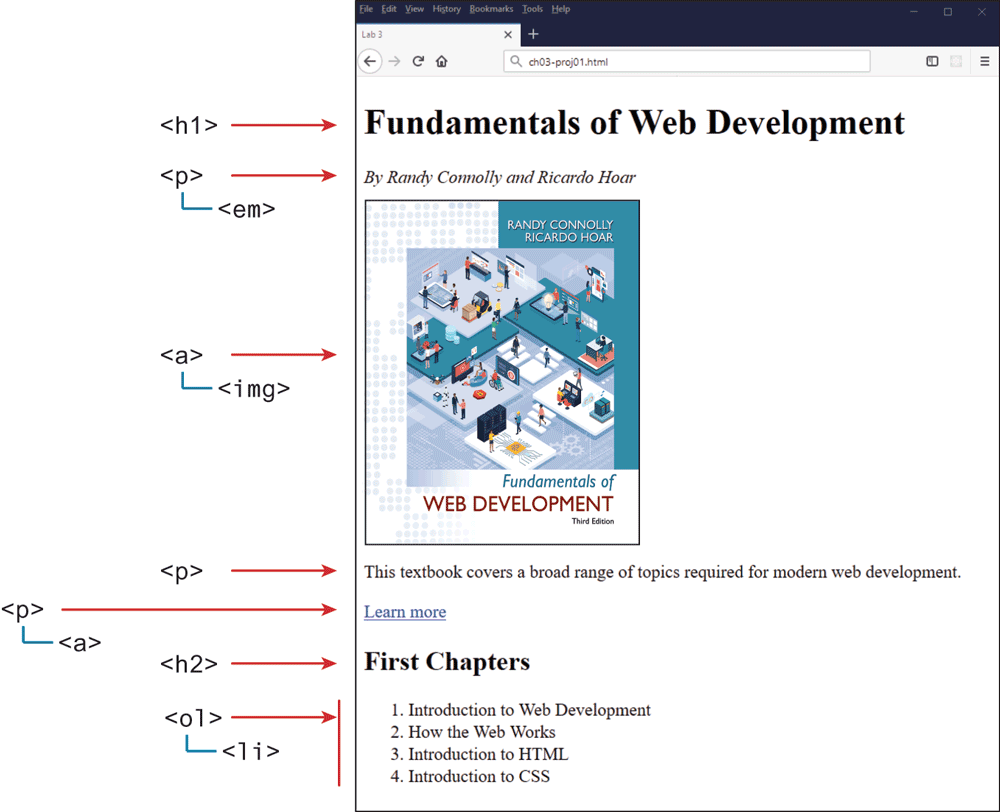
This project requires the creation of a simple web page from scratch. The final result should look similar to that shown in Figure 3.32.
Figure 3.32 Completed Project 1
Instructions
Create a new file named ch03-proj01.html in the editor of your choice.
Start by adding the basic HTML structure as shown in Figure 3.9.
In the body, add the tags and content as shown in Figure 3.32. The image is named
<cover-small.jpg>. Wrap it in anaelement whose href is set to cover-large.jpg (so when the user clicks on the smaller image, she will see a larger version of the image).For the “Learn More” link, set its href to http://www.funwebdev.com.
Guidance and Testing
Test your page in a browser and see if it looks similar to that in Figure 3.32.
Check if clicking on the book image requests the larger version.
Validate the page by either using a built-in tool in your editor, or pasting the HTML into http:/
/ validator.w3.org or https:/ / html5.validator.nu and ensure that it displays a message that indicates it contains no errors.
Project 2: Using Semantic Elements
Difficulty Level: Beginner
Overview
In this project you will be augmenting the provided page to use semantic HTML5 tags.
Instructions
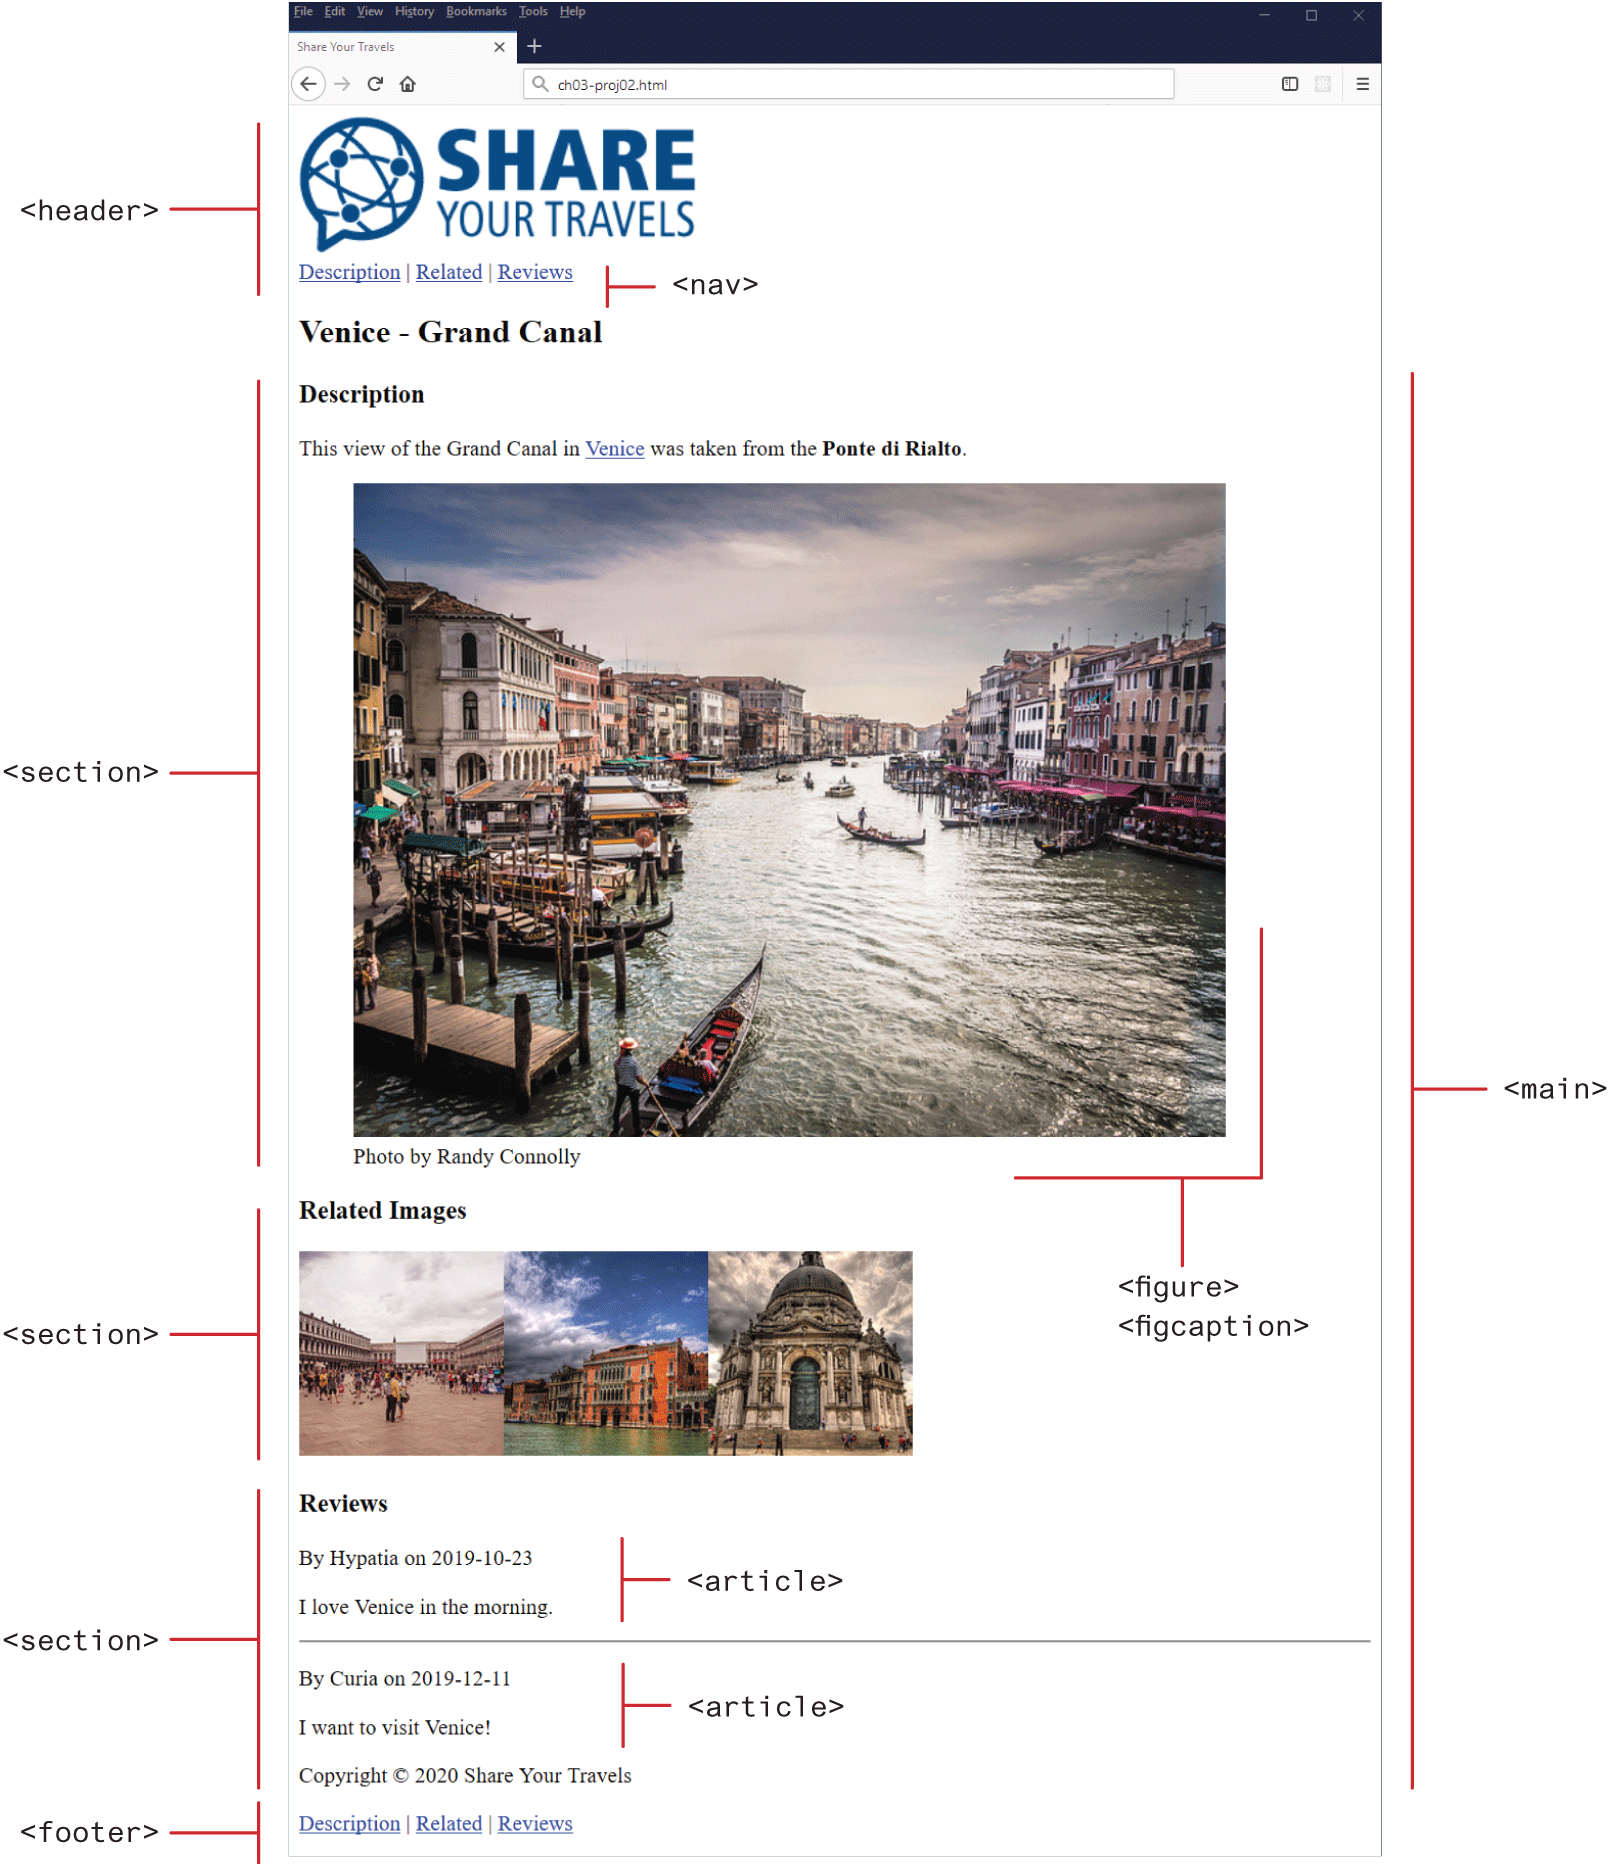
Examine ch03-proj02.html in a browser and then in the editor of your choice. In this project the look of your page will remain relatively unchanged from how it looks at the start as shown in Figure 3.33.
Figure 3.33 Completed Project 2
Reflect on why adding semantic markup is a worthwhile endeavor, even if the final, rendered page looks identical.
Replace and supplement generic HTML tags like
<div>with semantic tags like<article>,<nav>, or<footer>(for example). Some parts make sense to wrap inside a tag such as<section>or<figure>. Figure 3.33 indicates which semantic tags you should use.
Guidance and Testing
Test your page side by side with the original in a browser to make sure it looks similar.
Project 3: HTML Site
Difficulty Level: Intermediate
Overview
This project is the first step in the creation of an art store website. Unlike the previous exercises, your task is to create an HTML page from scratch based on the image in Figure 3.34.
Figure 3.34 Completed Project 3

Instructions
Create ch03-proj3.html. The
<body>should contain just seven<img>elements. The file gallery-header.jpg appears in the header of the page and then the six square images for each of the six galleries appear in the main section of the page.Wrap each of the six square gallery images in a link to their respective page (e.g., gallery1.png to gallery1.html).
Create the six gallery pages. The content for each gallery page can be found in the information.txt file. Wrap the address information in an
<address>element and make the link a working link to the correct page. Make the address and the highlights separate sections. The four highlight images for each gallery have the gallery name in the filename.Make the image (gallery-thin.png) in the header of each gallery page a link back to the main ch03-proj3.html page.
In the information file, the latitude and longitude of each gallery is provided. These numbers can be used to accurately show the gallery on a map. Later in the book, you will learn how to do so directly via JavaScript. For now, you will simply add a link in the following format:
https:/
/ maps.google.com/ ?q=LAT,LON where LAT and LON will be replaced with the latitude and longitude numbers from the information file.
Guidance and Testing
To remove spaces between smaller square museum images, put all the markup for those museum images and links on a single line. Remember that the browser interprets returns and tabs as white space.
Display ch03-proj3.html in a browser and test each of the links. Verify the map links work correctly.