14
Scoring

In this chapter, we’ll finish building Alien Invasion. We’ll add a Play button to start the game on demand and to restart the game once it ends. We’ll also change the game so it speeds up when the player moves up a level, and we’ll implement a scoring system. By the end of the chapter, you’ll know enough to start writing games that increase in difficulty as a player progresses and that feature complete scoring systems.
Adding the Play Button
In this section, we’ll add a Play button that appears before a game begins and reappears when the game ends so the player can play again.
Right now, the game begins as soon as you run alien_invasion.py. Let’s start the game in an inactive state and then prompt the player to click a Play button to begin. To do this, modify the __init__() method of AlienInvasion:
alien_invasion.py
    def __init__(self):
        """Initialize the game, and create game resources."""
        pygame.init()
        --snip--

        # Start Alien Invasion in an inactive state.
        self.game_active = False
Now the game should start in an inactive state, with no way for the player to start it until we make a Play button.
Creating a Button Class
Because Pygame doesn’t have a built-in method for making buttons, we’ll write a Button class to create a filled rectangle with a label. You can use this code to make any button in a game. Here’s the first part of the Button class; save it as button.py:
button.py
import pygame.font

class Button:
    """A class to build buttons for the game."""

❶     def __init__(self, ai_game, msg):
        """Initialize button attributes."""
        self.screen = ai_game.screen
        self.screen_rect = self.screen.get_rect()

        # Set the dimensions and properties of the button.
❷         self.width, self.height = 200, 50
        self.button_color = (0, 135, 0)
        self.text_color = (255, 255, 255)
❸         self.font = pygame.font.SysFont(None, 48)

        # Build the button's rect object and center it.
❹         self.rect = pygame.Rect(0, 0, self.width, self.height)
        self.rect.center = self.screen_rect.center

        # The button message needs to be prepped only once.
❺         self._prep_msg(msg)
First, we import the pygame.font module, which lets Pygame render text to the screen. The __init__() method takes the parameters self, the ai_game object, and msg, which contains the button’s text ❶. We set the button dimensions ❷, set button_color to color the button’s rect object dark green, and set text_color to render the text in white.
Next, we prepare a font attribute for rendering text ❸. The None argument tells Pygame to use the default font, and 48 specifies the size of the text. To center the button on the screen, we create a rect for the button ❹ and set its center attribute to match that of the screen.
Pygame works with text by rendering the string you want to display as an image. Finally, we call _prep_msg() to handle this rendering ❺.
Here’s the code for _prep_msg():
button.py
    def _prep_msg(self, msg):
        """Turn msg into a rendered image and center text on the button."""
❶         self.msg_image = self.font.render(msg, True, self.text_color,
                self.button_color)
❷         self.msg_image_rect = self.msg_image.get_rect()
        self.msg_image_rect.center = self.rect.center
The _prep_msg() method needs a self parameter and the text to be rendered as an image (msg). The call to font.render() turns the text stored in msg into an image, which we then store in self.msg_image ❶. The font.render() method also takes a Boolean value to turn antialiasing on or off (antialiasing makes the edges of the text smoother). The remaining arguments are the specified font color and background color. We set antialiasing to True and set the text background to the same color as the button. (If you don’t include a background color, Pygame will try to render the font with a transparent background.)
We center the text image on the button by creating a rect from the image and setting its center attribute to match that of the button ❷.
Finally, we create a draw_button() method that we can call to display the button onscreen:
button.py
    def draw_button(self):
        """Draw blank button and then draw message."""
        self.screen.fill(self.button_color, self.rect)
        self.screen.blit(self.msg_image, self.msg_image_rect)
We call screen.fill() to draw the rectangular portion of the button. Then we call screen.blit() to draw the text image to the screen, passing it an image and the rect object associated with the image. This completes the Button class.
Drawing the Button to the Screen
We’ll use the Button class to create a Play button in AlienInvasion. First, we’ll update the import statements:
alien_invasion.py
--snip--
from game_stats import GameStats
from button import Button
Because we need only one Play button, we’ll create the button in the __init__() method of AlienInvasion. We can place this code at the very end of __init__():
alien_invasion.py
    def __init__(self):
        --snip--
        self.game_active = False

        # Make the Play button.
        self.play_button = Button(self, "Play")
This code creates an instance of Button with the label Play, but it doesn’t draw the button to the screen. To do this, we’ll call the button’s draw_button() method in _update_screen():
alien_invasion.py
    def _update_screen(self):
        --snip--
        self.aliens.draw(self.screen)

        # Draw the play button if the game is inactive.
        if not self.game_active:
            self.play_button.draw_button()

        pygame.display.flip()
To make the Play button visible above all other elements on the screen, we draw it after all the other elements have been drawn but before flipping to a new screen. We include it in an if block, so the button only appears when the game is inactive.
Now when you run Alien Invasion, you should see a Play button in the center of the screen, as shown in Figure 14-1.
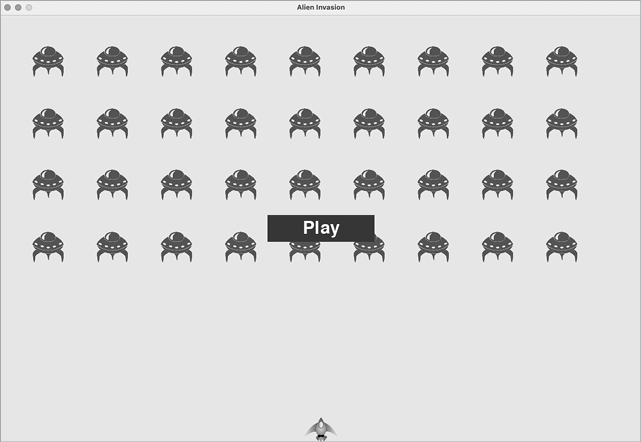
Figure 14-1: A Play button appears when the game is inactive.
Starting the Game
To start a new game when the player clicks Play, add the following elif block to the end of _check_events() to monitor mouse events over the button:
alien_invasion.py
    def _check_events(self):
        """Respond to keypresses and mouse events."""
        for event in pygame.event.get():
            if event.type == pygame.QUIT:
                --snip--
❶             elif event.type == pygame.MOUSEBUTTONDOWN:
❷                 mouse_pos = pygame.mouse.get_pos()
❸                 self._check_play_button(mouse_pos)
Pygame detects a MOUSEBUTTONDOWN event when the player clicks anywhere on the screen ❶, but we want to restrict our game to respond to mouse clicks only on the Play button. To accomplish this, we use pygame.mouse.get_pos(), which returns a tuple containing the mouse cursor’s x- and y-coordinates when the mouse button is clicked ❷. We send these values to the new method _check_play_button() ❸.
Here’s _check_play_button(), which I chose to place after _check_events():
alien_invasion.py
    def _check_play_button(self, mouse_pos):
        """Start a new game when the player clicks Play."""
❶         if self.play_button.rect.collidepoint(mouse_pos):
            self.game_active = True
We use the rect method collidepoint() to check whether the point of the mouse click overlaps the region defined by the Play button’s rect ❶. If so, we set game_active to True, and the game begins!
At this point, you should be able to start and play a full game. When the game ends, the value of game_active should become False and the Play button should reappear.
Resetting the Game
The Play button code we just wrote works the first time the player clicks Play. But it doesn’t work after the first game ends, because the conditions that caused the game to end haven’t been reset.
To reset the game each time the player clicks Play, we need to reset the game statistics, clear out the old aliens and bullets, build a new fleet, and center the ship, as shown here:
alien_invasion.py
    def _check_play_button(self, mouse_pos):
        """Start a new game when the player clicks Play."""
        if self.play_button.rect.collidepoint(mouse_pos):
            # Reset the game statistics.
❶             self.stats.reset_stats()
            self.game_active = True

            # Get rid of any remaining bullets and aliens.
❷             self.bullets.empty()
            self.aliens.empty()

            # Create a new fleet and center the ship.
❸             self._create_fleet()
            self.ship.center_ship()
We reset the game statistics ❶, which gives the player three new ships. Then we set game_active to True so the game will begin as soon as the code in this function finishes running. We empty the aliens and bullets groups ❷, and then we create a new fleet and center the ship ❸.
Now the game will reset properly each time you click Play, allowing you to play it as many times as you want!
Deactivating the Play Button
One issue with our Play button is that the button region on the screen will continue to respond to clicks even when the Play button isn’t visible. If you click the Play button area by accident after a game begins, the game will restart!
To fix this, set the game to start only when game_active is False:
alien_invasion.py
    def _check_play_button(self, mouse_pos):
        """Start a new game when the player clicks Play."""
❶         button_clicked = self.play_button.rect.collidepoint(mouse_pos)
❷         if button_clicked and not self.game_active:
            # Reset the game statistics.
            self.stats.reset_stats()
            --snip--
The flag button_clicked stores a True or False value ❶, and the game will restart only if Play is clicked and the game is not currently active ❷. To test this behavior, start a new game and repeatedly click where the Play button should be. If everything works as expected, clicking the Play button area should have no effect on the gameplay.
Hiding the Mouse Cursor
We want the mouse cursor to be visible when the game is inactive, but once play begins, it just gets in the way. To fix this, we’ll make it invisible when the game becomes active. We can do this at the end of the if block in _check_play_button():
alien_invasion.py
    def _check_play_button(self, mouse_pos):
        """Start a new game when the player clicks Play."""
        button_clicked = self.play_button.rect.collidepoint(mouse_pos)
        if button_clicked and not self.game_active:
            --snip--
            # Hide the mouse cursor.
            pygame.mouse.set_visible(False)
Passing False to set_visible() tells Pygame to hide the cursor when the mouse is over the game window.
We’ll make the cursor reappear once the game ends so the player can click Play again to begin a new game. Here’s the code to do that:
alien_invasion.py
    def _ship_hit(self):
        """Respond to ship being hit by alien."""
        if self.stats.ships_left > 0:
            --snip--
        else:
            self.game_active = False
            pygame.mouse.set_visible(True)
We make the cursor visible again as soon as the game becomes inactive, which happens in _ship_hit(). Attention to details like this makes your game more professional looking and allows the player to focus on playing, rather than figuring out the user interface.
Leveling Up
In our current game, once a player shoots down the entire alien fleet, the player reaches a new level, but the game difficulty doesn’t change. Let’s liven things up a bit and make the game more challenging by increasing the game’s speed each time a player clears the screen.
Modifying the Speed Settings
We’ll first reorganize the Settings class to group the game settings into static and dynamic ones. We’ll also make sure any settings that change during the game reset when we start a new game. Here’s the __init__() method for settings.py:
settings.py
    def __init__(self):
        """Initialize the game's static settings."""
        # Screen settings
        self.screen_width = 1200
        self.screen_height = 800
        self.bg_color = (230, 230, 230)

        # Ship settings
        self.ship_limit = 3

        # Bullet settings
        self.bullet_width = 3
        self.bullet_height = 15
        self.bullet_color = 60, 60, 60
        self.bullets_allowed = 3

        # Alien settings
        self.fleet_drop_speed = 10

        # How quickly the game speeds up
❶         self.speedup_scale = 1.1

❷         self.initialize_dynamic_settings()
We continue to initialize settings that stay constant in the __init__() method. We add a speedup_scale setting ❶ to control how quickly the game speeds up: a value of 2 will double the game speed every time the player reaches a new level; a value of 1 will keep the speed constant. A value like 1.1 should increase the speed enough to make the game challenging but not impossible. Finally, we call the initialize_dynamic_settings() method to initialize the values for attributes that need to change throughout the game ❷.
Here’s the code for initialize_dynamic_settings():
settings.py
    def initialize_dynamic_settings(self):
        """Initialize settings that change throughout the game."""
        self.ship_speed = 1.5
        self.bullet_speed = 2.5
        self.alien_speed = 1.0

        # fleet_direction of 1 represents right; -1 represents left.
        self.fleet_direction = 1
This method sets the initial values for the ship, bullet, and alien speeds. We’ll increase these speeds as the player progresses in the game and reset them each time the player starts a new game. We include fleet_direction in this method so the aliens always move right at the beginning of a new game. We don’t need to increase the value of fleet_drop_speed, because when the aliens move faster across the screen, they’ll also come down the screen faster.
To increase the speeds of the ship, bullets, and aliens each time the player reaches a new level, we’ll write a new method called increase_speed():
settings.py
    def increase_speed(self):
        """Increase speed settings."""
        self.ship_speed *= self.speedup_scale
        self.bullet_speed *= self.speedup_scale
        self.alien_speed *= self.speedup_scale
To increase the speed of these game elements, we multiply each speed setting by the value of speedup_scale.
We increase the game’s tempo by calling increase_speed() in _check_bullet_alien_collisions() when the last alien in a fleet has been shot down:
alien_invasion.py
    def _check_bullet_alien_collisions(self):
        --snip--
        if not self.aliens:
            # Destroy existing bullets and create new fleet.
            self.bullets.empty()
            self._create_fleet()
            self.settings.increase_speed()
Changing the values of the speed settings ship_speed, alien_speed, and bullet_speed is enough to speed up the entire game!
Resetting the Speed
Now we need to return any changed settings to their initial values each time the player starts a new game; otherwise, each new game would start with the increased speed settings of the previous game:
alien_invasion.py
    def _check_play_button(self, mouse_pos):
        """Start a new game when the player clicks Play."""
        button_clicked = self.play_button.rect.collidepoint(mouse_pos)
        if button_clicked and not self.game_active:
            # Reset the game settings.
            self.settings.initialize_dynamic_settings()
            --snip--
Playing Alien Invasion should be more fun and challenging now. Each time you clear the screen, the game should speed up and become slightly more difficult. If the game becomes too difficult too quickly, decrease the value of settings.speedup_scale. Or if the game isn’t challenging enough, increase the value slightly. Find a sweet spot by ramping up the difficulty in a reasonable amount of time. The first couple of screens should be easy, the next few should be challenging but doable, and subsequent screens should be almost impossibly difficult.
Scoring
Let’s implement a scoring system to track the game’s score in real time and display the high score, level, and number of ships remaining.
The score is a game statistic, so we’ll add a score attribute to GameStats:
game_stats.py
class GameStats:
    --snip--
    def reset_stats(self):
        """Initialize statistics that can change during the game."""
        self.ships_left = self.ai_settings.ship_limit
        self.score = 0
To reset the score each time a new game starts, we initialize score in reset_stats() rather than __init__().
Displaying the Score
To display the score on the screen, we first create a new class, Scoreboard. For now, this class will just display the current score. Eventually, we’ll use it to report the high score, level, and number of ships remaining as well. Here’s the first part of the class; save it as scoreboard.py:
scoreboard.py
import pygame.font

class Scoreboard:
    """A class to report scoring information."""

❶     def __init__(self, ai_game):
        """Initialize scorekeeping attributes."""
        self.screen = ai_game.screen
        self.screen_rect = self.screen.get_rect()
        self.settings = ai_game.settings
        self.stats = ai_game.stats

        # Font settings for scoring information.
❷         self.text_color = (30, 30, 30)
❸         self.font = pygame.font.SysFont(None, 48)

        # Prepare the initial score image.
❹         self.prep_score()
Because Scoreboard writes text to the screen, we begin by importing the pygame.font module. Next, we give __init__() the ai_game parameter so it can access the settings, screen, and stats objects, which it will need to report the values we’re tracking ❶. Then we set a text color ❷ and instantiate a font object ❸.
To turn the text to be displayed into an image, we call prep_score() ❹, which we define here:
scoreboard.py
    def prep_score(self):
        """Turn the score into a rendered image."""
❶         score_str = str(self.stats.score)
❷         self.score_image = self.font.render(score_str, True,
                self.text_color, self.settings.bg_color)

        # Display the score at the top right of the screen.
❸         self.score_rect = self.score_image.get_rect()
❹         self.score_rect.right = self.screen_rect.right - 20
❺         self.score_rect.top = 20
In prep_score(), we turn the numerical value stats.score into a string ❶ and then pass this string to render(), which creates the image ❷. To display the score clearly onscreen, we pass the screen’s background color and the text color to render().
We’ll position the score in the upper-right corner of the screen and have it expand to the left as the score increases and the width of the number grows. To make sure the score always lines up with the right side of the screen, we create a rect called score_rect ❸ and set its right edge 20 pixels from the right edge of the screen ❹. We then place the top edge 20 pixels down from the top of the screen ❺.
Then we create a show_score() method to display the rendered score image:
scoreboard.py
    def show_score(self):
        """Draw score to the screen."""
        self.screen.blit(self.score_image, self.score_rect)
This method draws the score image onscreen at the location score_rect specifies.
Making a Scoreboard
To display the score, we’ll create a Scoreboard instance in AlienInvasion. First, let’s update the import statements:
alien_invasion.py
--snip--
from game_stats import GameStats
from scoreboard import Scoreboard
--snip--
Next, we make an instance of Scoreboard in __init__():
alien_invasion.py
    def __init__(self):
        --snip--
        pygame.display.set_caption("Alien Invasion")

        # Create an instance to store game statistics,
        #   and create a scoreboard.
        self.stats = GameStats(self)
        self.sb = Scoreboard(self)
        --snip--
Then we draw the scoreboard onscreen in _update_screen():
alien_invasion.py
    def _update_screen(self):
        --snip--
        self.aliens.draw(self.screen)

        # Draw the score information.
        self.sb.show_score()

        # Draw the play button if the game is inactive.
        --snip--
We call show_score() just before we draw the Play button.
When you run Alien Invasion now, a 0 should appear at the top right of the screen. (At this point, we just want to make sure the score appears in the right place before developing the scoring system further.) Figure 14-2 shows the score as it appears before the game starts.
Next, we’ll assign point values to each alien!

Figure 14-2: The score appears at the top-right corner of the screen.
Updating the Score as Aliens Are Shot Down
To write a live score onscreen, we update the value of stats.score whenever an alien is hit, and then call prep_score() to update the score image. But first, let’s determine how many points a player gets each time they shoot down an alien:
settings.py
    def initialize_dynamic_settings(self):
        --snip--

        # Scoring settings
        self.alien_points = 50
We’ll increase each alien’s point value as the game progresses. To make sure this point value is reset each time a new game starts, we set the value in initialize_dynamic_settings().
Let’s update the score in _check_bullet_alien_collisions() each time an alien is shot down:
alien_invasion.py
    def _check_bullet_alien_collisions(self):
        """Respond to bullet-alien collisions."""
        # Remove any bullets and aliens that have collided.
        collisions = pygame.sprite.groupcollide(
                self.bullets, self.aliens, True, True)

        if collisions:
            self.stats.score += self.settings.alien_points
            self.sb.prep_score()
        --snip--
When a bullet hits an alien, Pygame returns a collisions dictionary. We check whether the dictionary exists, and if it does, the alien’s value is added to the score. We then call prep_score() to create a new image for the updated score.
Now when you play Alien Invasion, you should be able to rack up points!
Resetting the Score
Right now, we’re only prepping a new score after an alien has been hit, which works for most of the game. But when we start a new game, we’ll still see our score from the old game until the first alien is hit.
We can fix this by prepping the score when starting a new game:
alien_invasion.py
    def _check_play_button(self, mouse_pos):
        --snip--
        if button_clicked and not self.game_active:
            --snip--
            # Reset the game statistics.
            self.stats.reset_stats()
            self.sb.prep_score()
            --snip--
We call prep_score() after resetting the game stats when starting a new game. This preps the scoreboard with a score of 0.
Making Sure to Score All Hits
As currently written, our code could miss scoring for some aliens. For example, if two bullets collide with aliens during the same pass through the loop or if we make an extra-wide bullet to hit multiple aliens, the player will only receive points for hitting one of the aliens. To fix this, let’s refine the way that bullet-alien collisions are detected.
In _check_bullet_alien_collisions(), any bullet that collides with an alien becomes a key in the collisions dictionary. The value associated with each bullet is a list of aliens it has collided with. We loop through the values in the collisions dictionary to make sure we award points for each alien hit:
alien_invasion.py
    def _check_bullet_alien_collisions(self):
        --snip--
        if collisions:
            for aliens in collisions.values():
                self.stats.score += self.settings.alien_points * len(aliens)
            self.sb.prep_score()
    --snip--
If the collisions dictionary has been defined, we loop through all values in the dictionary. Remember that each value is a list of aliens hit by a single bullet. We multiply the value of each alien by the number of aliens in each list and add this amount to the current score. To test this, change the width of a bullet to 300 pixels and verify that you receive points for each alien you hit with your extra-wide bullets; then return the bullet width to its normal value.
Increasing Point Values
Because the game gets more difficult each time a player reaches a new level, aliens in later levels should be worth more points. To implement this functionality, we’ll add code to increase the point value when the game’s speed increases:
settings.py
class Settings:
    """A class to store all settings for Alien Invasion."""

    def __init__(self):
        --snip--
        # How quickly the game speeds up
        self.speedup_scale = 1.1
        # How quickly the alien point values increase
❶         self.score_scale = 1.5

        self.initialize_dynamic_settings()

    def initialize_dynamic_settings(self):
        --snip--

    def increase_speed(self):
        """Increase speed settings and alien point values."""
        self.ship_speed *= self.speedup_scale
        self.bullet_speed *= self.speedup_scale
        self.alien_speed *= self.speedup_scale

❷         self.alien_points = int(self.alien_points * self.score_scale)
We define a rate at which points increase, which we call score_scale ❶. A small increase in speed (1.1) makes the game more challenging quickly. But to see a more notable difference in scoring, we need to change the alien point value by a larger amount (1.5). Now when we increase the game’s speed, we also increase the point value of each hit ❷. We use the int() function to increase the point value by whole integers.
To see the value of each alien, add a print() call to the increase_speed() method in Settings:
settings.py
    def increase_speed(self):
        --snip--
        self.alien_points = int(self.alien_points * self.score_scale)
        print(self.alien_points)
The new point value should appear in the terminal every time you reach a new level.
Rounding the Score
Most arcade-style shooting games report scores as multiples of 10, so let’s follow that lead with our scores. Also, let’s format the score to include comma separators in large numbers. We’ll make this change in Scoreboard:
scoreboard.py
    def prep_score(self):
        """Turn the score into a rendered image."""
        rounded_score = round(self.stats.score, -1)
        score_str = f"{rounded_score:,}"
        self.score_image = self.font.render(score_str, True,
                self.text_color, self.settings.bg_color)
        --snip--
The round() function normally rounds a float to a set number of decimal places given as the second argument. However, when you pass a negative number as the second argument, round() will round the value to the nearest 10, 100, 1,000, and so on. This code tells Python to round the value of stats.score to the nearest 10 and assign it to rounded_score.
We then use a format specifier in the f-string for the score. A format specifier is a special sequence of characters that modifies the way a variable’s value is presented. In this case the sequence :, tells Python to insert commas at appropriate places in the numerical value that’s provided. This results in strings like 1,000,000 instead of 1000000.
Now when you run the game, you should see a neatly formatted, rounded score even when you rack up lots of points, as shown in Figure 14-3.
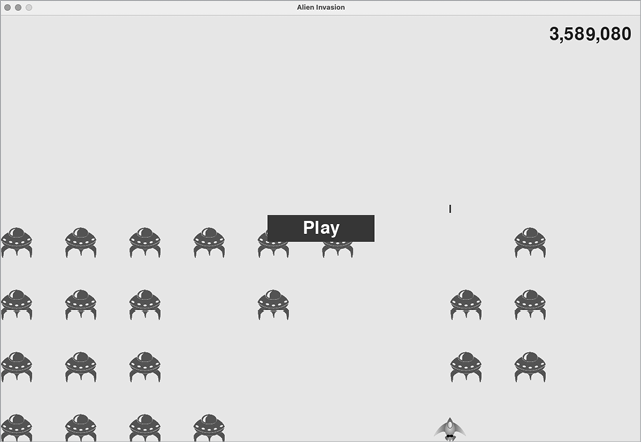
Figure 14-3: A rounded score with comma separators
High Scores
Every player wants to beat a game’s high score, so let’s track and report high scores to give players something to work toward. We’ll store high scores in GameStats:
game_stats.py
    def __init__(self, ai_game):
        --snip--
        # High score should never be reset.
        self.high_score = 0
Because the high score should never be reset, we initialize high_score in __init__() rather than in reset_stats().
Next, we’ll modify Scoreboard to display the high score. Let’s start with the __init__() method:
scoreboard.py
    def __init__(self, ai_game):
        --snip--
        # Prepare the initial score images.
        self.prep_score()
❶         self.prep_high_score()
The high score will be displayed separately from the score, so we need a new method, prep_high_score(), to prepare the high-score image ❶.
Here’s the prep_high_score() method:
scoreboard.py
    def prep_high_score(self):
        """Turn the high score into a rendered image."""
❶         high_score = round(self.stats.high_score, -1)
        high_score_str = f"{high_score:,}"
❷         self.high_score_image = self.font.render(high_score_str, True,
                self.text_color, self.settings.bg_color)

        # Center the high score at the top of the screen.
        self.high_score_rect = self.high_score_image.get_rect()
❸         self.high_score_rect.centerx = self.screen_rect.centerx
❹         self.high_score_rect.top = self.score_rect.top
We round the high score to the nearest 10 and format it with commas ❶. We then generate an image from the high score ❷, center the high score rect horizontally ❸, and set its top attribute to match the top of the score image ❹.
The show_score() method now draws the current score at the top right and the high score at the top center of the screen:
scoreboard.py
    def show_score(self):
        """Draw score to the screen."""
        self.screen.blit(self.score_image, self.score_rect)
        self.screen.blit(self.high_score_image, self.high_score_rect)
To check for high scores, we’ll write a new method, check_high_score(), in Scoreboard:
scoreboard.py
    def check_high_score(self):
        """Check to see if there's a new high score."""
        if self.stats.score > self.stats.high_score:
            self.stats.high_score = self.stats.score
            self.prep_high_score()
The method check_high_score() checks the current score against the high score. If the current score is greater, we update the value of high_score and call prep_high_score() to update the high score’s image.
We need to call check_high_score() each time an alien is hit after updating the score in _check_bullet_alien_collisions():
alien_invasion.py
    def _check_bullet_alien_collisions(self):
        --snip--
        if collisions:
            for aliens in collisions.values():
                self.stats.score += self.settings.alien_points * len(aliens)
            self.sb.prep_score()
            self.sb.check_high_score()
        --snip--
We call check_high_score() when the collisions dictionary is present, and we do so after updating the score for all the aliens that have been hit.
The first time you play Alien Invasion, your score will be the high score, so it will be displayed as the current score and the high score. But when you start a second game, your high score should appear in the middle and your current score should appear at the right, as shown in Figure 14-4.
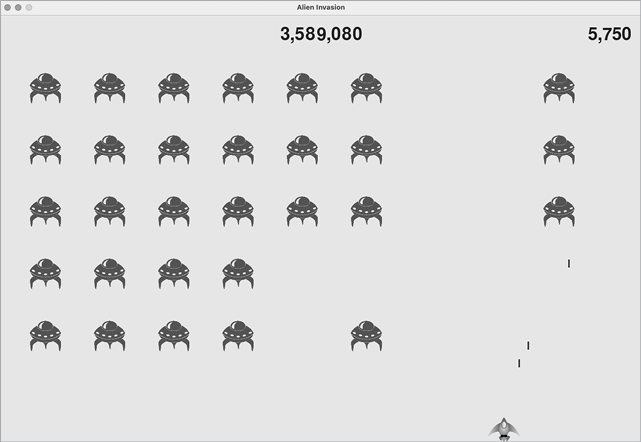
Figure 14-4: The high score is shown at the top center of the screen.
Displaying the Level
To display the player’s level in the game, we first need an attribute in GameStats representing the current level. To reset the level at the start of each new game, initialize it in reset_stats():
game_stats.py
    def reset_stats(self):
        """Initialize statistics that can change during the game."""
        self.ships_left = self.settings.ship_limit
        self.score = 0
        self.level = 1
To have Scoreboard display the current level, we call a new method, prep_level(), from __init__():
scoreboard.py
    def __init__(self, ai_game):
        --snip--
        self.prep_high_score()
        self.prep_level()
Here’s prep_level():
scoreboard.py
    def prep_level(self):
        """Turn the level into a rendered image."""
        level_str = str(self.stats.level)
❶         self.level_image = self.font.render(level_str, True,
                self.text_color, self.settings.bg_color)

        # Position the level below the score.
        self.level_rect = self.level_image.get_rect()
❷         self.level_rect.right = self.score_rect.right
❸         self.level_rect.top = self.score_rect.bottom + 10
The prep_level() method creates an image from the value stored in stats.level ❶ and sets the image’s right attribute to match the score’s right attribute ❷. It then sets the top attribute 10 pixels beneath the bottom of the score image to leave space between the score and the level ❸.
We also need to update show_score():
scoreboard.py
    def show_score(self):
        """Draw scores and level to the screen."""
        self.screen.blit(self.score_image, self.score_rect)
        self.screen.blit(self.high_score_image, self.high_score_rect)
        self.screen.blit(self.level_image, self.level_rect)
This new line draws the level image to the screen.
We’ll increment stats.level and update the level image in _check_bullet_alien_collisions():
alien_invasion.py
    def _check_bullet_alien_collisions(self):
        --snip--
        if not self.aliens:
            # Destroy existing bullets and create new fleet.
            self.bullets.empty()
            self._create_fleet()
            self.settings.increase_speed()

            # Increase level.
            self.stats.level += 1
            self.sb.prep_level()
If a fleet is destroyed, we increment the value of stats.level and call prep_level() to make sure the new level displays correctly.
To ensure the level image updates properly at the start of a new game, we also call prep_level() when the player clicks the Play button:
alien_invasion.py
    def _check_play_button(self, mouse_pos):
        --snip--
        if button_clicked and not self.game_active:
            --snip--
            self.sb.prep_score()
            self.sb.prep_level()
            --snip--
We call prep_level() right after calling prep_score().
Now you’ll see how many levels you’ve completed, as shown in Figure 14-5.
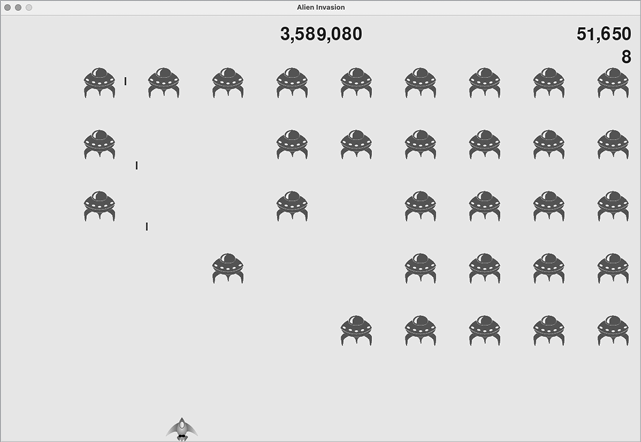
Figure 14-5: The current level appears just below the current score.
Displaying the Number of Ships
Finally, let’s display the number of ships the player has left, but this time, let’s use a graphic. To do so, we’ll draw ships in the upper-left corner of the screen to represent how many ships are left, just as many classic arcade games do.
First, we need to make Ship inherit from Sprite so we can create a group of ships:
ship.py
import pygame
from pygame.sprite import Sprite

❶ class Ship(Sprite):
    """A class to manage the ship."""

    def __init__(self, ai_game):
        """Initialize the ship and set its starting position."""
❷         super().__init__()
        --snip--
Here we import Sprite, make sure Ship inherits from Sprite ❶, and call super() at the beginning of __init__() ❷.
Next, we need to modify Scoreboard to create a group of ships we can display. Here are the import statements for Scoreboard:
scoreboard.py
import pygame.font
from pygame.sprite import Group

from ship import Ship
Because we’re making a group of ships, we import the Group and Ship classes.
Here’s __init__():
scoreboard.py
    def __init__(self, ai_game):
        """Initialize scorekeeping attributes."""
        self.ai_game = ai_game
        self.screen = ai_game.screen
        --snip--
        self.prep_level()
        self.prep_ships()
We assign the game instance to an attribute, because we’ll need it to create some ships. We call prep_ships() after the call to prep_level().
Here’s prep_ships():
scoreboard.py
    def prep_ships(self):
        """Show how many ships are left."""
❶         self.ships = Group()
❷         for ship_number in range(self.stats.ships_left):
            ship = Ship(self.ai_game)
❸             ship.rect.x = 10 + ship_number * ship.rect.width
❹             ship.rect.y = 10
❺             self.ships.add(ship)
The prep_ships() method creates an empty group, self.ships, to hold the ship instances ❶. To fill this group, a loop runs once for every ship the player has left ❷. Inside the loop, we create a new ship and set each ship’s x-coordinate value so the ships appear next to each other with a 10-pixel margin on the left side of the group of ships ❸. We set the y-coordinate value 10 pixels down from the top of the screen so the ships appear in the upper-left corner of the screen ❹. Then we add each new ship to the group ships ❺.
Now we need to draw the ships to the screen:
scoreboard.py
    def show_score(self):
        """Draw scores, level, and ships to the screen."""
        self.screen.blit(self.score_image, self.score_rect)
        self.screen.blit(self.high_score_image, self.high_score_rect)
        self.screen.blit(self.level_image, self.level_rect)
        self.ships.draw(self.screen)
To display the ships on the screen, we call draw() on the group, and Pygame draws each ship.
To show the player how many ships they have to start with, we call prep_ships() when a new game starts. We do this in _check_play_button() in AlienInvasion:
alien_invasion.py
    def _check_play_button(self, mouse_pos):
        --snip--
        if button_clicked and not self.game_active:
            --snip--
            self.sb.prep_level()
            self.sb.prep_ships()
            --snip--
We also call prep_ships() when a ship is hit, to update the display of ship images when the player loses a ship:
alien_invasion.py
    def _ship_hit(self):
        """Respond to ship being hit by alien."""
        if self.stats.ships_left > 0:
            # Decrement ships_left, and update scoreboard.
            self.stats.ships_left -= 1
            self.sb.prep_ships()
            --snip--
We call prep_ships() after decreasing the value of ships_left, so the correct number of remaining ships displays each time a ship is destroyed.
Figure 14-6 shows the complete scoring system, with the remaining ships displayed at the top left of the screen.
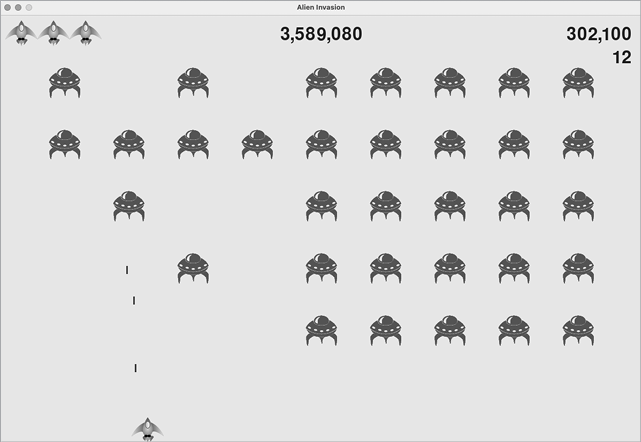
Figure 14-6: The complete scoring system for Alien Invasion
Summary
In this chapter, you learned how to implement a Play button to start a new game. You also learned how to detect mouse events and hide the cursor in active games. You can use what you’ve learned to create other buttons, like a Help button to display instructions on how to play your games. You also learned how to modify the speed of a game as it progresses, implement a progressive scoring system, and display information in textual and nontextual ways.