Deploying to Netlify
Netlify is a commercial platform for hosting static websites and single page applications. To deploy to Netlify, you need to push your code to a remote Git repository. But first, you need to set up a local Git repository and get version control in place. Once that’s done, you’ll push your local repository to a remote repository so you can integrate it with other services.
If you don’t have Git installed locally, follow the installation instructions on the official Git website.[39] Then, follow the instructions they provide to configure your client.[40]
Once Git is installed, navigate to your project directory and run the git init command to convert your directory into a new Git repository:
| | $ git init |
Your Git repository should only contain the code and files for your site, which means you won’t include the node_modules and public directories in your repository. You can specify files to ignore in a file named .gitignore.
Create a .gitignore file in the root of your project that excludes the following folders:
| | # exclude JS dependencies |
| | node_modules |
| | |
| | # exclude Hugo's output |
| | public |
Save the .gitignore file, and then add the rest of the files to your repository:
| | $ git add . |
This adds all of the files in the current directory and all child directories, except for those you’ve ignored.
Keep Hugo With Your Site | |
|---|---|

|
Since Hugo is a single binary, you could copy the Hugo executable to the root folder of your project and run it from there with ./hugo, ensuring you’ll always have the version of Hugo you used to build your site. You could even check it in to version control so you can pull down everything you need later. |
At this point, you’re ready to make your first commit:
| | $ git commit -m "initial import" |
Although your files are committed locally, they won’t be available on GitHub until you create a remote repository and push your code there. Visit GitHub, log in, and create a new repository named hugosite; however, don’t create a .gitignore or README file in this repository. If you choose to create a public repository, remember that a public repository means everyone will be able to see all of the code you’ve built and how you built it. Sometimes you might want to keep that a secret, so you should use a private repository instead.
After you create the remote repository, add it to your local repository as a remote source so you can push your code:
| | $ git remote add origin git@github.com:your_username/hugosite.git |
With the remote repository added, push your code to GitHub:
| | $ git push -u origin master |
Now that your site is available, visit Netlify and log in with your GitHub account. Once logged in, choose New Site from Git. Under the Continuous Deployment section, select GitHub. Authorize Netlify to access your account.
Netlify will then inform you that it doesn’t have access to any of your repositories. Click the Configure Netlify for GitHub button and give Netlify access to your hugosite repository.
Once you’ve configured the GitHub side of things, you’ll return to Netlify’s interface, and the hugosite repository displays in your list of repositories.
Select the hugosite repository to create your site and configure the deployment settings. Under the Basic Settings section, you’ll configure the command to build your site:
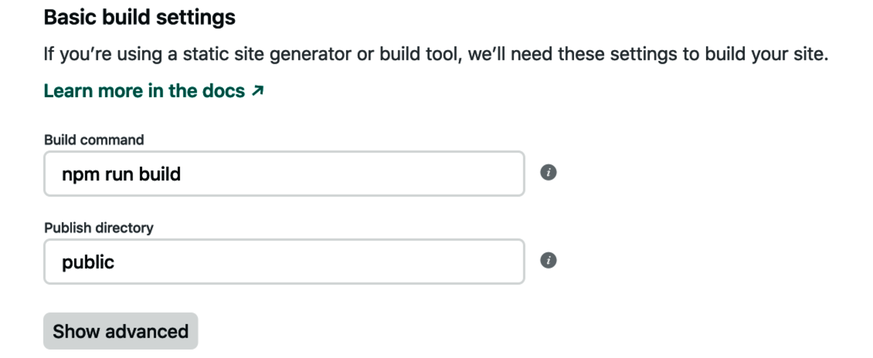
For the build command, enter npm run build, the command you created in Using Webpack and npm with Hugo.
Select Advanced Settings and add an environment variable named HUGO_VERSION. Enter the version of Hugo you have installed on your local machine. If you are not sure what version you have, you can use the hugo version command to find out:

Press the Deploy Site button and wait while your site deploys. Netlify downloads the appropriate version of Hugo, installs the Node modules you specified in the package.json file, and runs your build command:
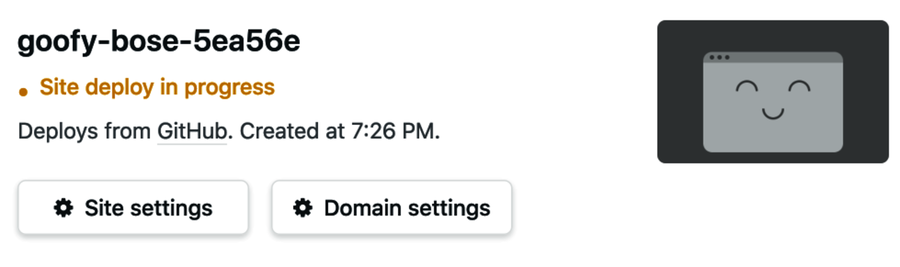
After a few minutes, you’ll see the link to your site appear. To preview your site, follow the link.
You can point your own domain name to your site by following the instructions provided. Netlify will walk you through the process of purchasing a new domain or verifying an existing domain name. It will also walk you through securing your site with a TLS certificate from Let’s Encrypt.[41]
After you select your domain and configure it to point to your Netlify site, you need to modify the baseURL setting for your site to match the domain name you’ve chosen. If you don’t, the URLs for your RSS feeds and JSON feeds you included in your site’s header won’t work properly.
There are two ways in which you can modify the baseURL setting:
- Edit the baseURL field in the config.toml file.
- Alter the hugo build command to specify the base URL for the site.
To change the baseURL field in config.toml, open the file in your editor, and replace baseURL with your domain. Be sure to include the https:// and also leave a trailing slash at the end:
| » | baseURL = "https://yourdomain.com/" |
| | languageCode = "en-us" |
| | title = "Brian's Portfolio" |
After you make these changes, save the file and get ready to commit them and push them to GitHub.
First, add the config.toml file using the git add command. Next, use the git commit command with a commit message explaining the change you made. Finally, use the git push command to push the changes to your remote repository:
| | $ git add config.toml |
| | $ git commit -m "Set the base URL for the site" |
| | $ git push origin master |
The other way to change the site’s base URL is to modify the command that builds your site.
Open the package.json file in your editor and change the hugo-build script so that it uses the -b switch to specify the base URL:
| | "scripts": { |
| | "build": "npm-run-all webpack hugo-build", |
| » | "hugo-build": "hugo --cleanDestinationDir -b https://yourdomain.com/", |
Save this file, and then add the package.json file using the git add command, followed by the commit command to commit the changes, and the push command to push the changes to your remote repository:
| | $ git add config.toml |
| | $ git commit -m "Set the base URL for the site" |
| | $ git push origin master |
Because Netlify is watching your repository, it will notice this commit and trigger a new deploy. And since you’ve committed your code to GitHub, you can use all of the collaborative tools it offers. You can even create new posts using GitHub’s interface, and Netlify will deploy those new pages for you.
Netlify gives you a fast and configurable way to deploy your static site. The free plan is good for small personal sites. However, as your site grows, so do your hosting costs.
Let’s explore another way to deploy your site.